Contents
Download an Example Maya Scene
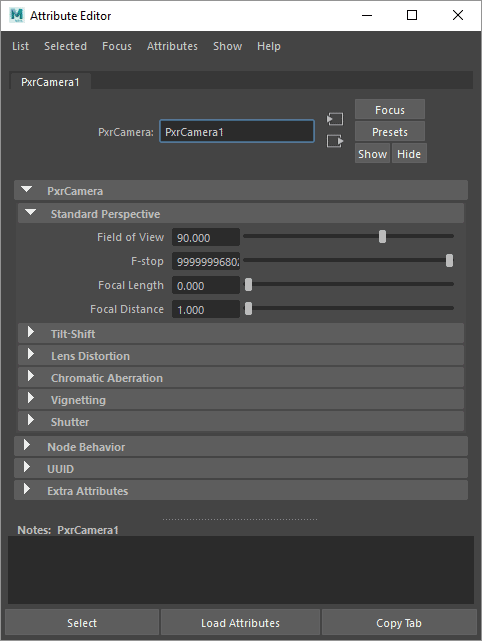
Tilt-Shift options are actually two different options in the camera. Tilt and Roll controls are designed to allow the user to point the lens in a different direction than the camera body. The Shift Options allow the user to move the lens in X (cross) and Y (rise and fall) while pointing it in the same direction as the camera. Focus 1, 2, and 3 allow the user to define an arbitrary plane of focus as a triangle (related to the Tilt controls). More explanation can be found below on each of these options.
You can access the controls by opening the Camera Attribute Editor and under the RenderMan rollout select "Enable Camera Projection"
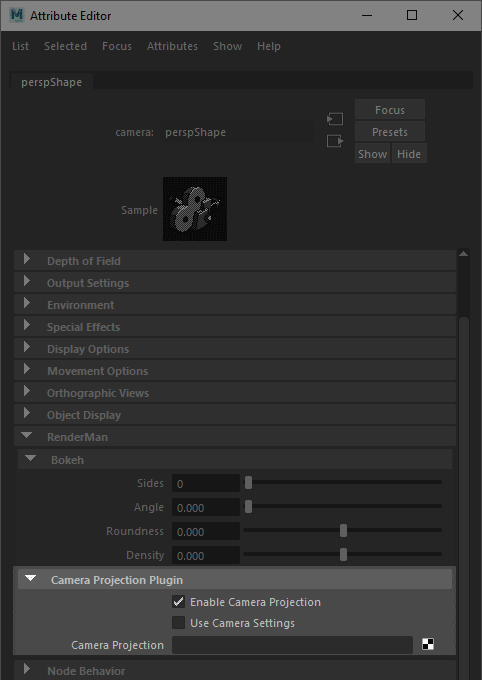
You will notice the Camera Projection field is empty. If you right-click you'll get two options: Omnidirectionalstereo (for VR and similar applications) and PxrCamera, choose the latter.
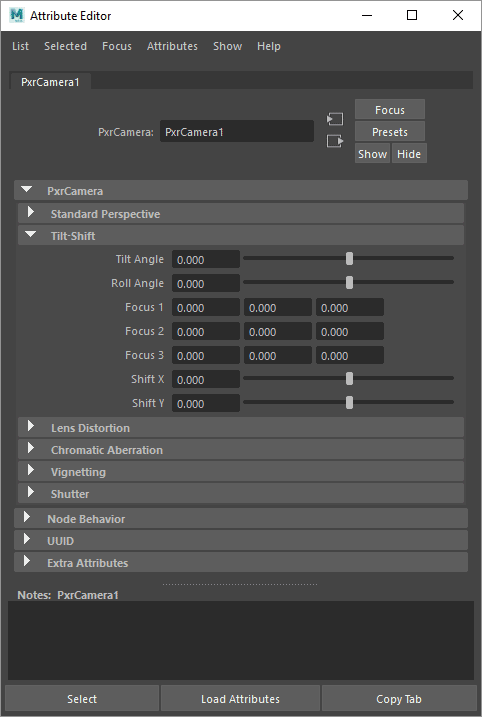
Tilt Angle: This allows pointing the lens in a different direction than the camera body. If you noticed in the Depth of Field in Maya section, the focal plane is parallel to the imaging plane. But what if you have a subject that is not parallel to the image plane? In architecture it's possible you have a wall that recedes at an angle away from the camera and you want to keep its length in focus without changing the camera framing. Tilt allows you to do this by angling the lens so that it's no longer perpendicular to the image plane.
In the below example the first image shows the focal plane as a dark bar and objects as blue and red spheres and to the right is the resulting render. This is parallel to the image plane in the camera. However, if you wanted the blue spheres to be in focus without changing the framing you can tilt the lens to alter the focal plane as shown in the second row of images.


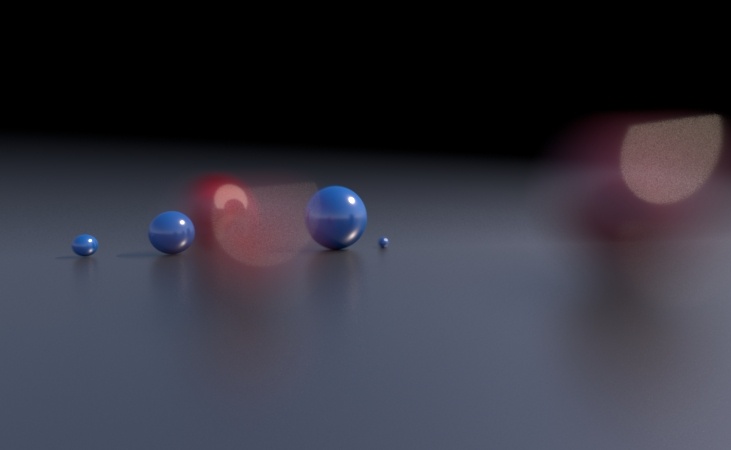
Use the slider to see the difference when applying a tilt and roll to the lens.
Roll Angle: This option allows the user to rotate the lens clockwise and is only effective if there's some degree of Tilt applied. Combining Tilt and Roll means the lens can be pointed in a somewhat limited hemisphere from the camera body.
Focus Points: You probably remember from geometry class that three points define a plane or triangle. This triangle can be user-defined in RenderMan to create any arbitrary plane of focus. Below we show how to do this more interactively in Maya using locators for perfect selective focus.

These points are all located in world space in your scene. Adjusting these manually can be very tedious so the below workflow is suggested to create a visual way to define the focal plane:
- Create a polygonal triangle.
- Using the Animation Deformer menu, create a cluster handle on each vertex. Select the vertex first then Animation Menu > Anim Deform > Open Full Deform Menu > Cluster
- Create a locator under the Create Menu > Locator and snap it to the vertex. Make the cluster handle a child of the locator transform. Now moving your locator moves the cluster and its vertex.
You should now have a polygonal triangle that changes position when you move a locator. Note that the locators are an extra step, you could simply use the cluster handles. However, locators are easy to select in the viewport and exclude from view using the Show Menu. Remember to Hide the triangle before rendering using a pre-render script or it will render in your scene, or you can select the triangle shape and turn off all of the Render Stats so that it doesn't render. RenderMan will report a warning at render time that it's not visible.
Now that you have a way to see your focal plane, you need to connect the transform outputs of locators (or cluster handles) to the Focus Parameters for the PxrCamera.
Select the PxrCamera from the Outliner (you can make it visible by deselecting Display > DAG Object Only in the Outliner Window) or by using this handy script:
select -r PxrCamera ;
- Load this and a locator transform into the Connection Editor. Connect the Locator Translate to a PxrCamera Focus for each locator.

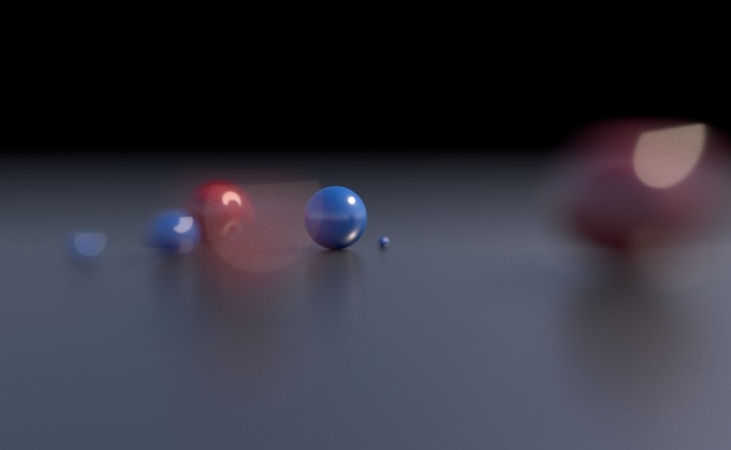
- The resulting setup can be seen below in the Maya Viewport where the red triangle represents the new focal plane. Be sure you've enabled Depth of Field in Maya in your render camera and render away!

The below images were rendered using the above setup.


This arbitrary focal plane method is not without risk. If your focal plan is too narrow/perpendicular to the camera image plan, your render will fail to output despite slowly rendering a black image. Below is an example where the plane generates an empty image.

Shift X Y: This control shifts the lens up and down or back and forth. In architecture this control has been used to maintain parallel lines in a composition. For example: In some cases a building that's tall may look like it's falling backwards because the top of it appears to converge at a point. Shifting can correct for this perspective view.
In the below images, imagine framing a building with your camera but the building is just too tall to fit in your view. So you tilt the whole camera upwards and frame the whole building. But now you have perspective distortion. In the last frame the lens is shifted to correct for the distortion.

Doesn't fit into frame.

Fits into frame but distorted by perspective.

Shifting the lens helps correct the perspective distortion.