...
The purpose of any Katana renderer plugin is to enable an artist to generate images using the full power of the given renderer. In order to start taking advantage of the RenderMan capabilities with the RenderMan plugin for Katana we need to start with a discussion of the PRMan-specific nodes and parameters:
| PrmanGlobalStatements | This node contains most of the prman the PRMan world state options, including selection of Hider and Integrator. This is where you'll find settings such as pixelVariance, maxsamples. |
| PrmanObjectStatements | This is where object-specific PRMan attributes are set. Look here for visibility and trace attributes among others. |
| PrmanIntegratorSettings | This node controls Integrator settings relevant to each integrator. The separation of these controls allows for easier integration of your own custom integrator. |
| PrmanCameraSettings | This node controls per camera settings, such as depth of field and field of view. |
| PrmanDenoiseChannelDefine | This macro creates all the DisplayChannels required for the denoise utility. |
| PrmanDenoiseRenderOutputDefine | This macro is used for defining the outputs required by the multichannel OpenEXR that is used by the denoiser. |
| PrmanHoldoutCreate | This macro automates the process of setting up the AOVs and Sample Filters required for holdouts. |
| PrmanOutputChannelDefine | This node is used for defining arbitrary output variables (AOVs) used for outputting extra data from the shader or renderer during render calculations. |
| PrmanShadingNode | This shading node is used to add PRMan shaders (Bxdfs and Patters) to a wider shading network (along with the NetworkMaterial node). |
| PrmanVolume | This node provides a simple interface to create either a volume box or import a vdb file. |
| Alembic_In_Prman | A multi-threaded node used to import/read Alembic Archives. |
...
Add Materials
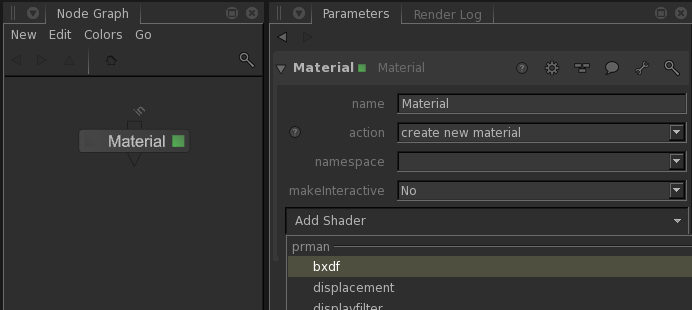
Let's spruce this sphere up a little bit. All of the new Pixar Surface Materials are available in RfK in the shader lists of the Material node and the PrmanShadingNode. For this simple scene let's just create a single Material node then select AddShaderAdd Shader->bxdf:
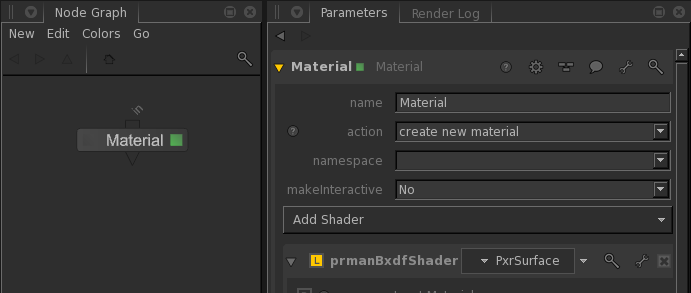
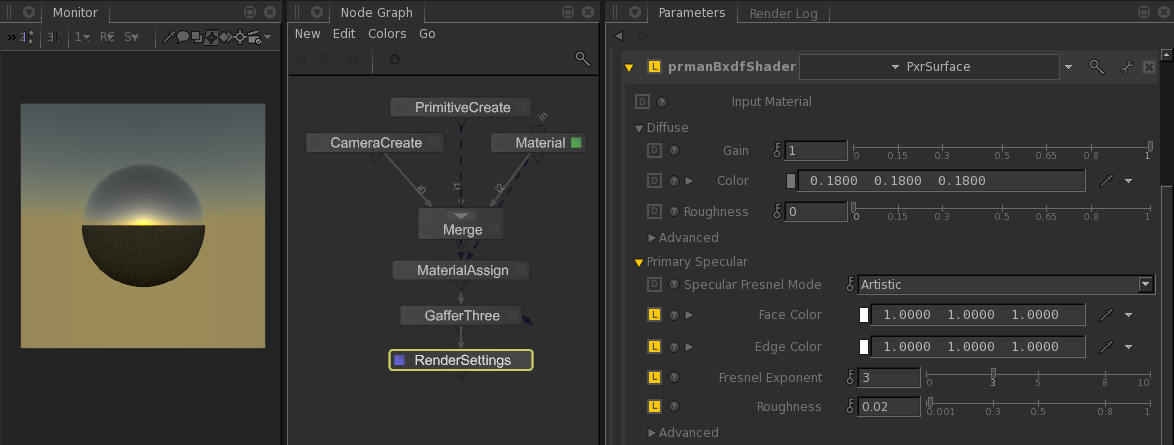
Choose PxrSurface from the list of prmanBxdfShaders:
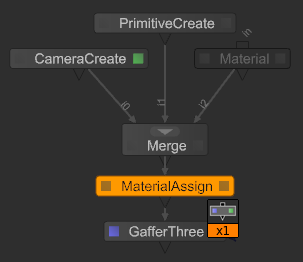
In order to connect the Material with its geometry you create and connect a MaterialAssign node and set the materialAssign attribute to the material location. The easiest way to do this is to Shift+middle-click and drag the Material node directly onto the MaterialAssign node:
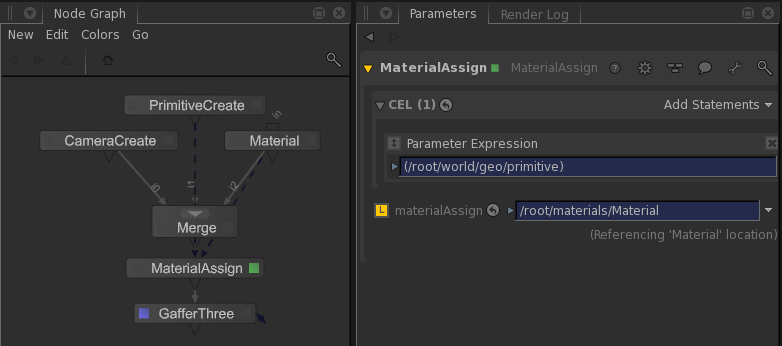
If you enable the MaterialAssign node for editing (hover over the node and hit E) you could also Shift+middle-click from the Material node into the materialAssign box in the Parameter tab. Add the primitive to the Material CEL location in a similar manner to finish the material assignment:
Rendering at this point will still give you a diffuse grey sphere, so let's shine up our surface a little bit by adjusting Color, Fresnel and Roughness on the Primary Specular. Thus we have Sunrise on a Sphere:
Patterns
Attributes of PxrSurface can be connected to outputs from RenderMan's extensive set of pattern nodes. Things like texture, bump mapping and procedural color can be added by setting up a PxrSurface bxdf using the PrmanShadingNode instead of a Material node, then wiring that node into a NetworkMaterial node. This is the start of a shading network which you can extend as far as your creativity takes you.
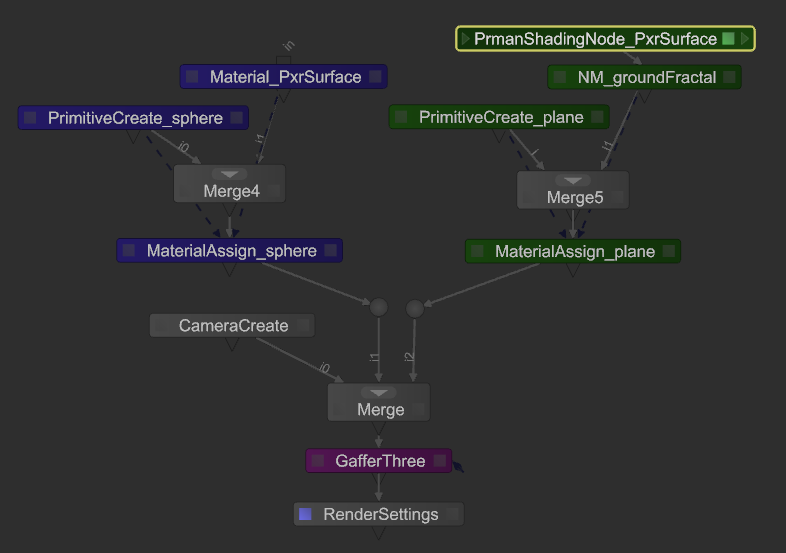
Let's add a ground plane to our scene with some fractal-based shading. Use another PrimitiveCreate to add a plane. Then create a NetworkMaterial node and choose bxdf from the Add Terminal menu. Create a PrmanShadingNode and set the NodeType to PxrSurface. Add a new MaterialAssign node and connect the plane to the NetworkMaterial the same way you assigned the sphere its material. With a little rearranging and color coordination the node graph is now set up with a light, a camera and two pieces of geometry, each assigned a PxrSurface material:
...