...
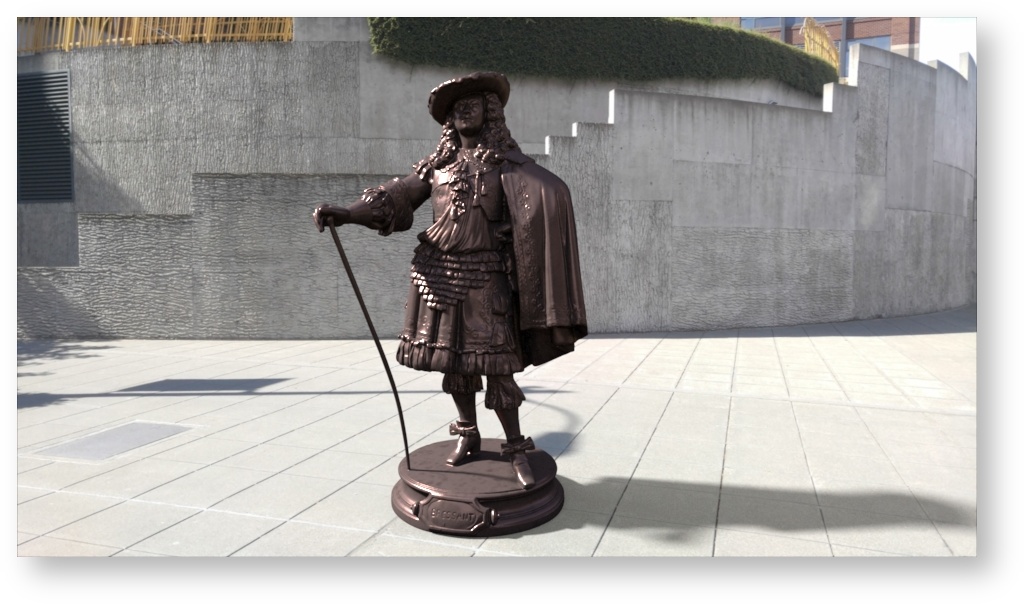
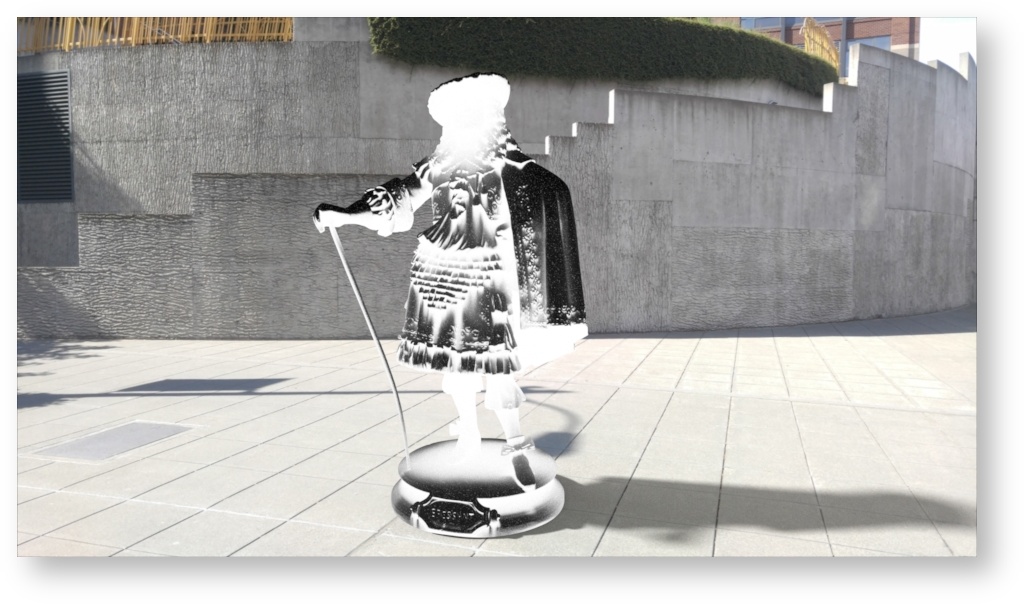
Below you can find a step by step example of creating a patina on a bronze statue that is then composited into a plate. At the end of the page there's a file package for you to try!

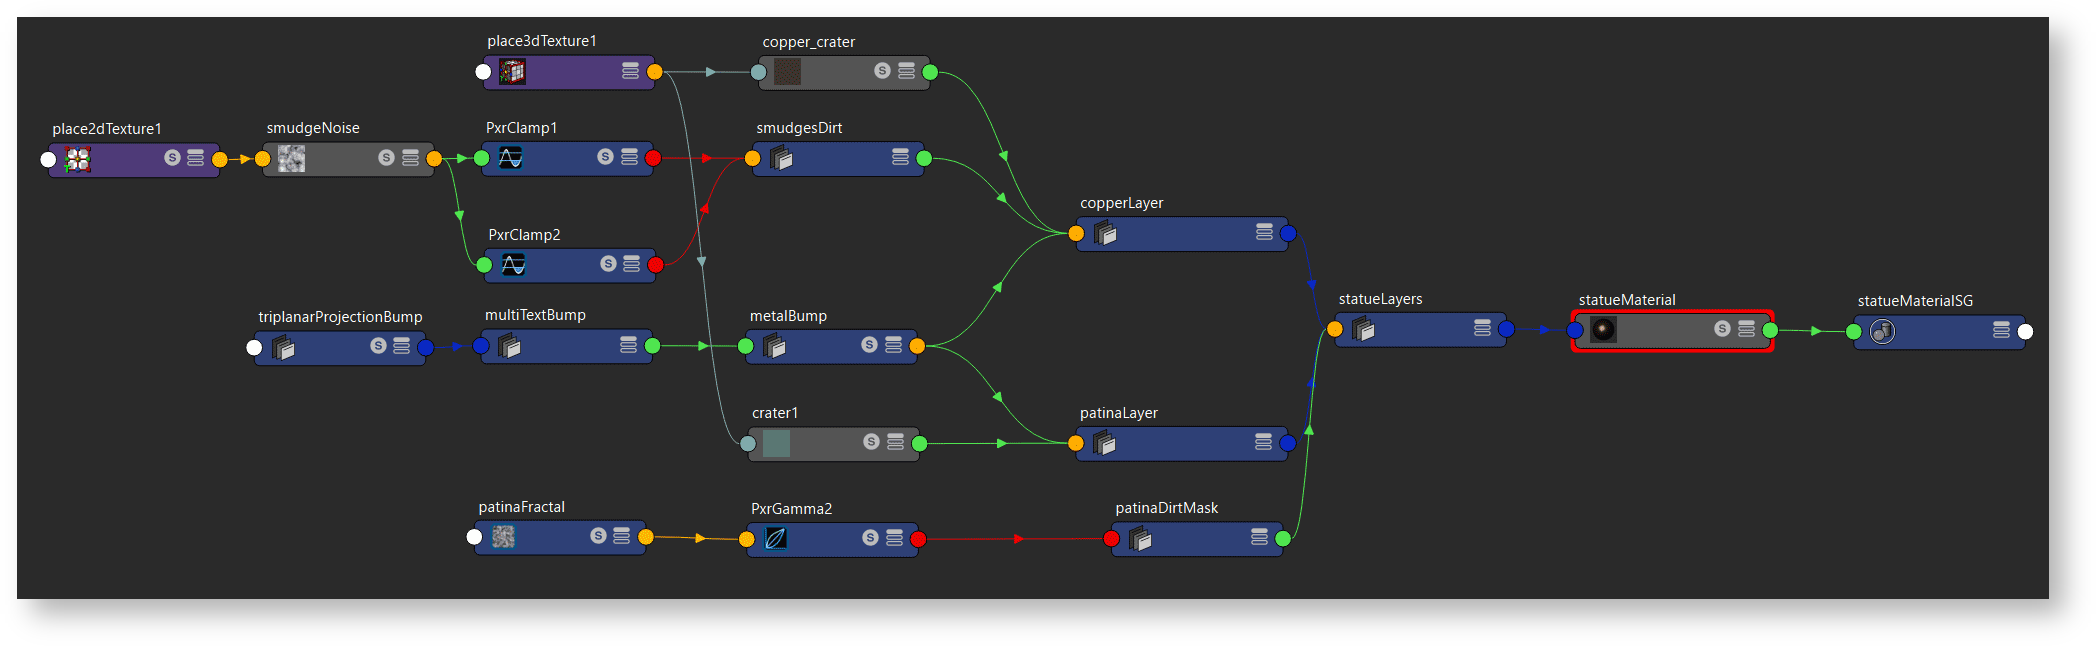
Step 1: To begin you should assign a PxrLayerSurface material to your object. This tells RenderMan which materials will be rendered for the assigned object. Leave it at default unless you prefer a different specular model. This must be changed in the assigned PxrLayerSurface. GGX is chosen as the specular model for this example. In Maya we automatically create a base and upper layer.
| Note |
|---|
Since we create an upper layer for the user in Maya when selecting PxrLayerSurface, it should be disabled in the PxrLayerMixer so you can see the base layer as you work. |
...
From here planning is very important to avoid duplicating work and making your material network as simple and useful as possible. In researching adding a real-life patina to copper and other metals, you will find it's a multi-stage project with different methods. Anything from heating the metal to produce different colors (a look easily achieved through PxrLayer Iridescence) to vinegar and salt used to create a crust on the metal, which is a look we'll experiment with here.
...
Below are the layers seen separately.
Step 2: Use the PxrLayerMixer and be sure it's connected to the Input Material of the PxrLayerSurface. Technically: PxrLayerMixer.pxrMaterialOut -> PxrLayerSurface.inputMaterial A simple middle mouse button drag in Maya works if doing this manually.
...
This sets up our node where we will be connecting everything. It's very simple using a Base and then layering each additional PxrLayer on top and in order from 1 to 4. Also note you can connect other PxrLayerMixers into the Layers for using collections of looks and masking them together. This is great if you want to reuse networks somewhere else. For this example we're just using two layers, the Base and Layer 1.
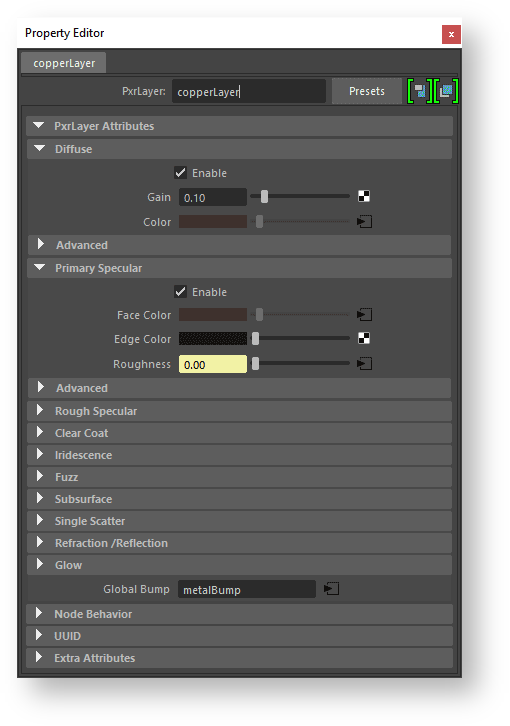
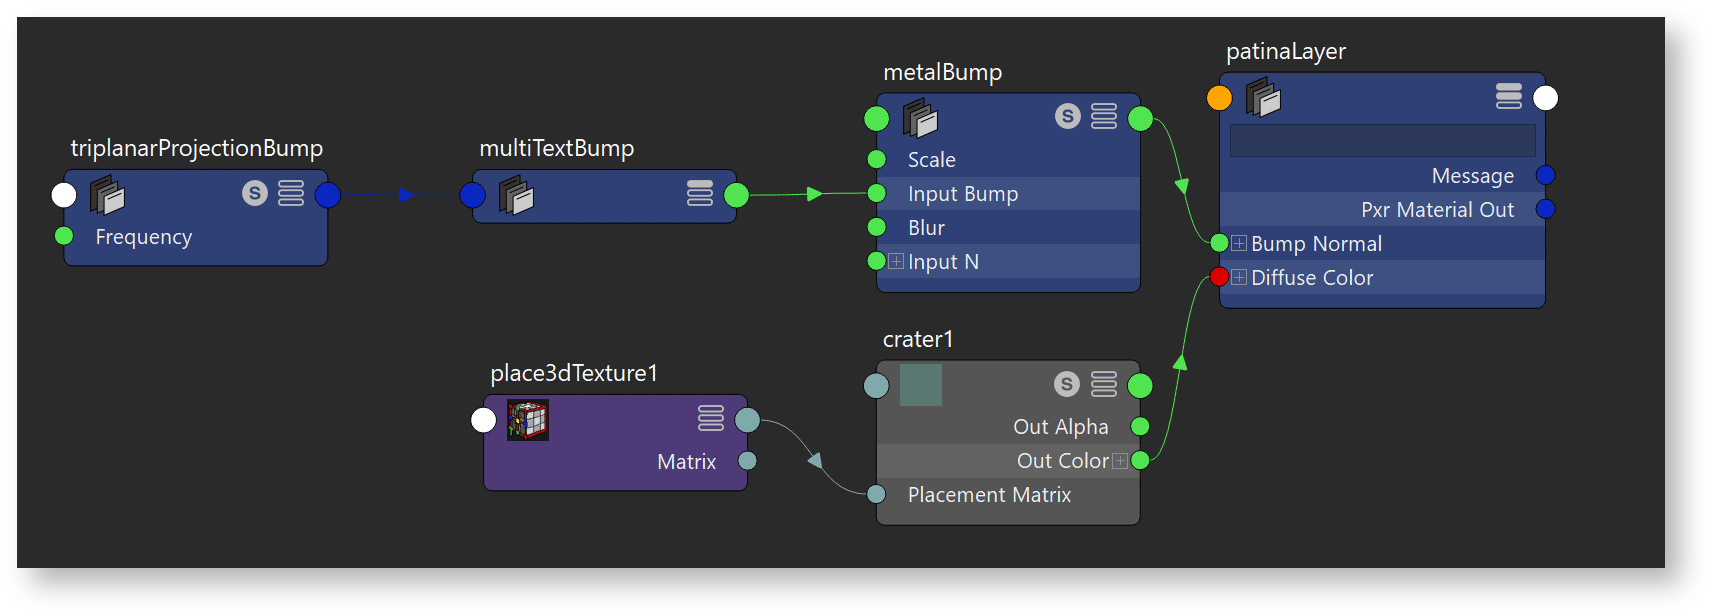
Step 3: The Copper/Bronze is accomplished by using the PxrLayer connected to the PxrLayerMixer as the Base. You can begin adjusting this for your base look. To make copper we are overriding the specular and diffuse properties. It's also useful to add a bump here so the copper has a nice texture to it.
...
The material look is largely controlled through the colors in the diffuse and face color parameters. Each of these has a modified Maya Crater pattern to provide the color with some variation. A Maya Noise pattern is used to control roughness and passed through a PxrClamp so that the roughness is in a useful range. Again, you can select whatever patterns or hand painted textures you want to make most anything!
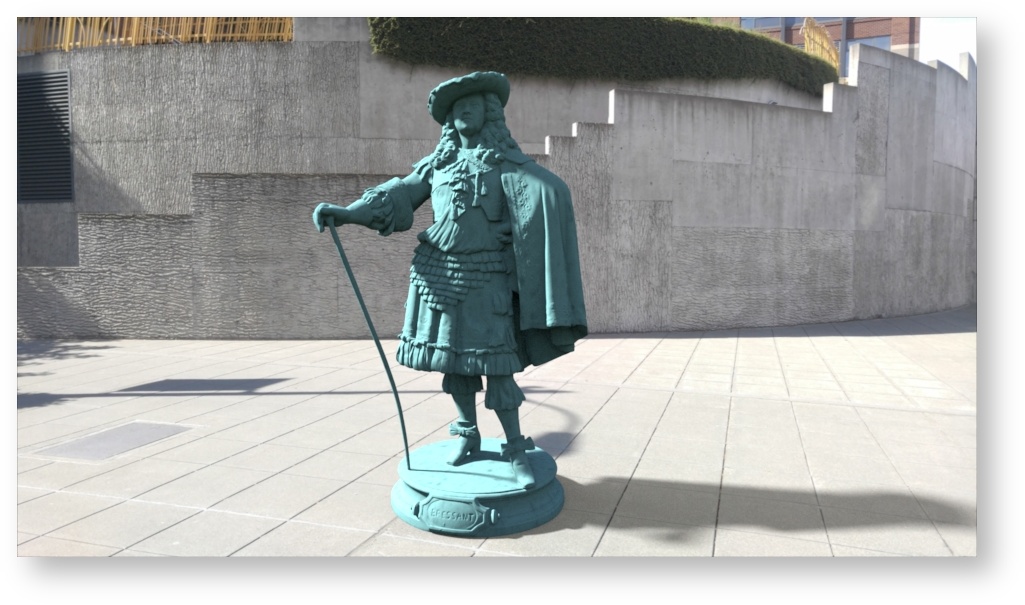
Step 4: The patina is a basic diffuse color with some diffuse roughness. Below are the settings.
Explanation of settings: The color is sampled from a real image and tweaked some. This is then used in a Maya Crater Pattern for some variation. The roughness helps bring out the "powdery" look from the patina crust. The previous bump pattern is used again in this layer to be consistent but you could actually use a different one here to really improve the realism.
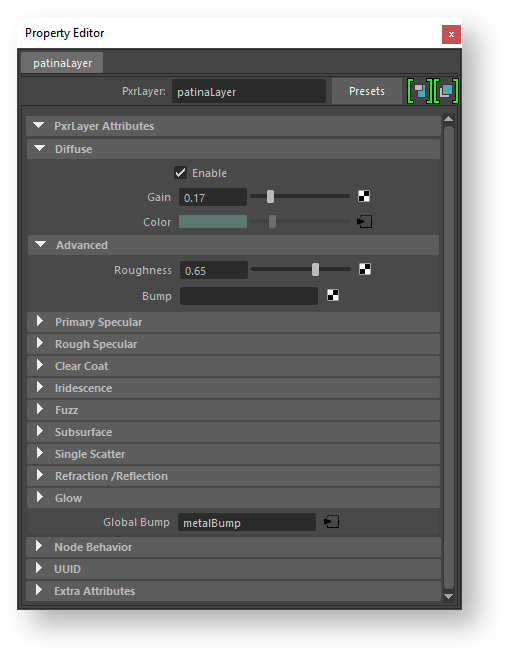
Step 5: Your patina layer is Layer 1 of your PxrLayerMixer. Note that Layer 1 is enabled by default at creation, but none of the other layers. When tuning the look of the base (above) we had set this to disabled to avoid obscuring the base.
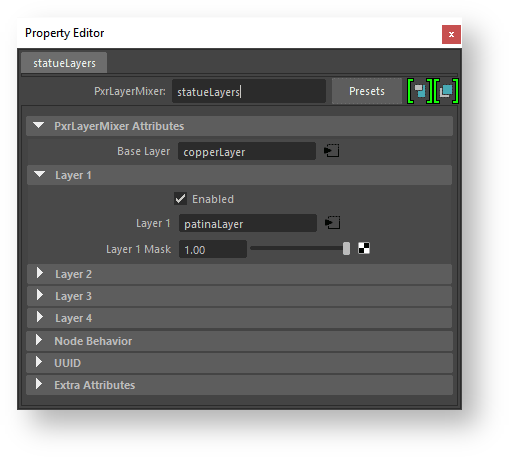
There's no mask, so this override completely covers the Base layer. We need to make a mask pattern of some form.
Step 6: We can accomplish this very easily using textures, but we may also make use of the PxrDirt node to control where the patina and metal are seen. At the beginning you see the weathering pattern produced by the PxrDirt node and a noise pattern. The Bias Normal for the PxrDirt node is 50.0 in Y to stretch out the result vertically as if rain and weathering has run down the statue. Below is the resulting mask rendered alone from a tweaked PxrDirt. The unoccluded color is driven by a PxrFractal and PxrGamma to break up the result some and control the strength respectively.
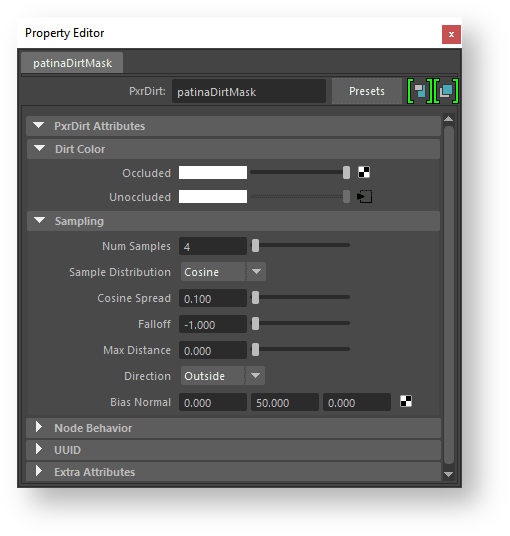
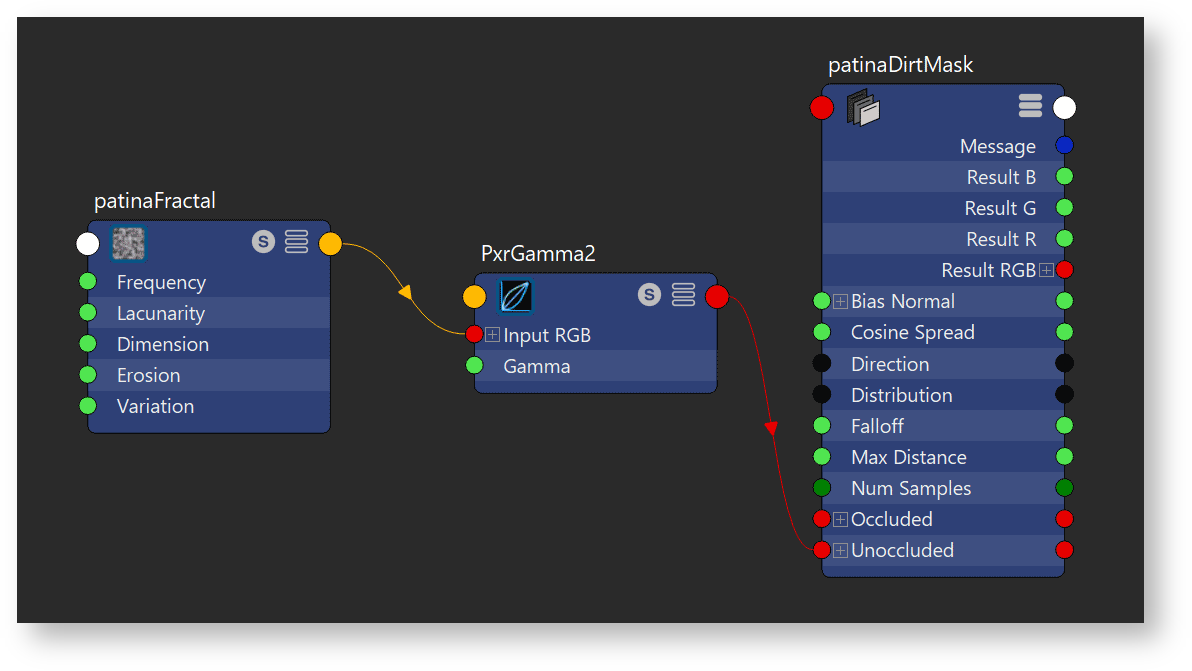
Step 7: PxrDirt outputs a color, you can connect the Red result to the Layer 1 mask or use a PxrToFloat node in between. Then render!
The images were taken in Seattle, Washington USA.
...
You can download me here: layeredExample.zip