RenderMan for Houdini exposes a powerful system of AOV creation and light transport output called Light Path Expressions. To simplify usage, many of the most common AOVs are available as presets in the ROP node under Images.
Display Driver
A Display driver identifies the file output and type for your rendered image. You may also specify additional AOVs to be added to the file under "Extra Image Planes" described below. By default we supply a single driver defaulted to an OpenEXR file. You can add more using the Displays parameter at the top of the Images Tab
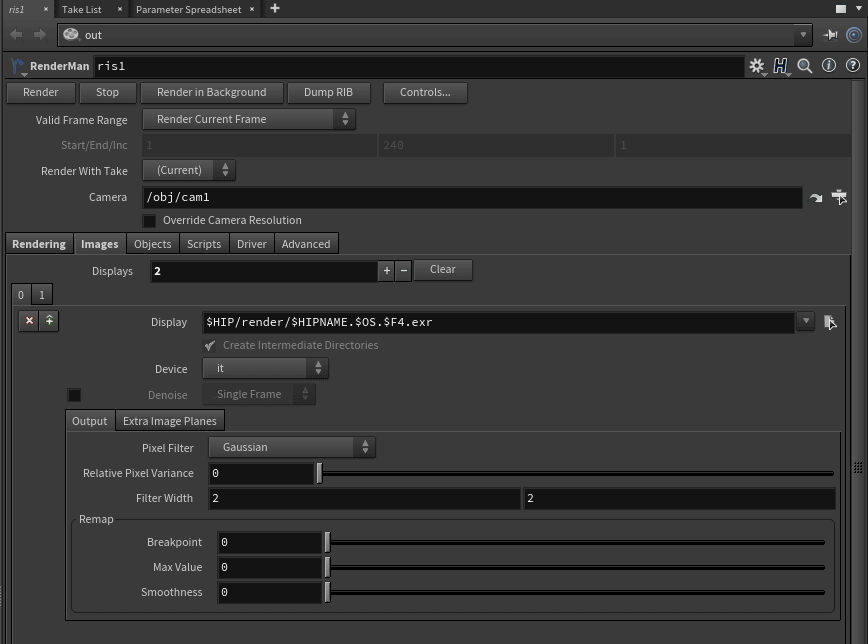
- Display - The path and the name of the file to be rendered with any appropriate tokens like $F4 for a frame padding of 4 digits in an .exr file
- Create Intermediate Directories - This allows Houdini to create the correct structure based on the tokens you've used above
- Device - The destination of the render, inside Houdini we default to "it" as the display device but you may specify supported file formats as well as Houdini's own display
- Denoise - Denoise the channels of this driver either as a single frame or as a sequence/multi-frame
Output
- Pixel Filter - The filter used to combine samples into a finished pixel color, note that Denoise options enforce Importance Sample Filtering
- Relative Pixel Variance - This is a multiplier on the setting used for Quality of the final frame. This may cause this display driver to be sampled as the main driver of quality by changing the multiplier lower, or effectively ignored if higher than 1
- Filter Width - Increasing this value may soften the resulting image by taking in more and more samples before filtering them together for a pixel. Note that the values provided per-filter are the typical lowest default
- Remap - Remap the image to handle highlights and other color values in-render
Extra Image Planes
Presets of additional common outputs are included with options to create your own as discussed below/
Built-in AOV
Instead of specifying a variable, you can select one of the following:
...
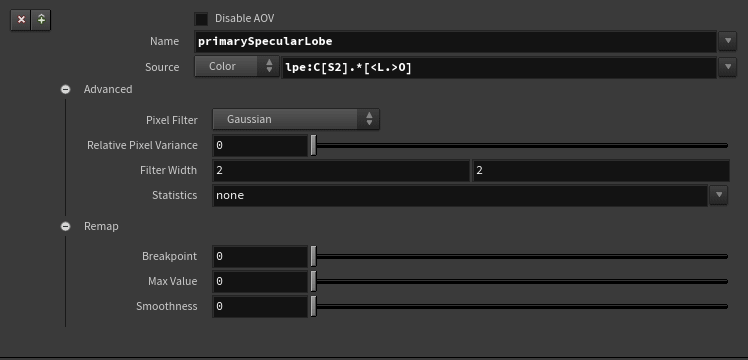
To specify an AOV you should provide the following information to RenderMan:
...
Name - Specify the name and type of the AOV, e.g. varying normal Nn. These selections that are built in simply need you to choose them, we provide the correct name to the renderer.
Source - Set the source string (expression) for an LPE. If using a built-in LPE (see below images), you can leave this field empty; otherwise, you must provide the appropriate LPE expression, e.g. the type: color and expression: lpe:C<RD>[<L.>O]
...
.
...
Filter - For color AOVs, the recommended filter is Gaussian, this typically should match the Beauty or Ci Display Channel. Data AOVs should be unfiltered.
Relative Pixel Variance - This is a multiplier on the setting used for Quality of the final frame. This may cause this display chennel to be sampled as the main measure of quality by changing the multiplier lower, or effectively ignored if higher than 1
Filter Width - As above, when using color AOVs, a filter width of 2 2 using Gaussian matches the default render settings.
Statistics - This field is only used if you are specifying AOVs manually for Denoising.
Remap - As explained above