...
Or, if you prefer to set them up manually, you can follow these steps
1.
| Anchor | ||||
|---|---|---|---|---|
|
The power behind the Stylized Looks system in RenderMan lies with the custom set of AOVs that the system needs to determine such features as Hatching, line work, and toon shading.
...
| Info | ||
|---|---|---|
| ||
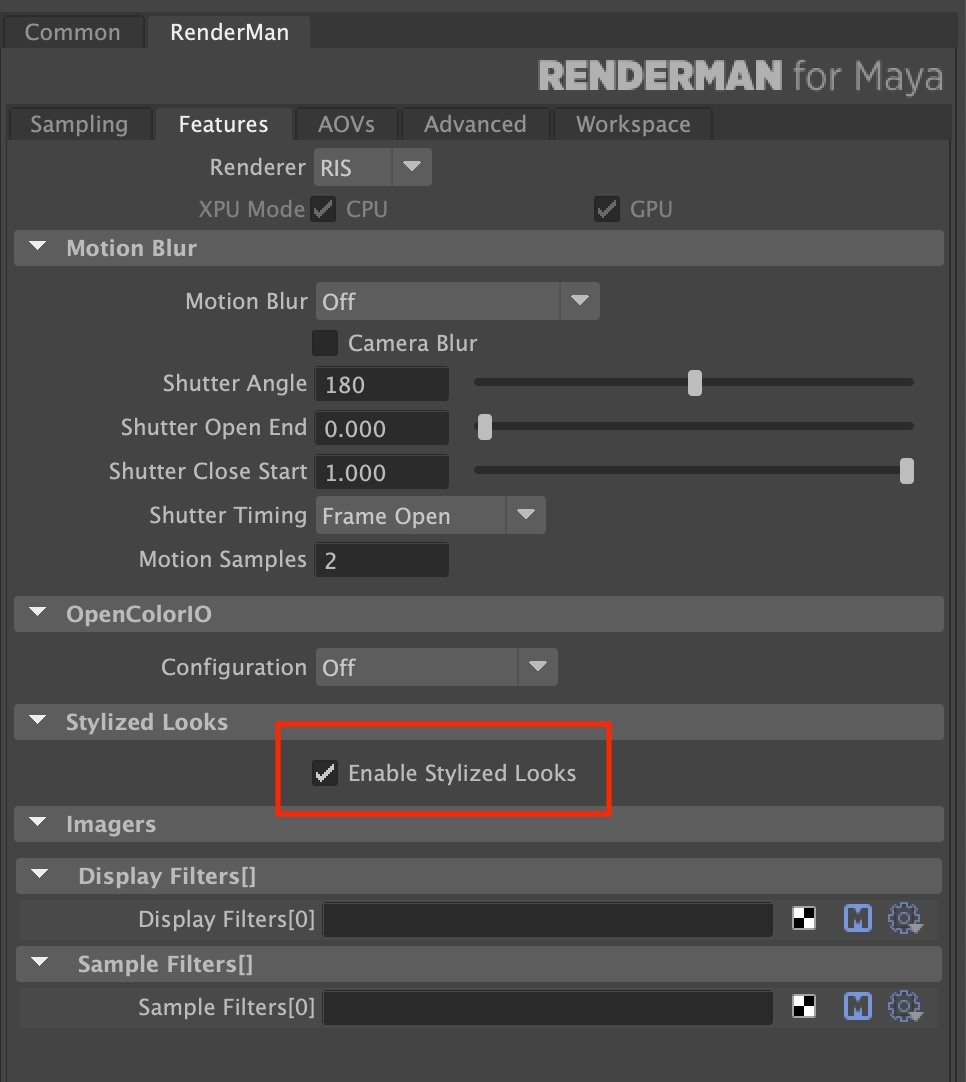
Don't forget to enable the "Output AOVs" option in the RenderMan preferences. |
2.
| Anchor | ||||
|---|---|---|---|---|
|
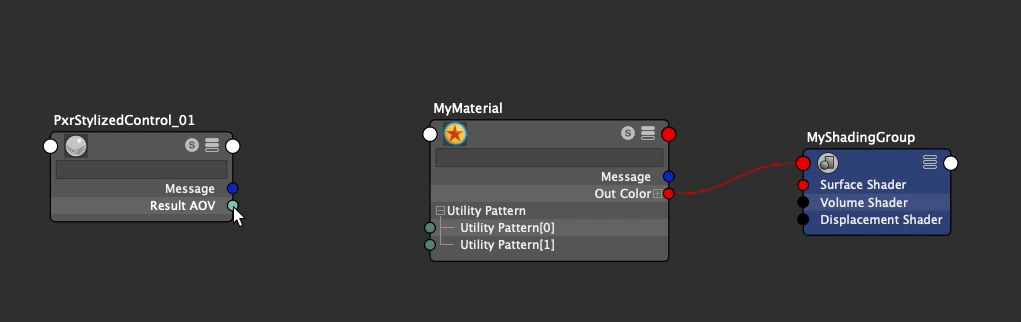
Once you've loaded all the AOVs, you now have to go through each of the shaders that are attached to your model and connect the AOV Output from a PxrStylizedControl node into the Utility Pattern input of your Materials.
3.
| Anchor | ||||
|---|---|---|---|---|
|
This is where the fun really starts! You are now ready to begin adding Stylized Looks Display Filters.
...
To avoid an empty background, use a PxrBackgroundDisplayFilter to simulate paper or other backgrounds.
4. Add lighting
Get creative with your lighting from the selection of RenderMan lights. Remember, the smaller the light, the sharper your shadows will look.
5. Interactive Rendering
One of the main strengths of the Stylized Looks system is that artists can see these new treatments directly in the rendering viewport of the authoring application as they move lights, change geometry, alter animation, and adjust shading parameters. This “in-camera” capability in the same application can dramatically speed up artistic explorations and decision making.
6. Combine Display Filters to really get creative
A lot of customization is possible since many of the treatments can be driven by painted or procedural maps. In addition, the specialized display filters that apply the treatments are driven by pattern signals that are selected by artists. It is easy (and fun!) to come up with novel uses of the supplied pattern AOVs or add others to the mix. Effects can also be driven by rendering quantities such as light intensity, light filter domain, facing ratios, distance from the camera, etc.
...