...
| Note |
|---|
PxrVolume is a dedicated volume shader, optimized for dealing with "pure" volumes. It cannot deal with any surface effects such as refraction or reflection at a boundary between two different types of media, so you cannot use PxrVolume to render things like murky glass or water surfaces. If you are looking for shader that can do surface effects, along with a limited amount of volumetric effects, take a look at the single scattering parameters of PxrSurface. |
...
Basic Workflows
Constant fog
...
If depth attenuation is the only effect that is required, the Diffuse Color can be set to black: light is not scattered by the volume, it is only absorbed, and Density is the only parameter that is important. Otherwise, the diffuse color needs to be set to the color of the fog.
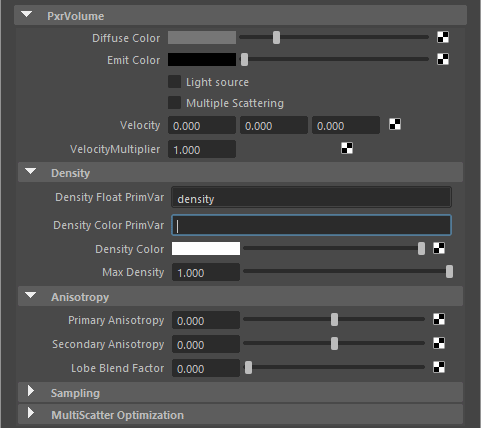
Smoke
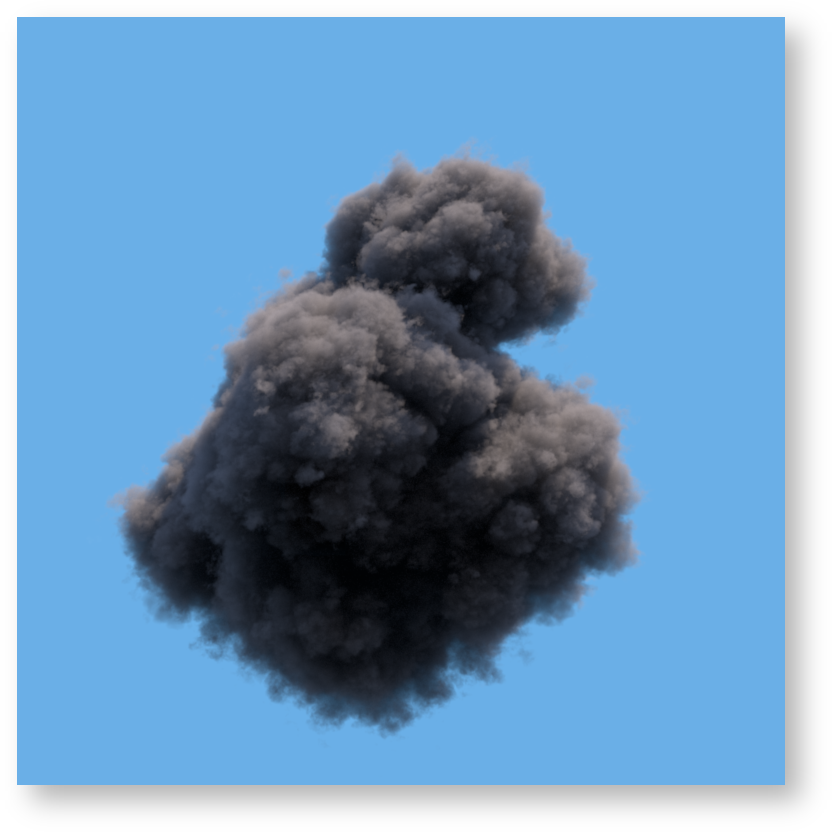
For heterogeneous media like smoke, the typical approach is to bake the properties of the smoke into a file like an OpenVDB file. The OpenVDB file would contain a small number of properties including the density, the velocity (if using motion blur), and possibly the albedo. The OpenVDB should be attached to a RiVolume and read using the impl_openvdb plugin. The name of the density property of the OpenVDB file is then used directly with the PxrVolume Density Float PrimVar parameter.
...
Since smoke is typically isotropic, the Anisotropy settings can be left at their default. The Equiangular weight can be left as is if it is expected that there are light sources near to, or within the volume, or set to 0.0 if no light sources are expected to be anywhere close to the volume.
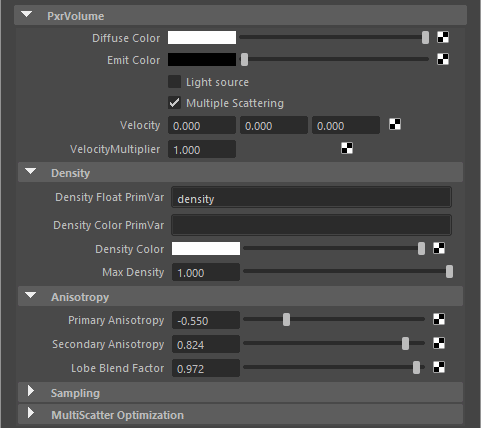
Clouds
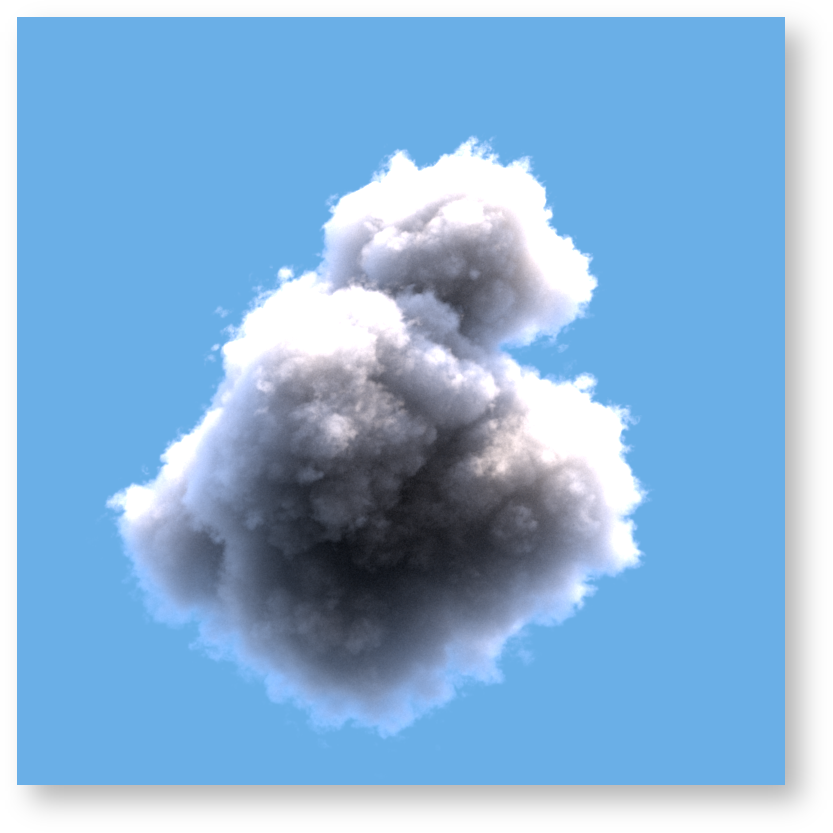
Clouds are very difficult volumes to render, because the aggregate behavior of water droplets and their interaction with light is a complicated phenomenon. Unlike smoke, the light that reaches the eye from a cloud has typically bounced inside the cloud tens or hundreds of times. On top of that, the scattering behavior (the way light bounces inside the cloud) is very complicated, as it involves both forward scattering and backwards scattering, with multiple peaks for both.
...
| Info |
|---|
Note that scattering in the volume is controlled by the Max Path Length parameter in the chosen integrator and not the individual diffuse and specular trace depths. You can find more information on this under the section below called Multiple Scattering. |
...
...
Advanced Workflows
Crepuscular Beams
...
In order to efficiently render crepuscular beams, it is important to try to maximize the effect of direct lighting - i.e. maximize the volume that can directly trace a path to a light source. If the volume must trace a path to a light source indirectly by going through another surface or material, the convergence of the beams may be very slow and unacceptably noisy. In the image above, the stained glass window on the right is modelled as "thin glass": instead of relying on a secondary material bounce to refract through the glass, shadow rays from the volume that trace towards the light source are unimpeded (do not refract), and rely only on the shadow tinting behavior of the stained glass material. The "thin" parameter of PxrSurface (located under the glass parameters) allows one to achieve exactly this optimization.
...
Performance Suggestions
Density is the most critical property of a volume. It is a measure of both how much light is absorbed and scattered by the volume. Volume integration may require many billions of density evaluations over the course of a single render, so it is important to ensure that the renderer can evaluate the density as quickly as possible. This is where baking a complicated signal to a volumetric file format such as OpenVDB can be useful, as it means the renderer can simply look up the value from the data. For best performance, we highly recommend using the PrimVar density parameters if at all possible, rather than using an input connection, even if that input connection is just a single PxrPrimVar node.
...
Emissive volumes may be very slow to converge, especially if they are the only light source in the scene - it may require many hundreds or even thousands of camera samples to render a noise free image. Until volumes are supported as full light sources that can be used for direct lighting, we We suggest that emissive volumes be used very sparingly, instead use the Light Source parameter.
Multiple Scattering is a very costly effect, both because it means the light is bouncing that many more times in a volume, but also because PxrVolume cannot take more samples itself (the Samples parameter is ignored), and is at the mercy of the Integrator settings. Moreover, multiple scattering may slow down the convergence of objects behind the volume. Therefore we suggest that whenever possible, multiple scattering should be avoided. For media with low albedo, multiple scattering adds very little to the final render. For some media like clouds, whose light transport involves many tens or hundreds of light bounces, unfortunately multiple scattering may be unavoidable.
...
| Info |
|---|
Adding a displacement bound to motion blurred volumes is recommended but not required in 21.5+. Currently retrieving this data automatically can be costly. If you find you have clipping, then you should add this parameter. |
...
The velocity vector value is expected to be relative to the entire frame. If you are working with velocity data measured in units per second, you may need to scale the data by the number of frames per second (i.e. 1/24.0) for a correct picture.
We supply a control as a Velocity Multiplier to aid in conversion should your data be in the wrong measurement or allow you to make artistic tweaks to the motion blur.
As noted above: unlike other parameters to PxrVolume, the As noted above: unlike other parameters to PxrVolume, the accuracy of deformation motion blur is directly related to and controlled by the dice attribute micropolygonlength . If you find that the fine detail of a motion blurred volume is lost, you may need to decrease this attribute in order to regain the detail. This will have a direct effect on render times and memory.
...
| Expand | ||
|---|---|---|
| ||
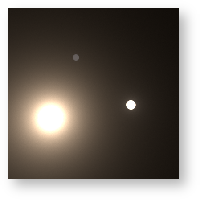
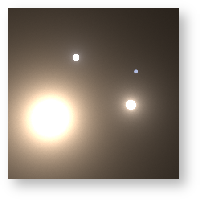
Extinction Distance This is the distance (in scene units) at which a homogeneous volume becomes opaque. If this is non-zero, it overrides the density connections, maintaining a homogeneous volume. This is great for creating fog/mist that fills a scene. Below we set the parameter to a low value and then increase it until the last light in the scene is clearly visible.
Density Float PrimVar A primvar from the geometry which overrides the density float of the volume, unset by default. Setting this overrides the densityFloat input, and is more efficient than simply using a PxrPrimVar pattern connection. For workflows that use a baked volumetric representation (such as an OpenVDB file) we highly recommend the use of this parameter setting over the use of an input connected to the Density Float parameter. Density Float The density of the volume directly controls how light is attenuated by the volume - i.e. it directly affects how the volume casts shadows. The density float parameter is overridden by the density color if density color is changed from its default value. Unless you require colored shadows, you should prefer to set this parameter rather than the density color parameter as the volume will render more efficiently. Making an input connection on this parameter will create a heterogeneous volume. The density is also known as the extinction coefficient (the sum of the absorption and scattering coefficients). Below, from left to right: density of 0.1, 0.25, and 2.0.
Density Color PrimVar A primvar from the geometry which overrides the density color of the volume, unset by default. Setting this overrides the densityColor input, and is more efficient than simply using a PxrPrimVar pattern connection. For workflows that use a baked volumetric representation (such as an OpenVDB file) we highly recommend the use of this parameter setting over the use of an input connected to the Density Color parameter. Density Color The density of the volume directly controls how light is attenuated by the volume - i.e. it directly affects how the volume casts shadows. The density color parameter overrides the density float if density color is changed from its default value. If you do not need colored shadows from the volume, then you should set the density float parameter and leave the density color parameter untouched; the volume will render more efficiently. Making an input connection on this parameter will create a heterogeneous volume. The density is also known as the extinction coefficient (the sum of the absorption and scattering coefficients). Below, from left to right: density color of (1. Density Float PrimVar A primvar from the geometry which overrides the density float of the volume, unset by default. Setting this overrides the densityFloat input, and is more efficient than simply using a PxrPrimVar pattern connection. For workflows that use a baked volumetric representation (such as an OpenVDB file) we highly recommend the use of this parameter setting over the use of an input connected to the Density Float parameter. Density Float The density of the volume directly controls how light is attenuated by the volume - i.e. it directly affects how the volume casts shadows. The density float parameter is overridden by the density color if density color is changed from its default value. Unless you require colored shadows, you should prefer to set this parameter rather than the density color parameter as the volume will render more efficiently. Making an input connection on this parameter will create a heterogeneous volume. The density is also known as the extinction coefficient (the sum of the absorption and scattering coefficients). Below, from left to right: density of 0.1, 0.25, and 2.0.
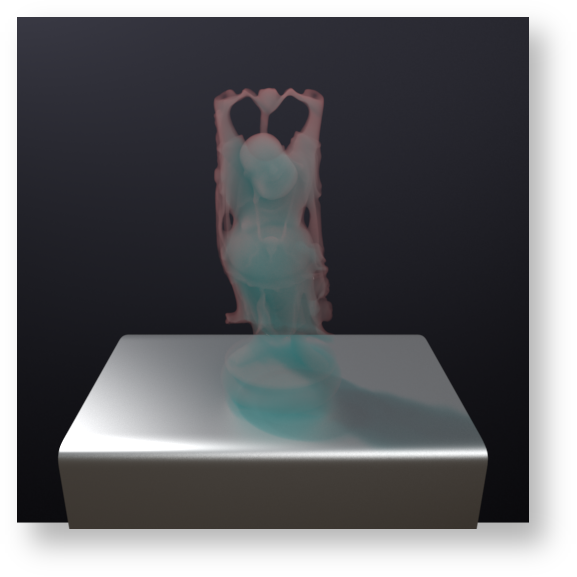
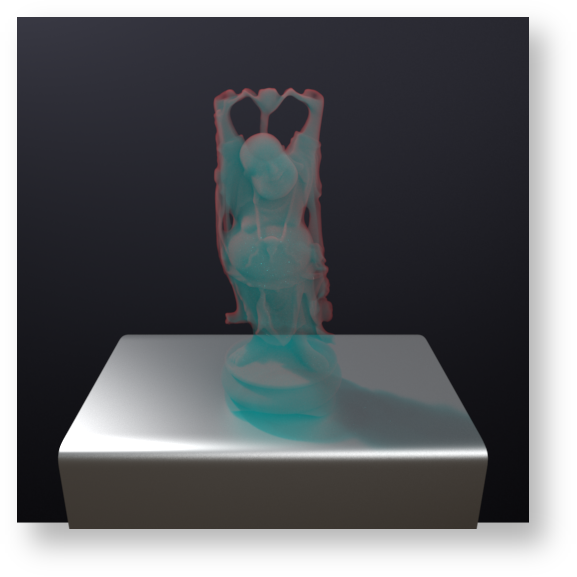
Density Color PrimVar A primvar from the geometry which overrides the density color of the volume, unset by default. Setting this overrides the densityColor input, and is more efficient than simply using a PxrPrimVar pattern connection. For workflows that use a baked volumetric representation (such as an OpenVDB file) we highly recommend the use of this parameter setting over the use of an input connected to the Density Color parameter. Density Color The density of the volume directly controls how light is attenuated by the volume - i.e. it directly affects how the volume casts shadows. The density color parameter overrides the density float if density color is changed from its default value. If you do not need colored shadows from the volume, then you should set the density float parameter and leave the density color parameter untouched; the volume will render more efficiently. Making an input connection on this parameter will create a heterogeneous volume. The density is also known as the extinction coefficient (the sum of the absorption and scattering coefficients). Below, from left to right: density color of (1.0, 0.25, 0.25), (2.0, 0.25, 0.25), (2.0, 0.25, 0.25) and (5.0, 0.25, 0.25). Note that since the density of the volume is higher in the red channel, more red light is scattered away, leaving behind a cyan contribution.
Max Density The max density parameter is only used by heterogeneous volumes and controls the step size used to sample the volume. For correctly unbiased rendering, the max density must be higher than any density encountered inside the volume. A high value of max density may result in slower renders since more steps will be taken to sample the volume. Setting the max density too small will speed up your render, but will also lead to incorrect (biased) rendering as dense regions of the volume will be undersampled. Starting in version 20.7, for RiVolumes only, PxrVolume will also automatically compute the density bounds over the subsections of the volume, and use this information to vary the step size over the ray. This means that more steps will only be taken in denser parts of the volume. Therefore, for very heterogeneous volumes, setting a higher value for max density will no longer have a detrimental effect over the entire volume; in practice, it is often possible to simply set this to a very high value and not worry about this parameter any further. The default value of max density is 1.0. |


...
| Expand | ||
|---|---|---|
| ||
Equiangular Weight Sets the probability of equiangular sampling being used instead of density sampling. Equiangular sampling improves the convergence of volumes close to light sources, while density sampling can be a better technique when dealing with volumes with dense or highly varying density. The default value of 0.5 means both techniques will be used equally and combined with multiple importance sampling. If the volumes are dense and far away from light sources then decreasing the equiangular weight may result in better convergence. This does not apply to multi-scatter volumes. min/max Samples This setting controls sample quality for single scatter volumes. Higher number of volume samples will improve convergence of volumes at the cost of render time. However, the trade-off in scenes with other objects is that the volume will sample more without increasing costs elsewhere in the image and may improve your results. Note convergence rates vary within volumes as well, and this means some regions can converge reasonably well with a small number of volume samples, but others might need more help.
|
| Expand | ||
|---|---|---|
| ||
Multiscatter Optimization (Valid for PxrPathTracer) On/Off, the default is off. Extinction Multiplier This parameter is used during Multiscatter volume rendering. The value must be above 0.0 and defaults to 1.0 which is no modification. Values below 1 reduce the extinction coefficients while values above 1.0 increase them. Contribution Multiplier This multiplier is used during Multiscatter volume rendering. This parameter multiplies the direct lighting contribution for multiscatter events. Values must be above 0.0 and defaults to 1.0 which is no modification. Value below 1.0 reduce the contribution of direct lighting while values above 1.0 increase them (this may make volumes appear softer and more translucent.) |
...
equally and combined with multiple importance sampling. If the volumes are dense and far away from light sources then decreasing the equiangular weight may result in better convergence. This does not apply to multi-scatter volumes. min/max Samples This setting controls sample quality for single scatter volumes. Higher number of volume samples will improve convergence of volumes at the cost of render time. However, the trade-off in scenes with other objects is that the volume will sample more without increasing costs elsewhere in the image and may improve your results. Note convergence rates vary within volumes as well, and this means some regions can converge reasonably well with a small number of volume samples, but others might need more help.
|
| Expand | ||
|---|---|---|
| ||
Multiscatter Optimization (Valid for PxrPathTracer) On/Off, the default is off. Extinction Multiplier This parameter is used during Multiscatter volume rendering. The value must be above 0.0 and defaults to 1.0 which is no modification. Values below 1 reduce the extinction coefficients while values above 1.0 increase them. Contribution Multiplier This multiplier is used during Multiscatter volume rendering. This parameter multiplies the direct lighting contribution for multiscatter events. Values must be above 0.0 and defaults to 1.0 which is no modification. Value below 1.0 reduce the contribution of direct lighting while values above 1.0 increase them (this may make volumes appear softer and more translucent.) |
| Expand | ||
|---|---|---|
| ||
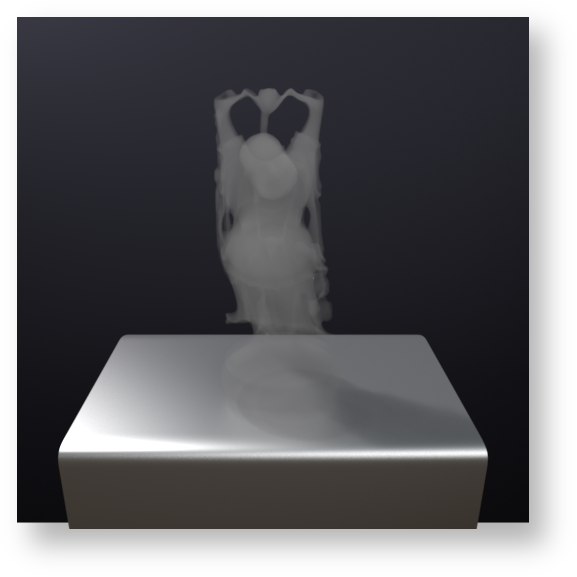
The above parameter for "Light Source" is useful for many applications when using a volume with emission properties. But there may be times you need to control the influence of the light from the volume. This requires the use of a light filter. The PxrVolume material doesn't have a way to use a light filter so you can apply the PxrMeshlight material to the volume object along with the PxrVolume for shading. In doing so this will light the scene but allow you to connect and use a light filter through the meshlight controls. But there is a caveat to this workflow that requires extra consideration in your setup. When you apply the meshlight to the volume you may notice an increase in illumination and/or additional noise. This is because of double contribution of the volume emission and the meshlight itself. Here are the current steps to reduce this issue.
Examples:
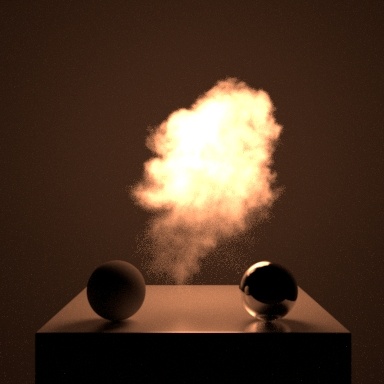
Using Light Source
Adding the meshlight increases light in the scene and noise, this is the incorrect workflow
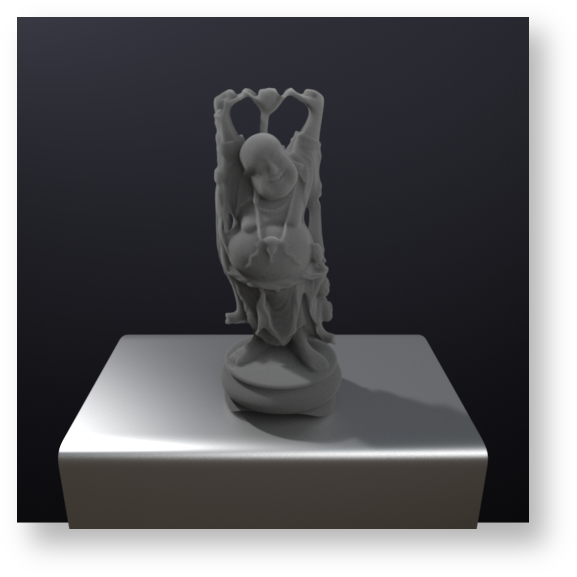
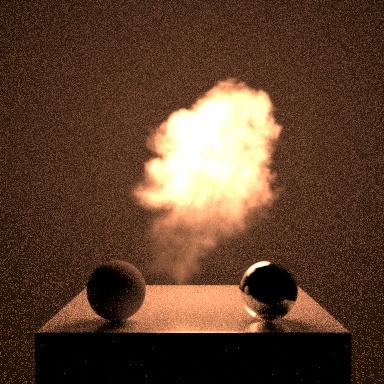
This image is using the above workflow to create a well converged render while allowing use of a light filter |

| Expand | ||
|---|---|---|
| ||
PxrVolume also writes to the U2 user lobe as "DiffuseAlbedo" |