Scene Setup
If you want to jump past all the explanations there is a simple example scene which is the RenderMan version of Katana's "hello_pony" Demonstration scene (hello_pony_prman.katana located in $KATANA_RESOURCES/Examples). Below is a more detailed explanation of each stage of building a similar scene with just a sphere and environment light.
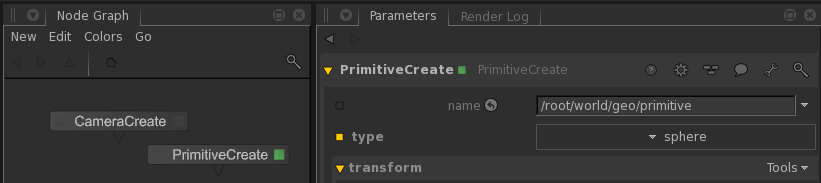
Create Camera and Geometry
Geometry can be brought into a Katana scene in any number of ways, but for introductory purposes simply add a sphere to your scene using a PrimitiveCreate node. Then create a Katana camera using the standard CameraCreate node:
By default both the camera and the sphere will be created at the origin. Re-position either the camera and/or the sphere as needed so the sphere is in the camera's field of view. Use the Viewer tab to quickly look-through the camera and re-frame on the sphere or use the manipulators to move objects around in the Viewer.
Add Lights
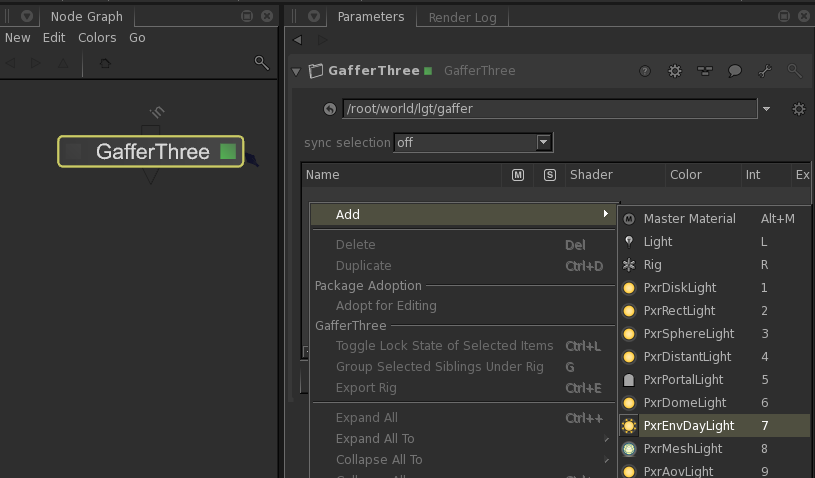
RenderMan will not work with the Katana built-in lights or lights from other renderers; you will need to use the built-in RenderMan lights included with RfK. These lights are now available as part of the Add context menu in the GafferThree node. Create a GafferThree node then press E to make it editable in the Parameters tab. In the Parameters tab right-click in the Gaffer object table and select Add . You'll see a context menu come up with options for several RenderMan ("Pxr") light types in addition to the simple "light" option. Create a PxrEnvDayLight:
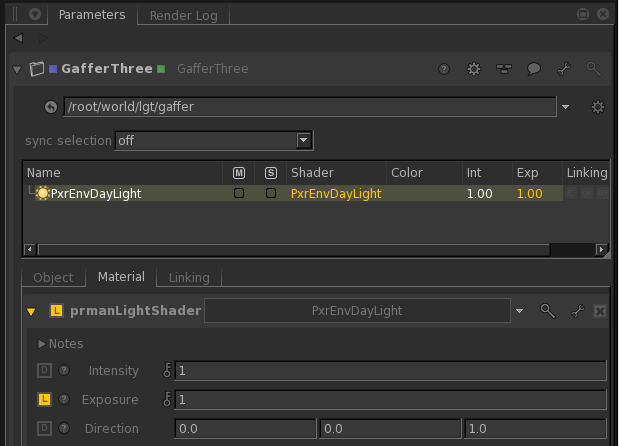
A couple of commonly adjusted controls on RenderMan lights are exposure and visibility. Lights have a physical falloff; if a light seems dark in a scene, you may want to turn up the exposure. The exposure attribute works like a film camera's exposure: increasing by 1 doubles the energy emitted by the light source.
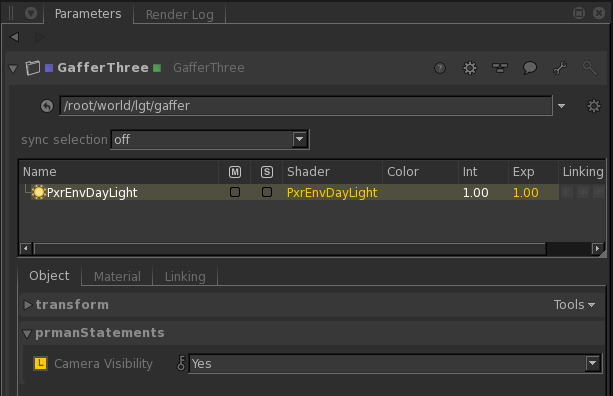
By default lights are not visible to the camera, so you will need to make the PxrEnvDaylight visible to the camera if you want to see the color of the daylight in the background. This setting is included as part of the Object settings for RenderMan lights:
So Far
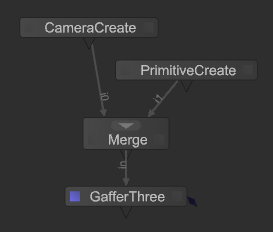
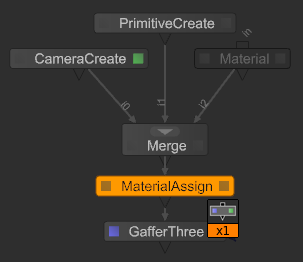
At this point we actually have enough nodes to do a basic test render. Wire the nodes together using a Merge node:
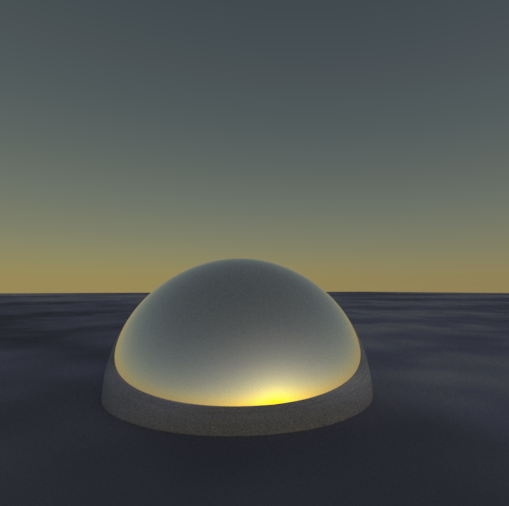
Right-click on the GafferThree node and select Preview Render from the context menu. Look to the Monitor tab for your preview render. With the camera translation set to (0.0, 0.0, 3.0) we'll see this render:
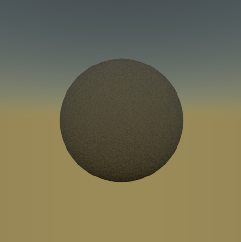
It's not very exciting, but it is a good test to make sure all the pieces are in place (so far!). If you get any errors during rendering please check your installation and your search paths. If you have other renderers installed you'll need to make sure RenderSettings is set up with renderer=prman.
From the context menu when you right-click on a node you could also choose Live Render which allows you to view changes to your scene as you make them without having to restart the render.
Add Materials
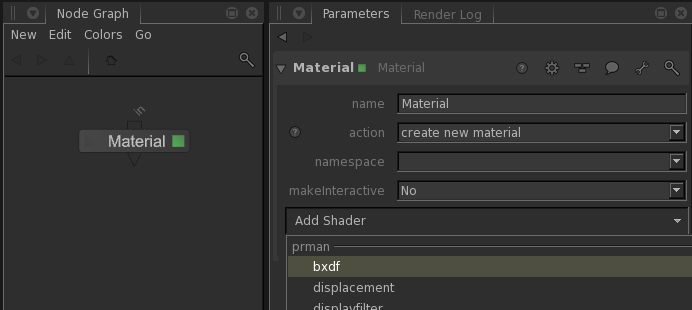
Let's spruce this sphere up a little bit. All of the new Pixar Surface Materials are available in RfK in the shader lists of the Material node and the PrmanShadingNode. For this simple scene let's just create a single Material node then select Add Shader->bxdf:
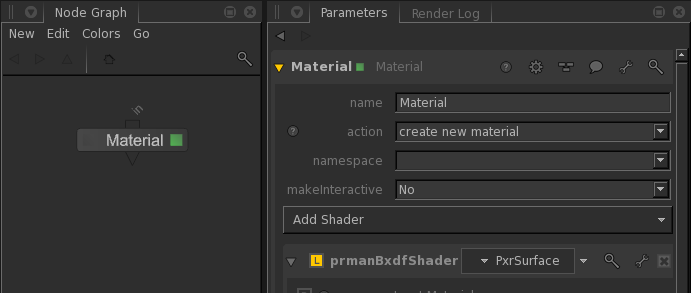
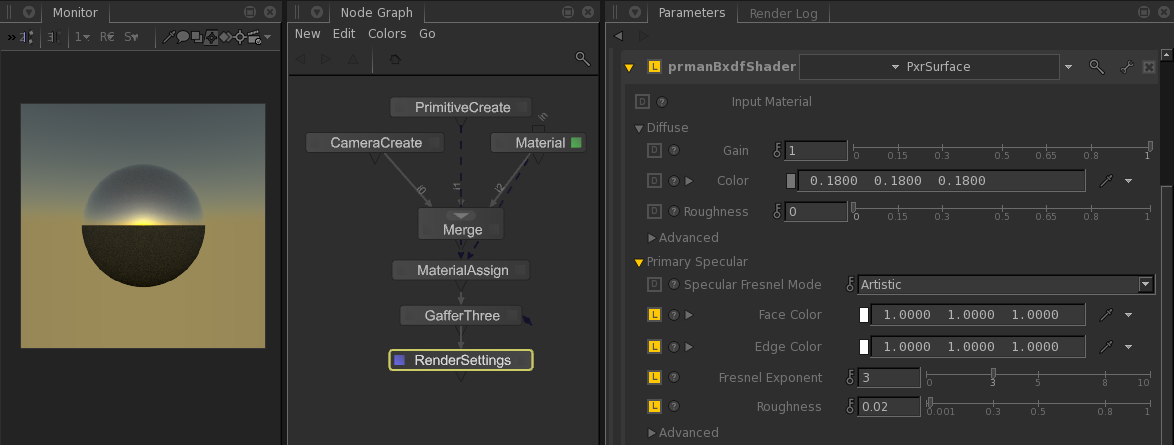
Choose PxrSurface from the list of prmanBxdfShaders:
In order to connect the Material with its geometry you create and connect a MaterialAssign node and set the materialAssign attribute to the material location. The easiest way to do this is to Shift+middle-click and drag the Material node directly onto the MaterialAssign node:
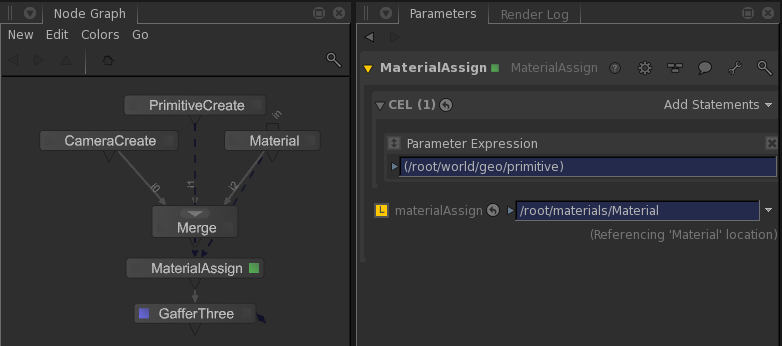
If you enable the MaterialAssign node for editing (hover over the node and hit E) you could also Shift+middle-click from the Material node into the materialAssign box in the Parameter tab. Add the primitive to the Material CEL location in a similar manner to finish the material assignment:
Rendering at this point will still give you a diffuse grey sphere, so let's shine up our surface a little bit by adjusting Color, Fresnel and Roughness on the Primary Specular. Thus we have Sunrise on a Sphere:
Patterns
Attributes of PxrSurface can be connected to outputs from RenderMan's extensive set of pattern nodes. Things like texture, bump mapping and procedural color can be added by setting up a PxrSurface bxdf using the PrmanShadingNode instead of a Material node, then wiring that node into a NetworkMaterial node. This is the start of a shading network which you can extend as far as your creativity takes you.
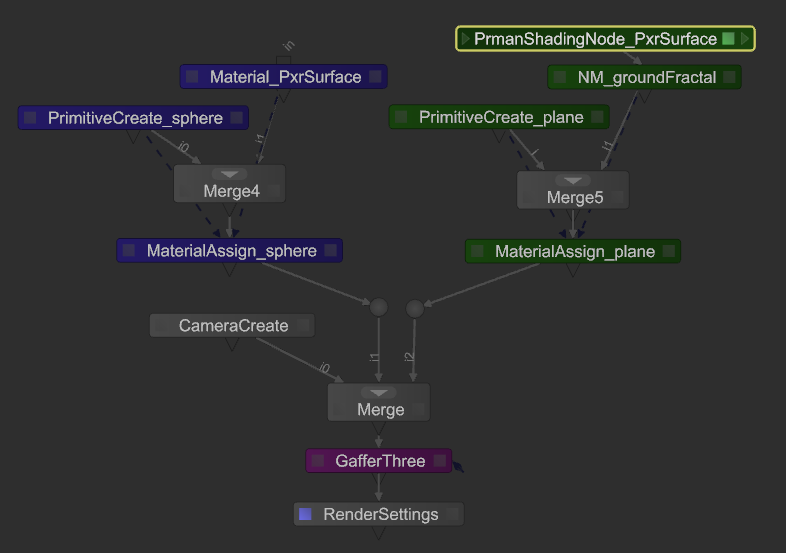
Let's add a ground plane to our scene with some fractal-based shading. Use another PrimitiveCreate to add a plane. Then create a NetworkMaterial node and choose bxdf from the Add Terminal menu. Create a PrmanShadingNode and set the NodeType to PxrSurface. Add a new MaterialAssign node and connect the plane to the NetworkMaterial the same way you assigned the sphere its material. With a little rearranging and color coordination the node graph is now set up with a light, a camera and two pieces of geometry, each assigned a PxrSurface material:
The addition of our fractal shading is done with series of PrmanShadingNodes, each with a Pattern that feeds an output into the next with the last feeding its result into Color input of the PxrSurface node:

The above node graph uses the PxrFractal, PxrToFloat3 and PxrHSL patterns to convert fractal noise into a surface shader for our ground plane. Sunrise on a Sphere in a Fractal Sea:
Fine Tuning
Now that you have a renderable scene you can start fine tuning the render with adjustments to the shaders and to the renderer itself. Most adjustments to the shaders can be done during Live Rendering. Render configuration, on the other hand, must be set before the render starts (e.g. resolution, samples, integrator). RfK has several places for configuring renderer attributes. The most commonly-used settings are discussed below; more detail on these and the rest of the settings can be found in the Render Settings page.
General Render Settings
If RenderMan is the only renderer installed for your Katana session then it will be used by default when you render. If there are other renderers installed then you'll need to create a RenderSettings node and set the Renderer attribute to "prman":
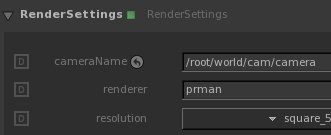
The RenderSettings node is also where you control things like:
- image resolution
- camera
- crop window
- shutter open/close.
RenderMan Controls
RenderMan-specific rendering controls such as Options and Attributes are available in the PrmanGlobalStatements node. Other RfK configuration options are exposed here as well. For example, if you'd like your renders to go to the RenderMan Image Tool ('it') instead of the Monitor window you can control that with the renderDisplay attribute in PrmanGlobalStatements.
Next Steps
Now that you're familiar with all the basics, take a look at the Tutorials for more advanced shading and rendering workflows. If you're looking to improve either speed or quality of rendering a good place to start would be the Sampling Modes documentation.
Happy Rendering!