Once you have RenderMan for Katana (RfK) installed there is minimal setup that you need in order to start generating renders! Before running Katana itself you'll need to set up your environment correctly after which Katana will automatically load the RfK plugin. Once in Katana you'll need to set up your scene with a camera and geometry, add RenderMan (PRMan) lights and materials then you're reading to render.
| Note |
|---|
If you have multiple are renderers installed for your Katana session you'll need to specify which renderer to use by setting the renderer attribute to prman in the RenderSettings node., to render with RenderMan, please set your DEFAULT_RENDERER environment variable to "prman" |
Set Up Environment
In order to use RenderMan for Katana the path to the RfK plugin must be added to your KATANA_RESOURCES search path:
...
| PrmanGlobalStatements | This node contains most of the prman world state options, including selection of Hider and Integrator. This is where you'll find settings such as pixelVariance, maxsamples. |
| PrmanObjectStatements | This is where object-specific PRMan attributes are set. Look here for visibility and trace attributes among others. |
| PrmanIntegratorSettings | This node controls Integrator settings relevant to each integrator. The separation of these controls allows for easier integration of your own custom integrator. |
| PrmanDenoiseChannelDefine | This macro creates all the DisplayChannels required for the denoise utility. |
| PrmanDenoiseRenderOutputDefine | This macro is used for defining the outputs required by the multichannel OpenEXR that is used by the denoiser. |
| PrmanHoldoutCreate | This macro automates the process of setting up the AOVs and Sample Filters required for holdouts. |
| PrmanOutputChannelDefine | This node is used for defining arbitrary output variables (AOVs) used for outputting extra data from the shader or renderer during render calculations. |
| PrmanShadingNode | This shading node is used to add PRMan shaders (Bxdfs and Patters) to a wider shading network (along with the NetworkMaterial node). |
| AlembicInPrmanAlembic_In_Prman | A multi-threaded node used to import/read Alembic Archives. |
...
The addition of our fractal shading is done with series of PrmanShadingNodes, each with a Pattern that feeds an output into the next with the last feeding its result into Color input of the PxrSurface node:
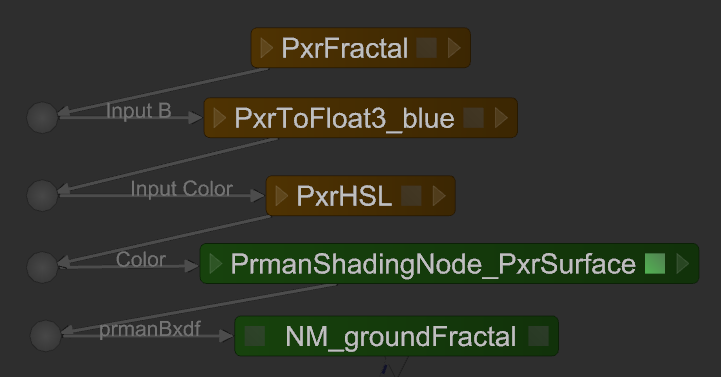
The above node graph uses the PxrFractal, PxrToFloat3 and PxrHSL patterns to convert fractal noise into a surface shader for our ground plane. Sunrise on a Sphere in a Fractal Sea:

Fine Tuning
Now that you have a renderable scene you can start fine tuning the render with adjustments to the shaders and to the renderer itself. Most adjustments to the shaders can be done during Live Rendering. Render configuration, on the other hand, must be set before the render starts (e.g. resolution, samples, integrator). RfK has several places for configuring renderer attributes. The most commonly-used settings are discussed below; more detail on these and the rest of the settings can be found in the Render Settings page.
General Render Settings
If RenderMan is the only renderer installed for your Katana session then it will be used by default when you render. If there are other renderers installed then you'll need to create a RenderSettings node and set the Renderer attribute to "prman":
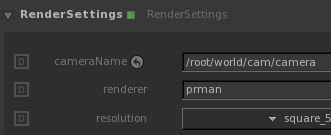
The RenderSettings node is also where you control things like:
- image resolution
- camera
- crop window
- shutter open/close.
RenderMan Controls
RenderMan-specific rendering controls such as Options and Attributes are available in the PrmanGlobalStatements node. Other RfK configuration options are exposed here as well. For example, if you'd like your renders to go to the RenderMan Image Tool ('it') instead of the Monitor window you can control that with the renderDisplay attribute in PrmanGlobalStatements.
Next Steps
Now that you're familiar with all the basics, take a look at the Tutorials for more advanced shading and rendering workflows. If you're looking to improve either speed or quality of rendering a good place to start would be the Sampling Modes documentation.
Happy Rendering!
...