| Info |
|---|
See Denoise Workflow for more information. |
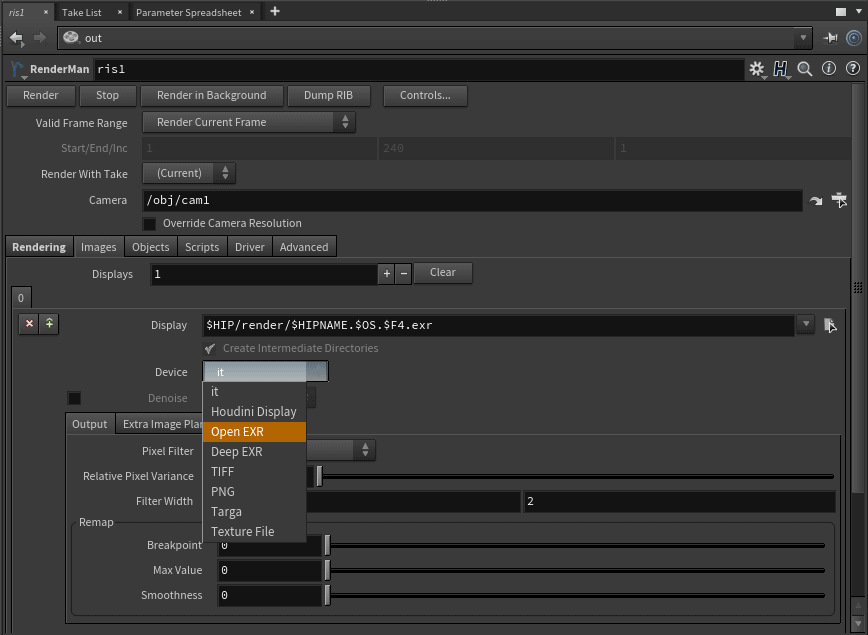
To output the multichannel EXR for the denoising workflow, select :
- ROP node > Images > Display Device > OpenEXR (This is for exporting final renders, for previewing with the Nvidia AI Denoiser in "it" you can leave the Display Device as "it")
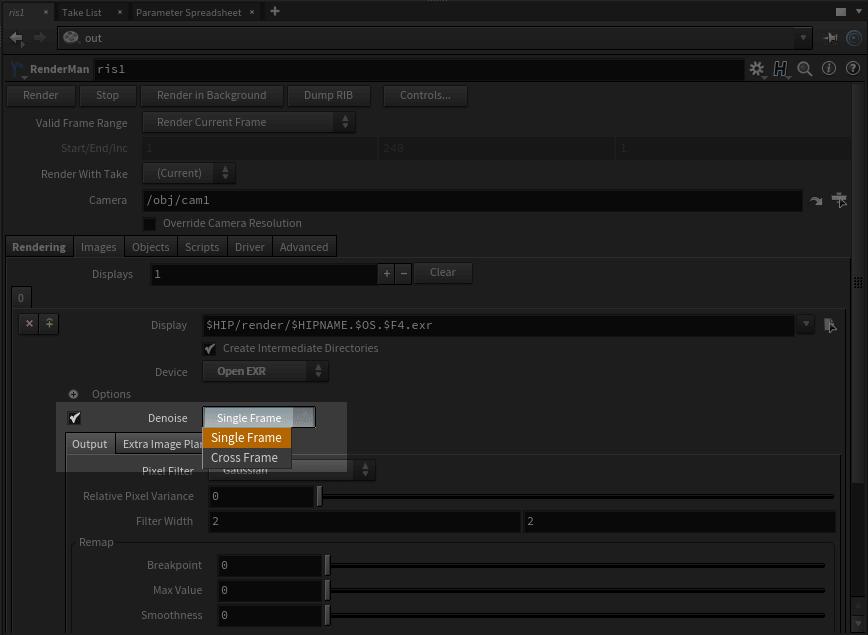
- Select Single Frame or Cross Frame in
...
- ROP's Images Tab. This will auto-select the appropriate AOVs (only if you followed the step above)
 Properties | RIS: Output Denoise EXR.
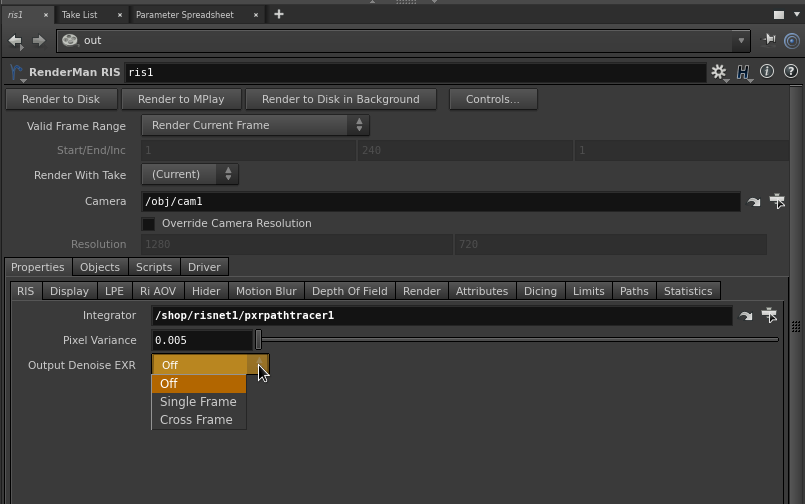
| Warning |
|---|
Additionally, you must set the RenderMan RIS ROP's Properties | Hider: Pixel Filter Mode to importance. If this is not set, it will introduce artifacts during the denoise process. |
![]()
| Tip |
|---|
When running the denoise command, use volume.filter.json instead of the default denoise filter for volumes. |
This setting is also required to the use the Nvidia Denoise preview in "it" as we set the filter type to Importance |
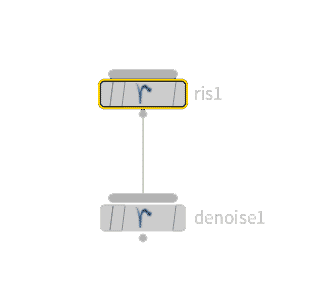
- Create a new Denoise ROP node
- Connect the original RIS ROP node from the above steps to the Denoise ROP
- Be sure the Controls... are set to Node by Node
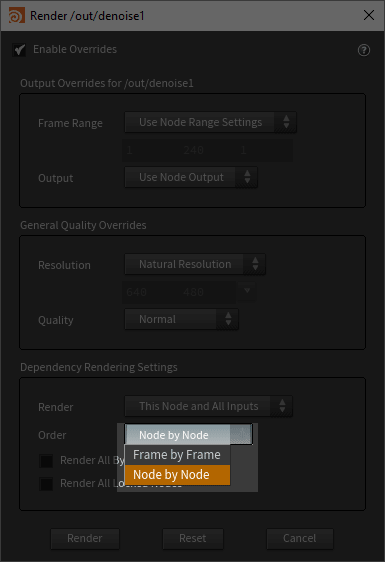
You have two choices in the Denoise ROP node of importance:
- Denoise: This uses the Houdini process to render and denoise the EXR and will lock Houdini
- Denoise in Background: This creates a new process to render and denoise while leaving Houdini free
For users wanting to output AOVs for Denoising manually (for the purpose of rendering separate EXRs and not a multi-channel EXR), you can find the AOV information on the Denoise Workflow. Keep in mind the Denoise feature requires a multi-channel EXR to work.
| Carousel Image Slider | ||||||||||||||
|---|---|---|---|---|---|---|---|---|---|---|---|---|---|---|
|
| Carousel Image Slider | ||||||||||||||
|---|---|---|---|---|---|---|---|---|---|---|---|---|---|---|
|
...