...
Specular and Rough Specular Parameters
The specular parameters control specular reflection. This is where you might define how shiny or reflective an object is. Is it plastic, a polished marble table, or is it a mirror? The Rough Specular lobe below this has identical settings and effects.
| Note |
|---|
There's also the option for Artistic and Physical controls. The Artistic controls allows you to manually alter the properties of the reflection to match your tastes. Using Physical (with provided presets) can provide you with a matching real-world response for those looking to duplicate reality without endless tweaking. |
Specular Model
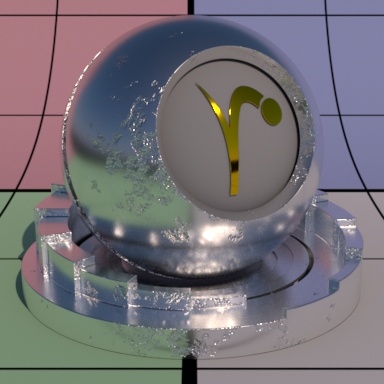
Select which specular model to use: Beckmann or Ggx. Beckmann is useful for perfect mirrors and chrome-like materials. Ggx may be preferred for its "tail", or how the highlight has a soft fade from the center reflection of a lightsource. Left is Beckmann and Right is GGX with roughness 0.25.
| Before After Image Slider | ||||||||||
|---|---|---|---|---|---|---|---|---|---|---|
|
Specular Fresnel Mode
InArtisticmode, specular fresnel response will be controlled by its Face Color, Edge Color, and Fresnel Exponent.
InPhysicalmode, specular fresnel response will be controlled by its Refractive Index, Extinction Coefficient, and Edge Color.
Face Color (Artistic Mode)
Specular color at facing angle (0 degree incidence). Note that there is no separate gain control. To control the specular "gain", simply adjust the color value or connect it to a PxrExposure node. Below are different choices including textured at roughness 0.25.


Edge Color
Specular color at the glancing angle (90-degree incidence). To control the edge specular "gain", simply adjust the color value or connect it to a PxrExposure node. Below are different choices including textured at roughness 0.25. The Fresnel Exponent is also reduced here to make it more obvious. Note that regardless of mode, the edge color will be increased to match the energy of the face color to avoid a darkened edge.


| Note |
|---|
Understand that this control changes meaning in the Physical Mode and operates as a multiplier for the reflection result in Physical mode. You can control reflection intensity and even tint the result using this parameter in Physical Mode. Below we used black, 50% gray, and white.
|


Fresnel Exponent (Artistic Mode)
Specular fresnel curve exponent. Lower numbers reducesthe effect of Face Color while increasing the effect of Edge Color. Higher numbers reverse this. If your face and edge colors are the same, then there is no visible effect. Below we use a red Face Color and green Edge Color and increase the Fresnel Exponent from 0.1 to 1.5 and finally 5.0 with a small roughness.


Refractive Index (Physical Mode)
This is a parameter meant to describe a physical refractive Index; the dielectric index of refraction for the material. Channel values for this parameter typically lie in the range 1 - 3. Since we support 3 color values to capture the spectral effect presets may be preferred over color pickers to avoid lots of tweaking.
Extinction Coefficient (Physical Mode)
Extinction Coefficient is a second refractive index for the material useful for characterizing metallic behaviors. Channel values for this parameter typically lie in the range 1 - 3. Since we support 3 color values to capture the spectral effect presets may be preferred over color pickers. When 0, the material reacts as a dielectric (glass, clearcoat). When non-zero, the material responds as a conductor would. Since this is based on physical values you should the presets more helpful than manual tweaking of settings. Below are presets for Copper, Gold, and Nickel.


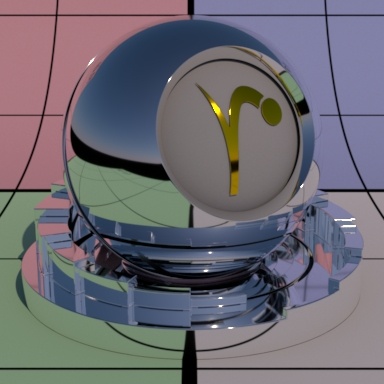
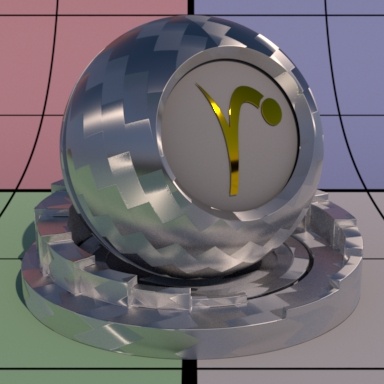
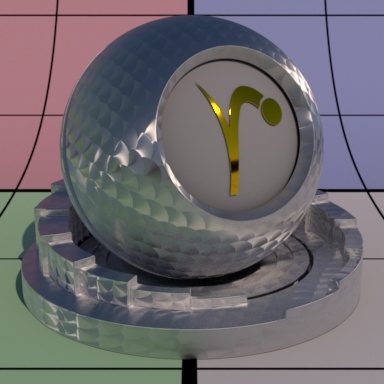
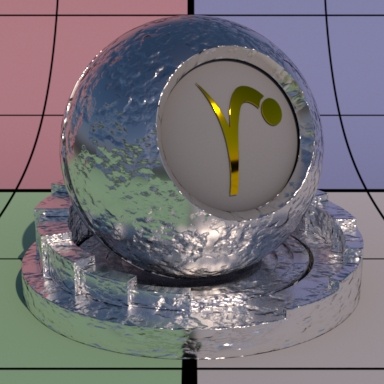
Roughness
Specular roughness. A greater value produces rougher or "blurry" specular reflection. At 1.0 it resembles a diffuse surface and at 0.0 it's a perfectly clear reflection. Most objects will be realistic somewhere in between these values. Texturing this value may give you interesting effects like smudges, greasy fingerprints, and worn surfaces. Below are examples from 0.0 to 0.5 and finally 1.0 (diffuse).


Anisotropy
Controls the shape of the specular highlights and reflections. 0 means isotropic which produces the regular circular specular highlight. Values from -1.0 to 1.0 produce the range of ellipses (stretching) from wide to tall.
By default, the direction of anisotropy is controlled by the model texture parameters. If the Shading Tangent is specified, it is used instead. Below are examples of -1.0, 0.0, and 1.0.
| Note |
|---|
It's recommended that the anisotropy value be set as low as possible to achieve your desired look. Extreme values (beyond -1.0 or 1.0) may generate noise that will not resolve effectively. This can be made worse with low roughness values. |


Shading Tangent
Controls the anisotropy direction. Only valid when it is connected to a pattern. This is useful for making brushed metals. Below are three examples using textures and an Anisotropy of -10

Bump
Normal to use for the specular illumination. If this is not set, it will use the global bump normal specified in the Properties near the bottom of this page.

Double Sided
If on, illuminate on both sides of the surface for this specular lobe, that is, this will illuminate the surface whose normal is pointing away from the camera as well. This is off by default to improve performance.
...