Introduction
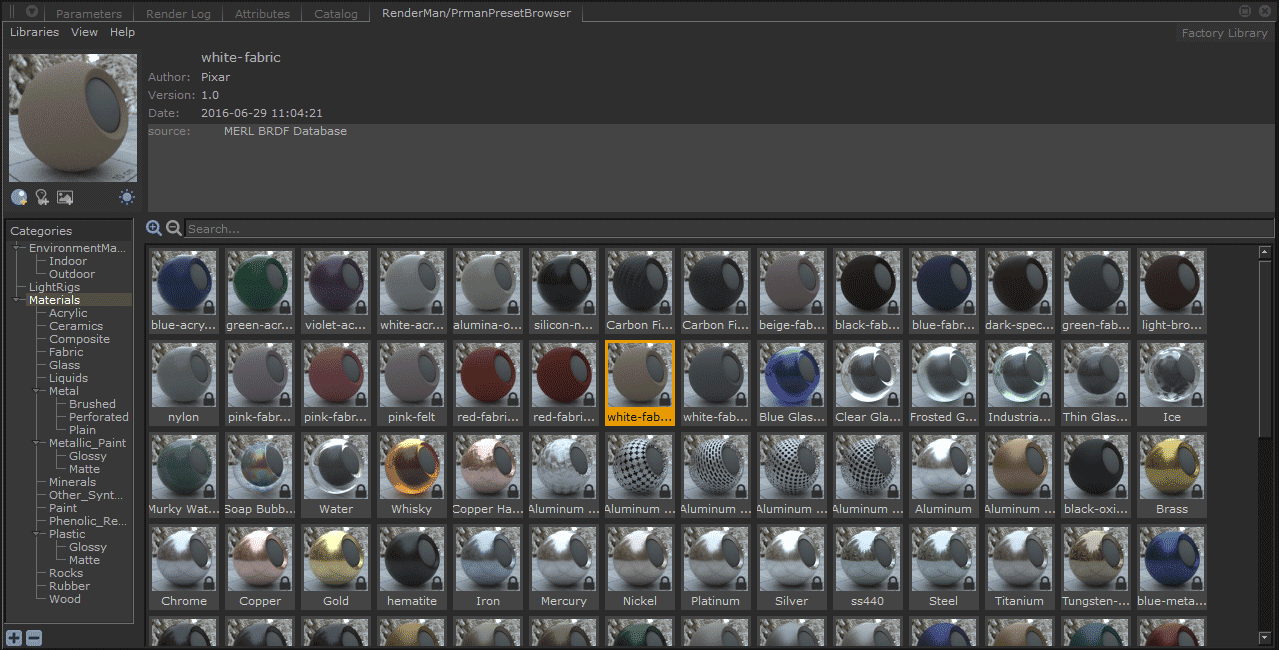
You can open the Preset Browser using the menu arrow button and looking under RenderMan.
Presets include categories for light rigs, environment lights, and materials.
- You can search for assets by name, usage category, or metadata.
Saving and Using
Saving/Exporting a material is easy!
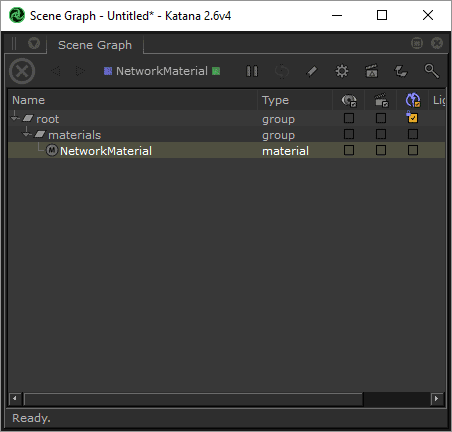
- You must select the BxDF network material from the Scene Graph (the export will recognize connected nodes) Note: the factory library cannot be modified, you can make a copy or create a new library
- Choose the category you want from the Preset Browser (Material, Light, etc)
- Choose the Save icon (the shiny material ball+ icon underneath the preview image)
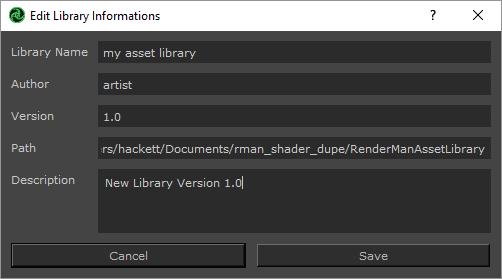
- Give it a useful name and any desired metadata for your pipeline

- RenderMan will generate a preview swatch render, this will auto-populate in the Preset Browser
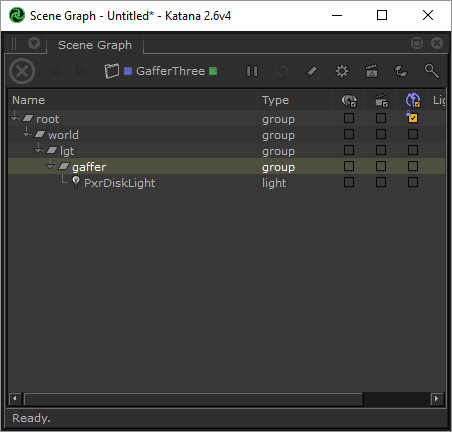
- Saving light rigs is the same except you use the little lightbulb icon with the + symbol next to the material save preset icon. You can export a Gaffer node or individual lights.
- Importing/Using a saved asset
- Simply right-click and choose "Import and Assign" to a selected object
- Make any adjustments for your object as needed!
Environment Maps
- You can save an Environment Map using the image icon+ underneath the large preview swatch in the Preset Browser
- Select the Environment category in the Preset Browser
- Choose the desired OpenEXR or .HDR file from the file browser window
- You can add/change metadata in the dialog or change the name.
- Then we convert the image to a compatible .tex format. This may take time depending on the original image size.
- A preview render is then performed and automatically populated in the browser category.
- Using a saved map is easy.
- Right-click the asset and import.
- Changing the map is as easy as double-clicking another environment map asset!
Asset Dependencies
When an asset is saved to disk, all its dependencies are saved to disk too.
These include :
- Textures : stored in tex format, UDIM is supported.
- HDRI environment maps : stored in tex format. We use a specific combination of flags to compress the texture as efficiently as possible.
- OSL shaders : stored in oso format to protect your IP, but you can manually add the osl file in the asset directory if you want to share the source code.
These dependencies can increase the size of a preset on disk and you should bear that in mind if you want to distribute them over the internet.
Cross-Application Materials
RenderManAssets have been designed to be easily transferable from one application (like Katana) to another (Maya, Houdini, Blender, etc) and vice-versa.
Compatibility Issues
Still, it is possible to run into compatibility issues if your material contains non-native RenderMan nodes. For example, RenderMan for Maya automatically converts a number of native Maya nodes which won't be available in Katana, e.g. the file node or Maya's Cloud pattern. To mitigate these problems, each RenderManAsset maintains a list of used nodes and use it to evaluate the preset's compatibility with the current host application and display a warning if it is not compatible.
The system will check :
- if the asset contains host-specific nodes
- if the asset's renderer version is superior or equal to the current version
- if the asset contains host-specific nodes, make sure the current host version is superior or equal to the asset's host version.
Best Practice
If you want to ensure cross-application compatibility, avoid non-Pixar BxDFs and Patterns.
Library Configuration
RenderMan ships with a standard library that can be found in : $RMANTREE/lib/RenderManAssetLibrary
| Info |
|---|
We recommend that you copy the standard library to a location of your choice and leave the default library untouched as a backup. The new copy should be readable and writable. The asset browser will not allow you to create new assets if it points to a non-writable location. |
Environment variable
The location of the asset library can be set through the RMAN_ASSET_LIBRARY environment variable.
| Warning |
|---|
We only support a single library, so you cannot pass a colon-delimited list of paths to RMAN_ASSET_LIBRARY. |
It can be set using different methods :
| Code Block | ||
|---|---|---|
| ||
RMAN_ASSET_LIBRARY = $RMANTREE/lib/RenderManAssetLibrary |
| Code Block | ||
|---|---|---|
| ||
RMAN_ASSET_LIBRARY = %RMANTREE%/lib/RenderManAssetLibrary |
System commands
Linux
On all Posix platforms (Linux & OSX), you can either define the environment variable in the shell you will launch Katana from or append it to your shell configuration file (.cshrc for csh/tcsh, .profile or .bashrc for bash).
| Code Block | ||||
|---|---|---|---|---|
| ||||
setenv RMAN_ASSET_LIBRARY $RMANTREE/lib/RenderManAssetLibrary |
| Code Block | ||||
|---|---|---|---|---|
| ||||
export RMAN_ASSET_LIBRARY=$RMANTREE/lib/RenderManAssetLibrary |
OSX
- If you are running Katana from the shell, you can setup your environment variables like Linux.
Windows
Right-click My Computer and choose Properties (or double-click System in the control panel), then click the Advanced tab, and click Environment Variables.