| Info |
|---|
This page discusses the workflow for Denoise, if you want to know how to use this from a DCC application and the technical details, take a look at the Denoising page. |
When using the Denoise feature in RenderMan, it's important to understand a few things to make your workflow better or even more automatic. Most packages expose this as a dropdown or menu selection. This is a post-render process so an image has to be written out before it can work.
...
Each of these may take different amounts of sampling to converge and they're spread unevenly through the scene.
| Note |
|---|
Here we're using the Default Denoise settings but there are other useful settings:
You can also choose different modes:
|
...
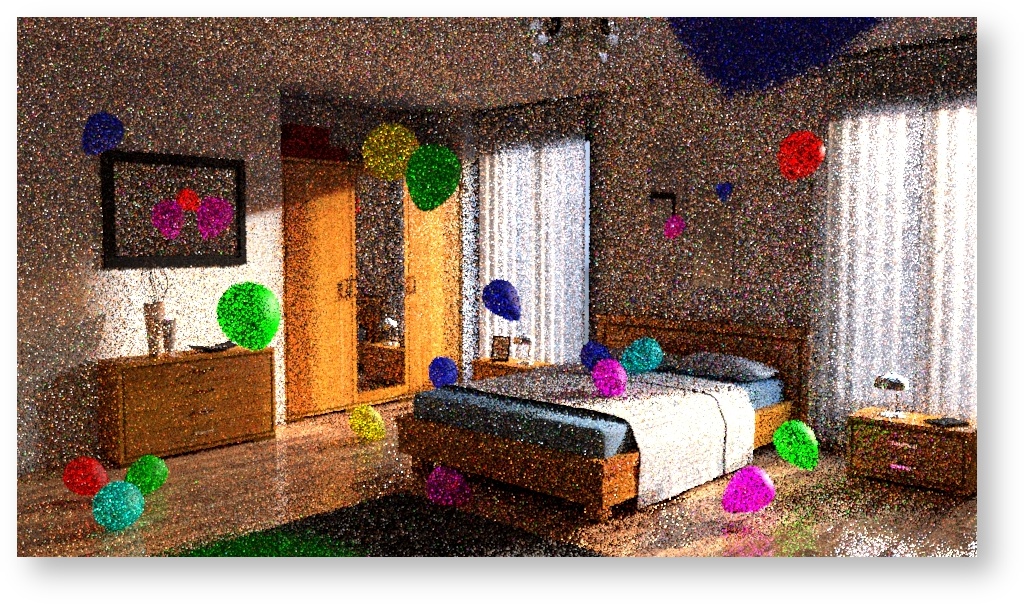
When rendering scenes using raytracing, the result of poor quality settings or insufficient time to converge shows noise. Users are familiar with this effect when a render just starts up and then converges before their eyes. For a first iteration you may see something like the image below:
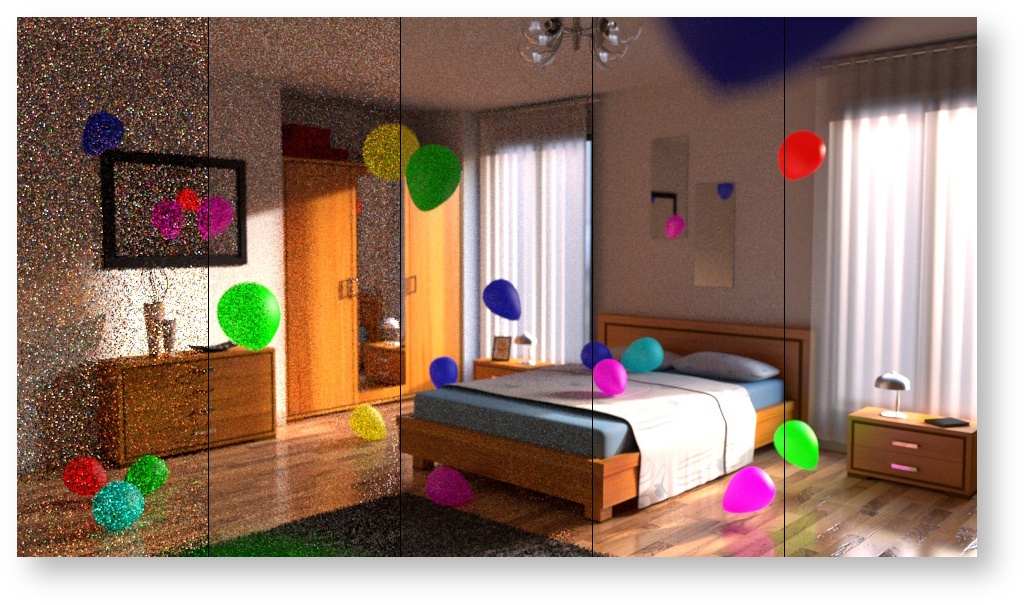
More samples will help the image improve, but this takes time. The more powerful your computer (the more processor cores and more modern it is) the faster this will go. When using RenderMan, you can increase the samples taken automatically by the renderer by decreasing the Pixel Variance parameter in small increments. You can get an idea about this looking at the progression below, each slice is a lower Pixel Variance value left to right.
Notice that as sample counts get higher and higher, the difference in quality becomes more and more subtle. This is because convergence over time tends to resemble a curve where eventually it starts to flatten out. This is where the Denoise feature does its work for the artist! By removing this sort-of long "tail" in the convergence curve, you can eliminate having to take more samples and finish your render earlier. Below is a simple illustration of this using the graph.
...
Trying Denoise
Using the simple Checkpointing in Renderman can give you multiple chances to try Denoise on frames as they converge without losing time by starting the render over. Below is a set of examples of trying Denoise at the same strength on different levels of convergence. Keep in mind you want an image similar to the one at the top of the page, which is our reference image fully converged. The bottom image in this section is very similar and with less than 25% of the samples in the reference image needed.
...
| Before After Image Slider | ||||||||||
|---|---|---|---|---|---|---|---|---|---|---|
|
| Before After Image Slider | ||||||||||
|---|---|---|---|---|---|---|---|---|---|---|
|
| Before After Image Slider | ||||||||||
|---|---|---|---|---|---|---|---|---|---|---|
|
Changing Strength
There are several ways to alter how the filter works but most helpful is the ability to change its strength. By default it operates at a setting of 0.5 but other overrides ship with RenderMan giving you options between 0.2 and 0.7 strength. You can even create your own simple override files to change the strength to a setting you prefer for a specific image or shot you're working on. More information about this can be found on the page regarding the Denoise Tool.
...
The following comparison is from Strength 0.2 and Strength 0.7. The default Strength is 0.5 for Denoising. Note that higher strength may work well to clear up a still image with a loss of some details. But too high may look "wobbly" or jittery in an animation. The best solution is a balance between a more converged image and a lower strength Denoise application.
| Before After Image Slider | ||||||||||
|---|---|---|---|---|---|---|---|---|---|---|
|