...
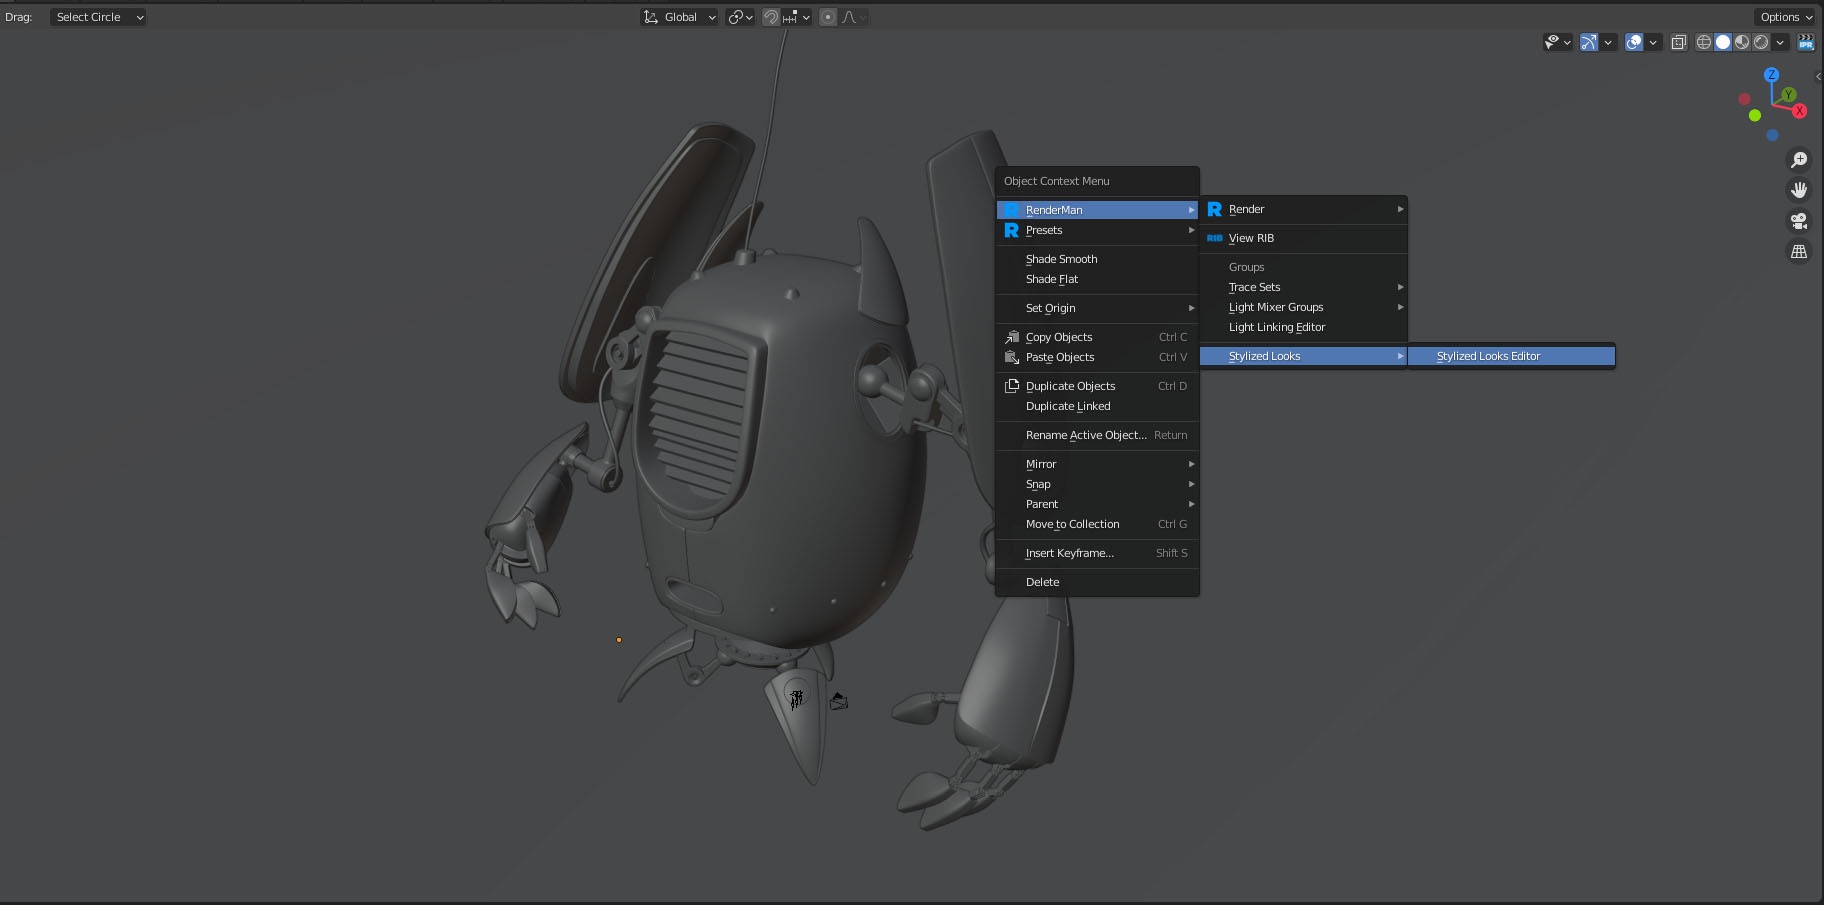
- Right-click in the viewport and select RenderMan → Stylized Looks → Stylized Looks Editor
- Enable Stylized Looks, select an object, and then select a PxrStylizedControl from Attach Stylized Pattern.
Pressing OK will now create and attach the required PxrStylizedControl nodes to the PxrSurface of the robot model.
The PxrStylizedControl network is required to be attached to every object in your scene and allows for individual shading control of each object.
This can also be achieved by selecting an object and RenderMan → Stylized Looks → Attach Stylized Pattern → PxrStylizedControl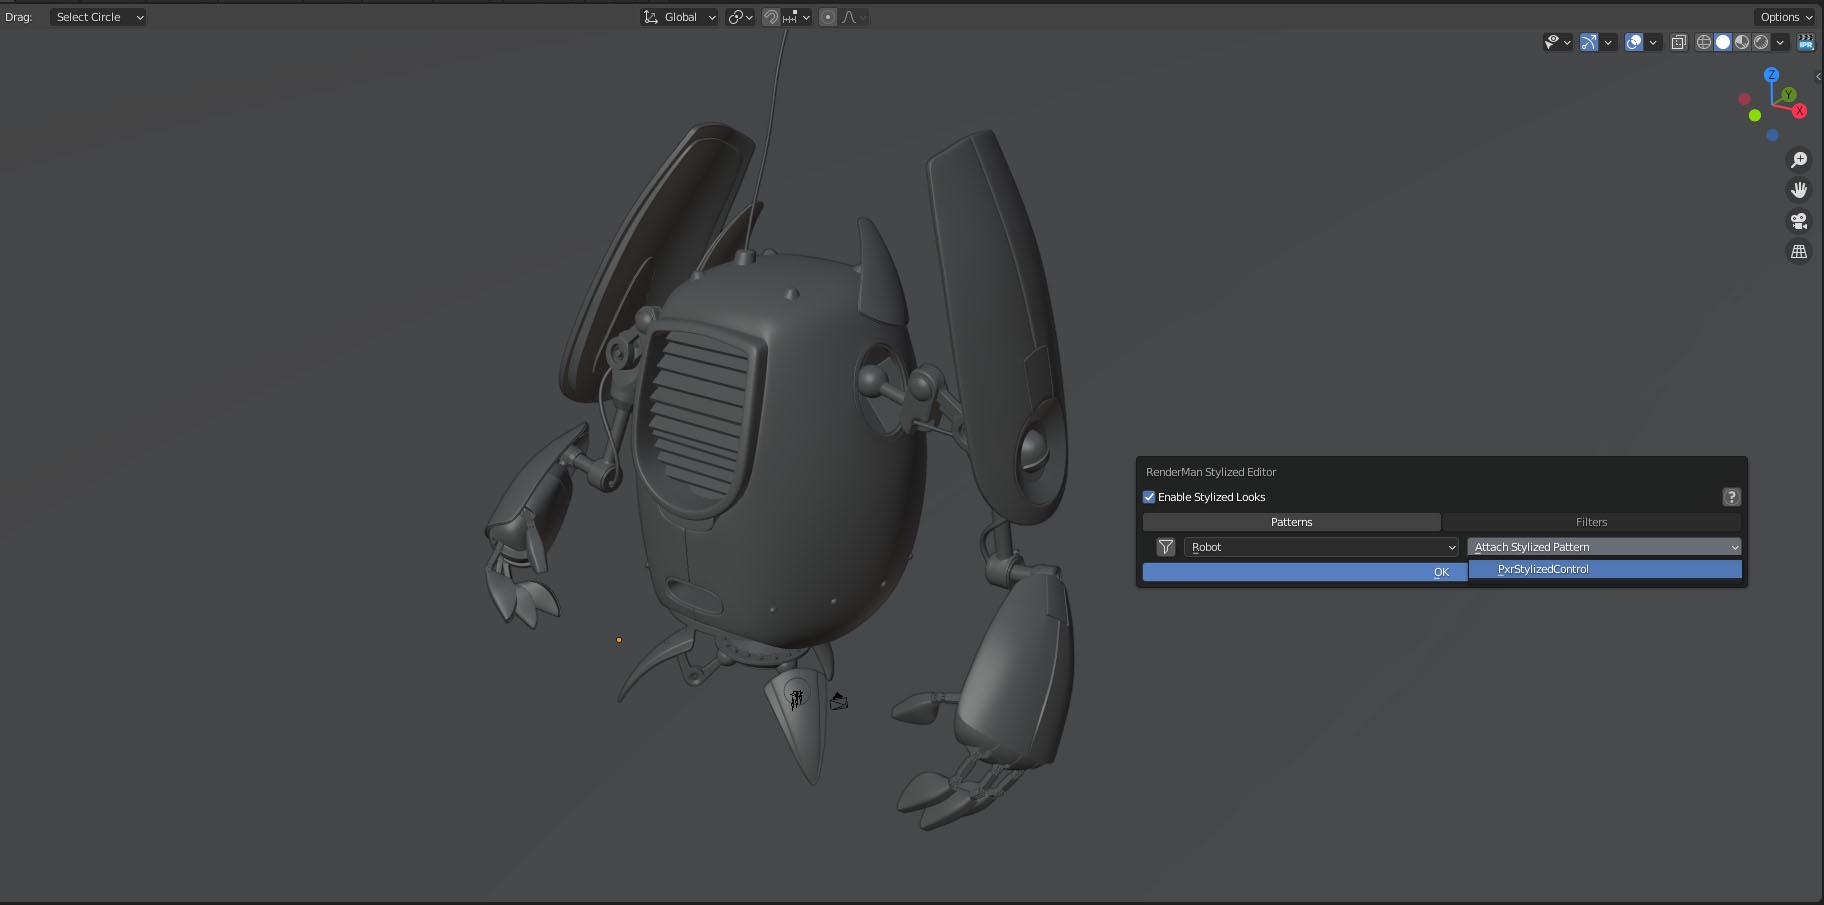
- Using the RenderMan Stylized Editor, you can now begin to add in Stylized Filters to begin creating your unique Stylized Look.
In this example, we'll add in a PxrStylizedHatching Filter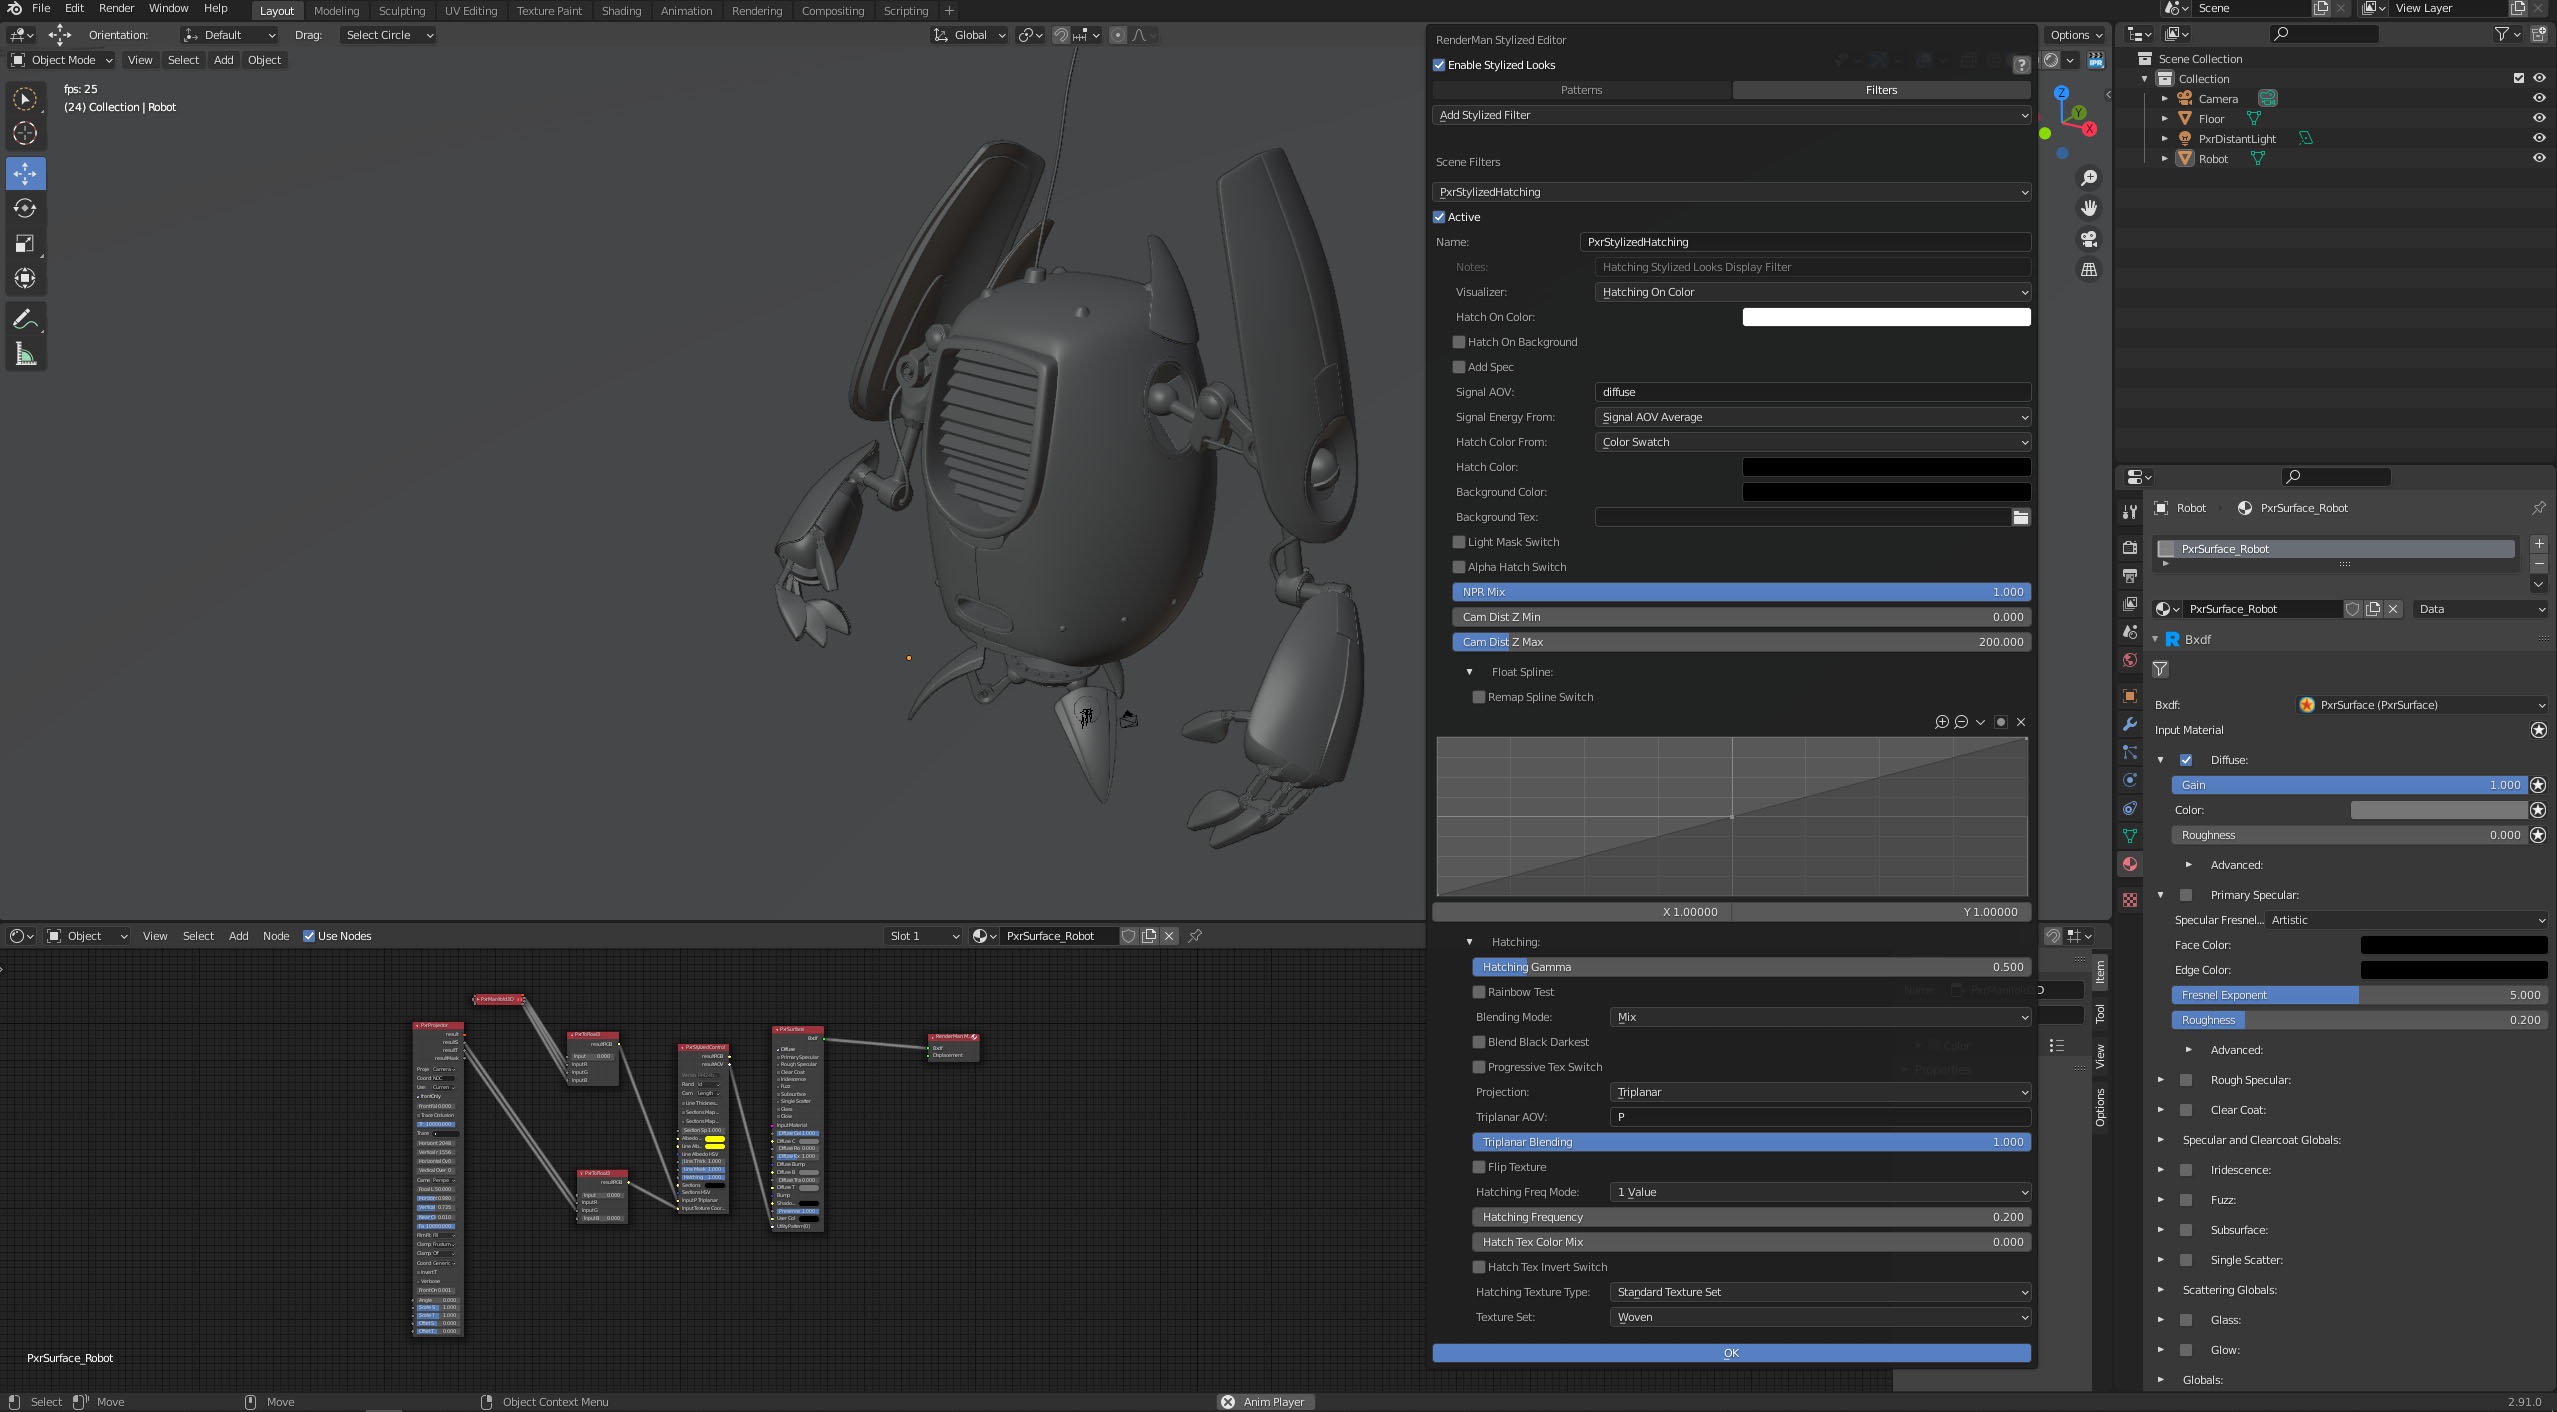
- Now, fire up the IPR, and your scene will now be rendering in Stylized Looks
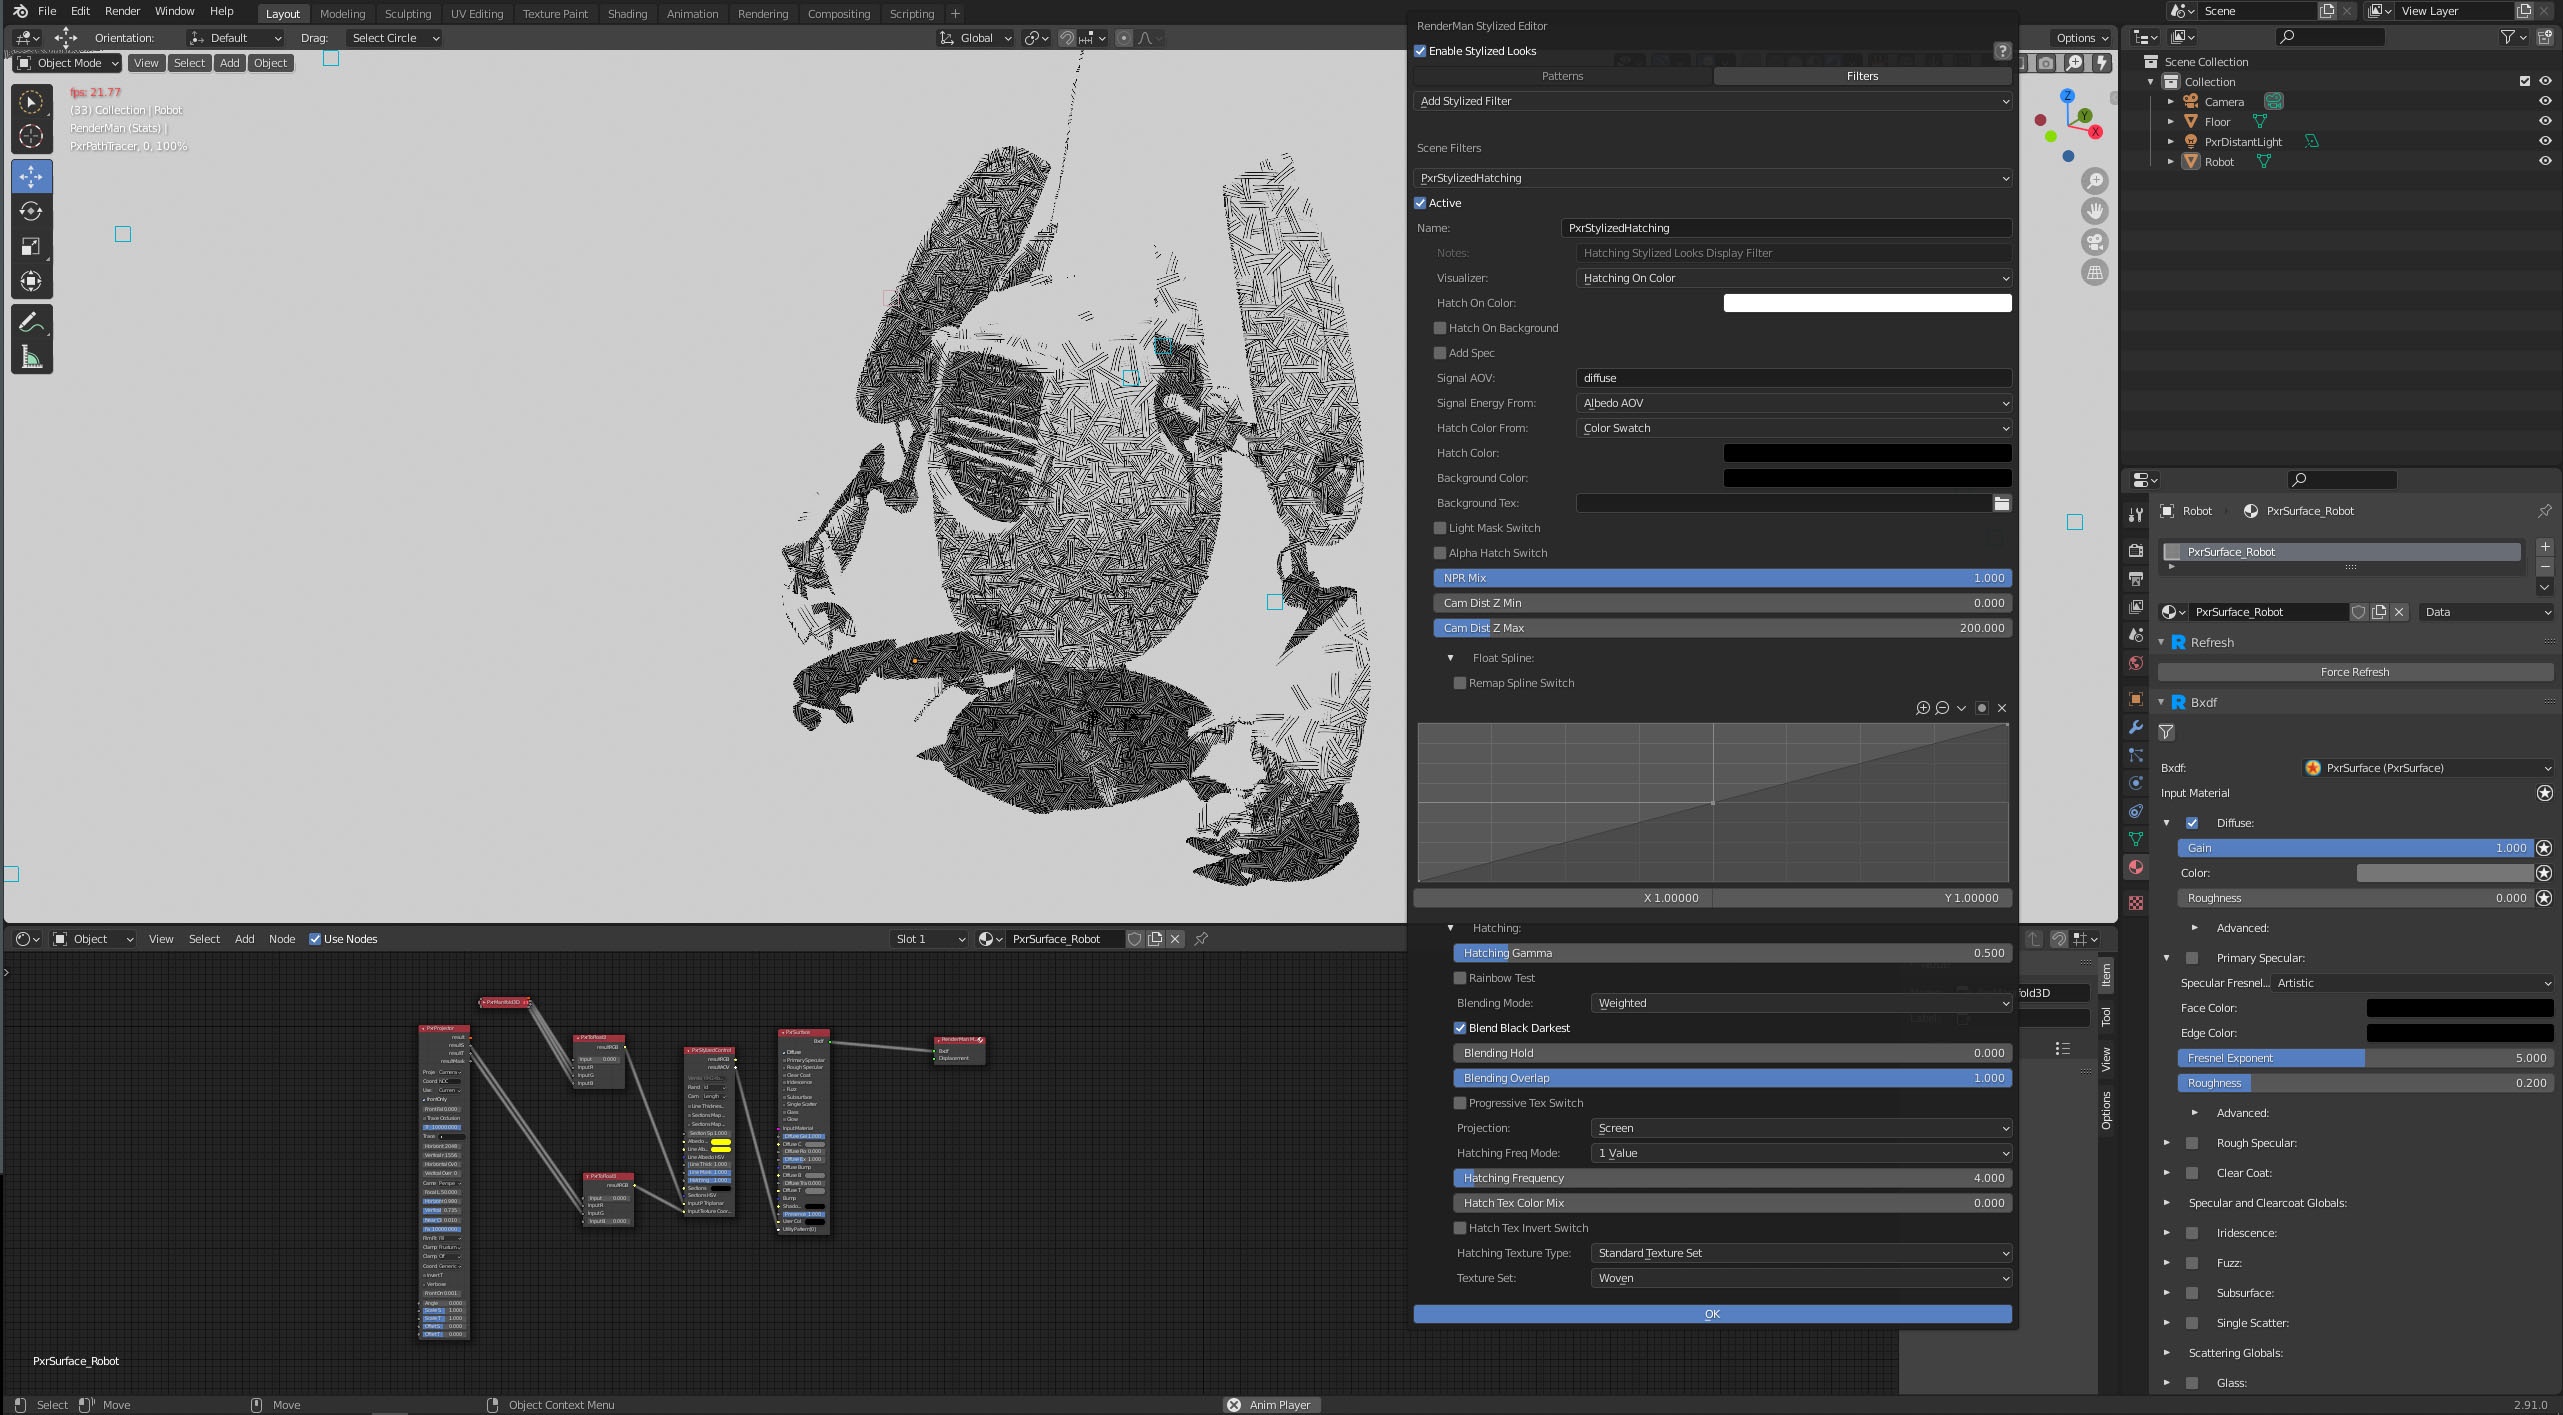
Note: In this example, the default settings have been tweaked in the following :
a) Signal Energy From : Albedo AOV
b) Blending Mode : Weighted
c) Blend Black Darkest : ON
d) Projection : Screen
e) Hatching Frequency : 4
You are now up and rendering with Stylized Looks!
Your creative adventure into NPR has started and don't forget that the power of Stylized Looks comes when you begin to combine a variety of Stylized Filters together to create your own unique styles and looks.
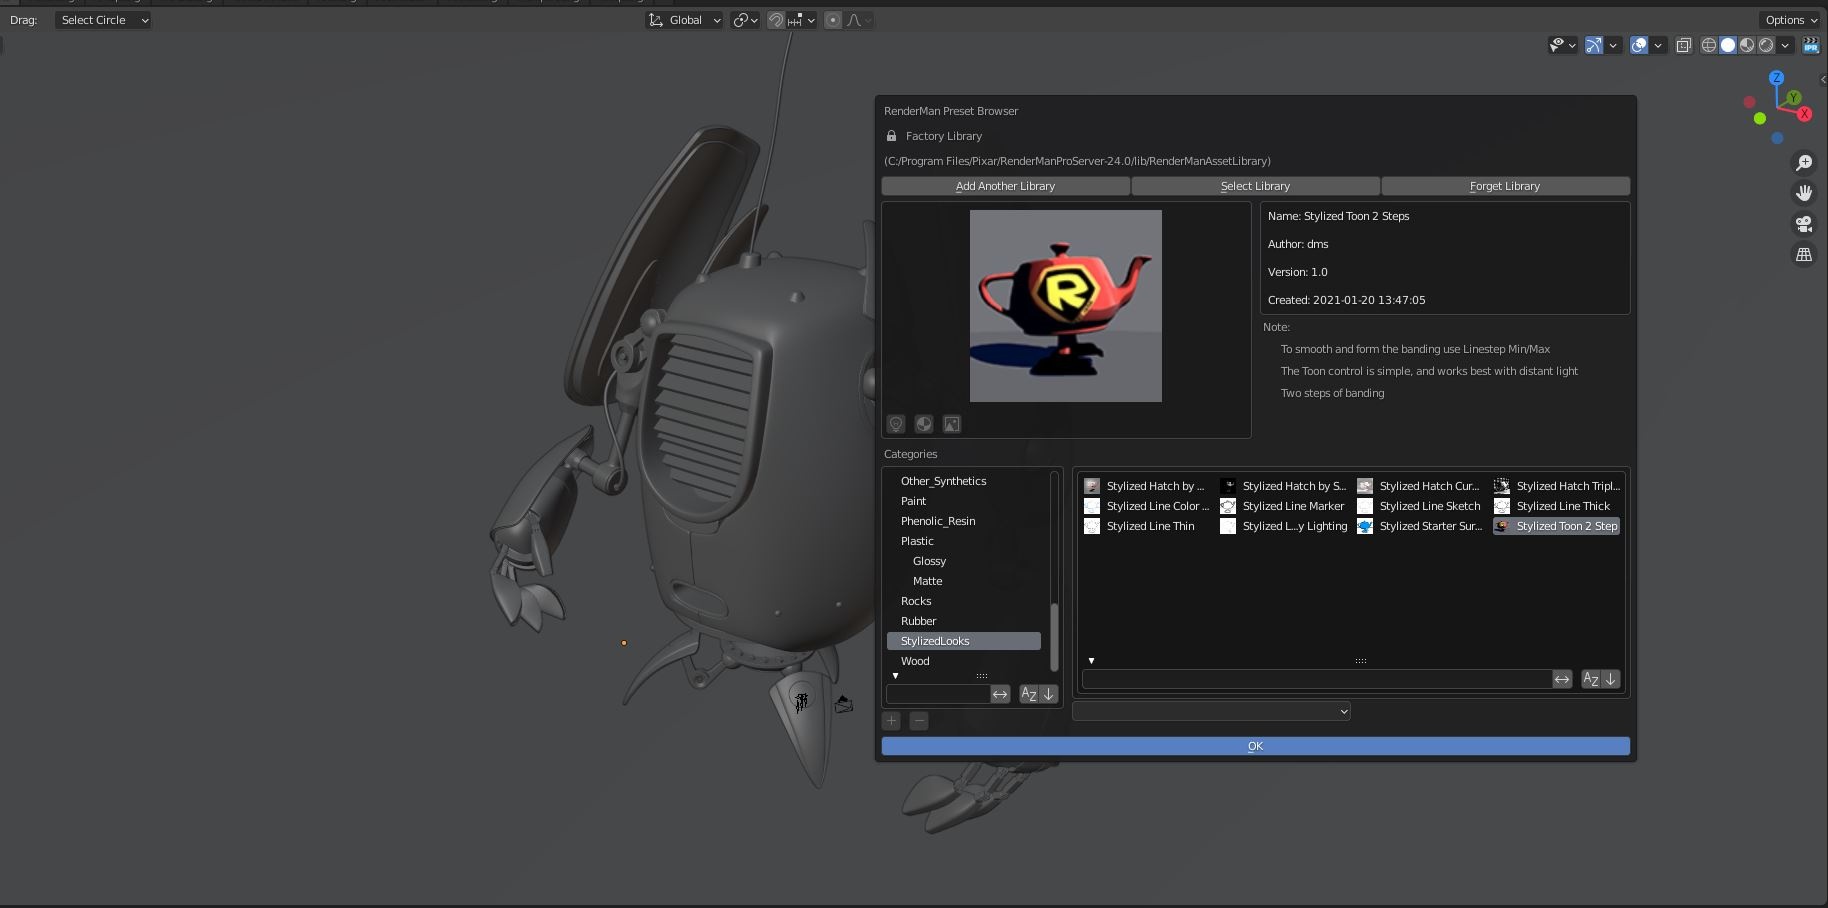
Stylized Looks also ships with several fun presets to get you started. You can find these inside the RenderMan Preset Browser