Contents
Rendering in RenderMan is accomplished using the ROP node in Houdini. If you choose the shelf button, we will create and connect the common choices for rendering including using the PxrPathTracer Integrator.
There are many options for rendering and some are obscure or for special circumstances. This document aims to help you navigate the differences as simply as possible.
Standard Controls
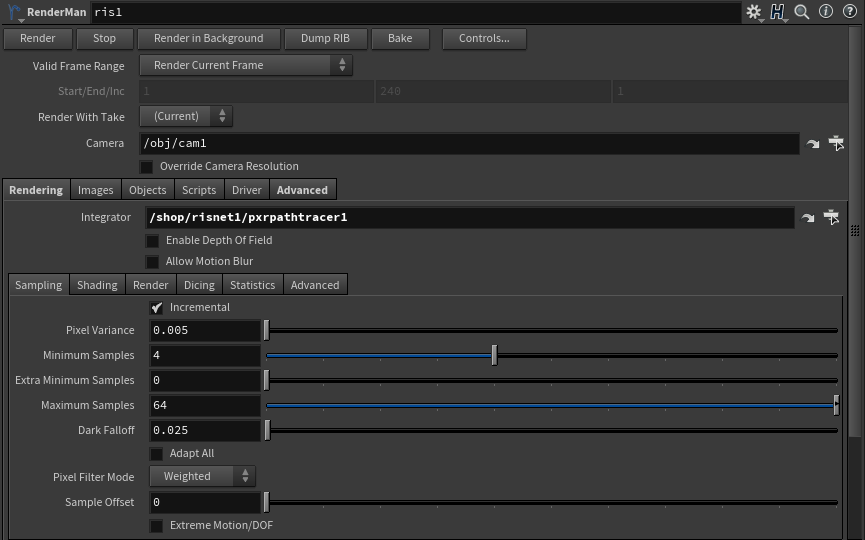
Buttons
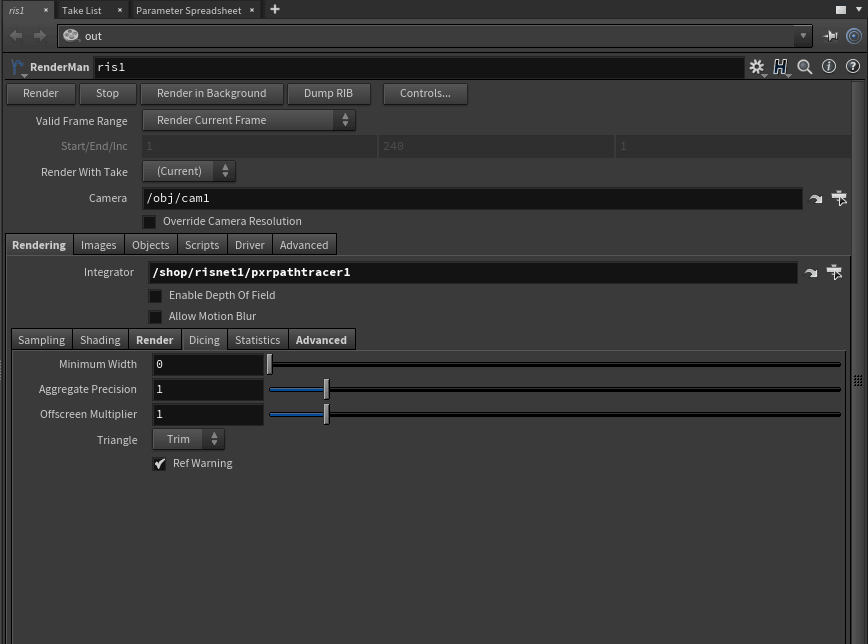
- Render - Initiate an Interactive Render to RenderMan
- Stop - Cancel or End the interactive render (you may also stop the render from "it")
- Render in Background - Render while keeping the Houdini UI available
- Dump Rib - Export a RIB file (defaults to the location of your .hip scene file) The default is Binary to save space. You may change this in the RIB Tab
- Controls... - Additional options for rendering like quality overrides and frame settings
Common Choices
- Valid Frame Range - Choose the frames to render, not valid for interactive rendering
- Start/End/Inc - The frame range and increments, accepts floating point values
- Render With Take - Which versioning to use
- Camera - Path to the chosen camera from which to render. This must have a camera specified. If using our shelf button, we will populate the field
- Override Camera Resolution - Change the render resolution from the one specified in the camera settings
Rendering
Sampling Tab
See also Renderer Options for more details
- Pixel Variance - This is your main quality control for the render. Lower values are higher quality. Typical production settings are 0.005 to 0.001 (extreme high quality). 0.01 is reasonable good to medium quality depending on scene complexity
- Sampling
- Minimum Samples - The lowest number of sample required per-pixel. A value of 0 takes the nearest square root of the Maximum Samples setting. Higher numbers may be necessary to capture small image features like small particles or thin hair
- Extra Minimum Samples - If a pixel fails the variance test, this value forces a specified number of additional samples before testing the variance again. At 0 it defaults to the same number as the Minimum Samples
- Maximum Samples - The most samples we will take before stopping samples on a pixel. Higher values may be necessary when rendering depth of field, motion blur, or other noisy effects
- Dark Falloff - If an area of the image is darker than this threshold, stop sampling since it won't be visible or perceived
- Adapt All - Test all the AOVs against the variance threshold. This means your AOVs are more likely to be noise-free but can significantly increase render times as some AOVs may trigger more samples without much gain to image quality
- Hider
- Raytrace Hider - This is used to render an image
- Bake Hider - This is used to invoke pattern baking
- Incremental - Render frame passes instead of bucket/tile based rendering. Preferred for most rendering choices including batched and checkpointed renders
- Pixel Filter Mode
- Weighted - This is the default setting where samples are filtered together
- Importance - This is required for denoising applications (Hyperion or Nvidia) where pixels are independent of one another
- Sample Motion - Objects are motion blurred when this is on, however, when off, your image will not be motion blurred but AOVs like dPdTime will still compute motion blur when motion blur is enabled, allowing for post blur effects
- Sample Offset - This allows several images to be rendered in parallel (with different sampleoffset values) and then combined
- Extreme Motion/DOF - Changed the sampling technique when depth of field or motion blur is extreme/dominant in the image. This is more accurate but introduces some overhead
Shading
See also Renderer Options for more details
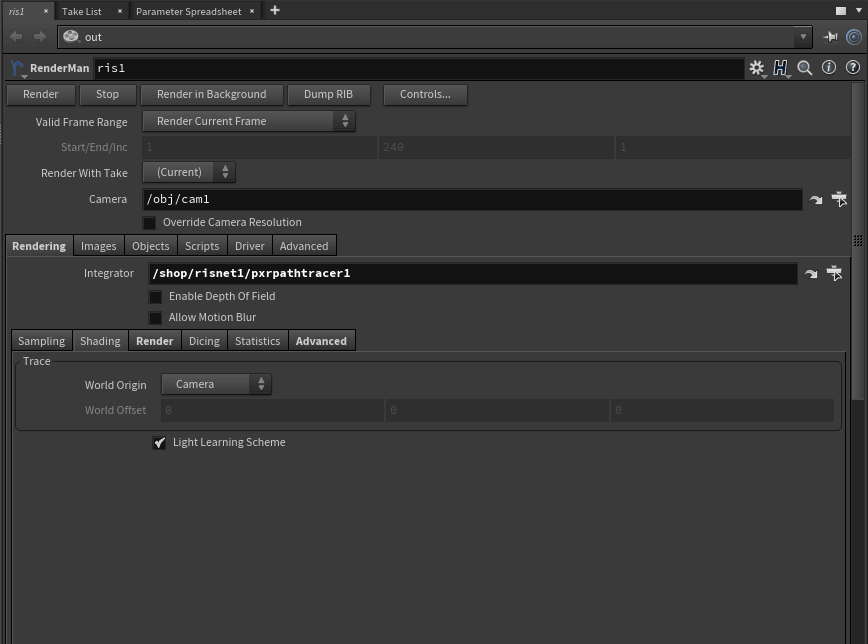
- Trace
- World Origin - Allows the user to select the origin fr the scene, useful for very large scenes where precision issues may cause slow renders or artifacts in raytracing
- Camera - The default uses the render camera position as the world origin (0, 0, 0)
- World - The original default where your scene grid is used as the origin for your scene
- World Offset - User supplied coordinates as the new origin for the scene during rendering
- World Offset - The user defined location of the new scene origin
- World Origin - Allows the user to select the origin fr the scene, useful for very large scenes where precision issues may cause slow renders or artifacts in raytracing
- Light Learning Scheme - This option allows the renderer to use light attributes and positions/occlusion to inform the renderer of how to balance samples across the scene to improve convergence. Complex scenes benefit more than simple scenes or scenes with few lights
Render
See also Renderer Options for more details
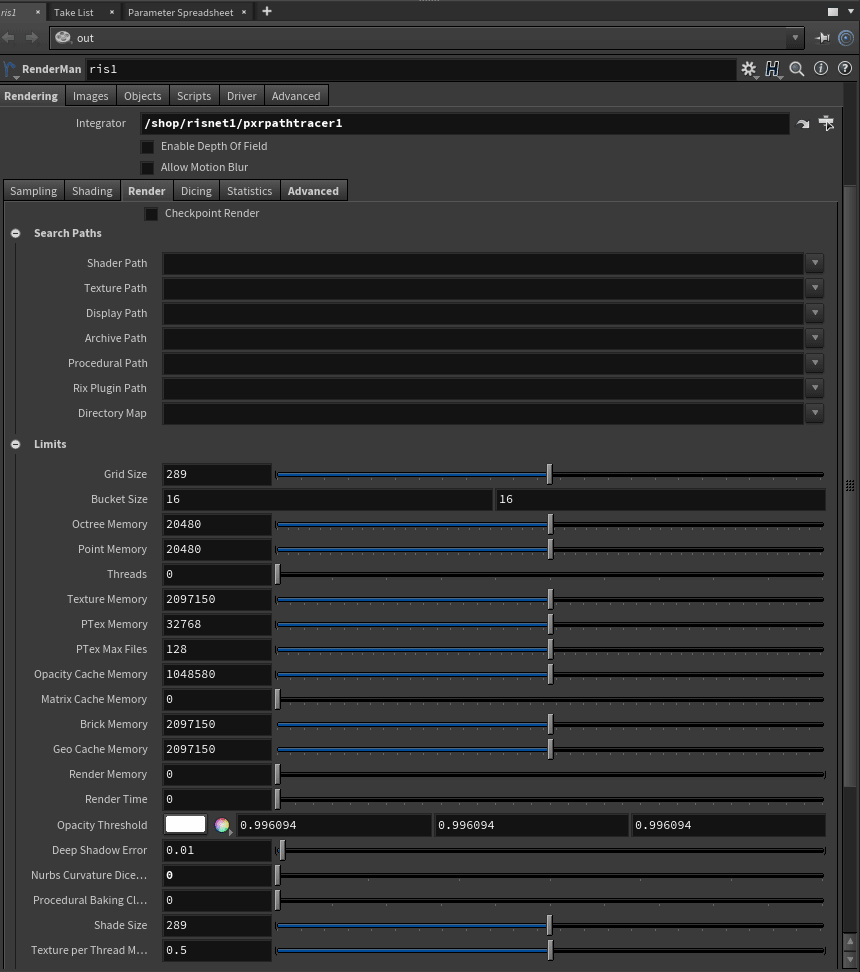
- Search Paths - These point to locations where RenderMan should look for custom plugins, image directories, and more
- Shader Path - Path to find shader plugins
- Texture Path - Path to search for texture files
- Display Path - Path to find Display plugins
- Archive Path - Path for finding and loading delayed read archives/RIB
- Procedural Path - Path to find procedural plugins (like Maya's Xgen)
- Rix Plugin Path - Path to other RenderMan plugins
- Directory Map - Path remapping
- Limits - These define memory limits for certain features of the renderer. On modern machines you may have enough memory to hold most entities in RAM, but for some parts of the render you may be able to efficiently reduce the memory used to render large scenes (geometry must be in-memory) We attempt to set this at reasonable limits by default. For more information, look under Configuration
Dicing
See also Renderer Options for more details
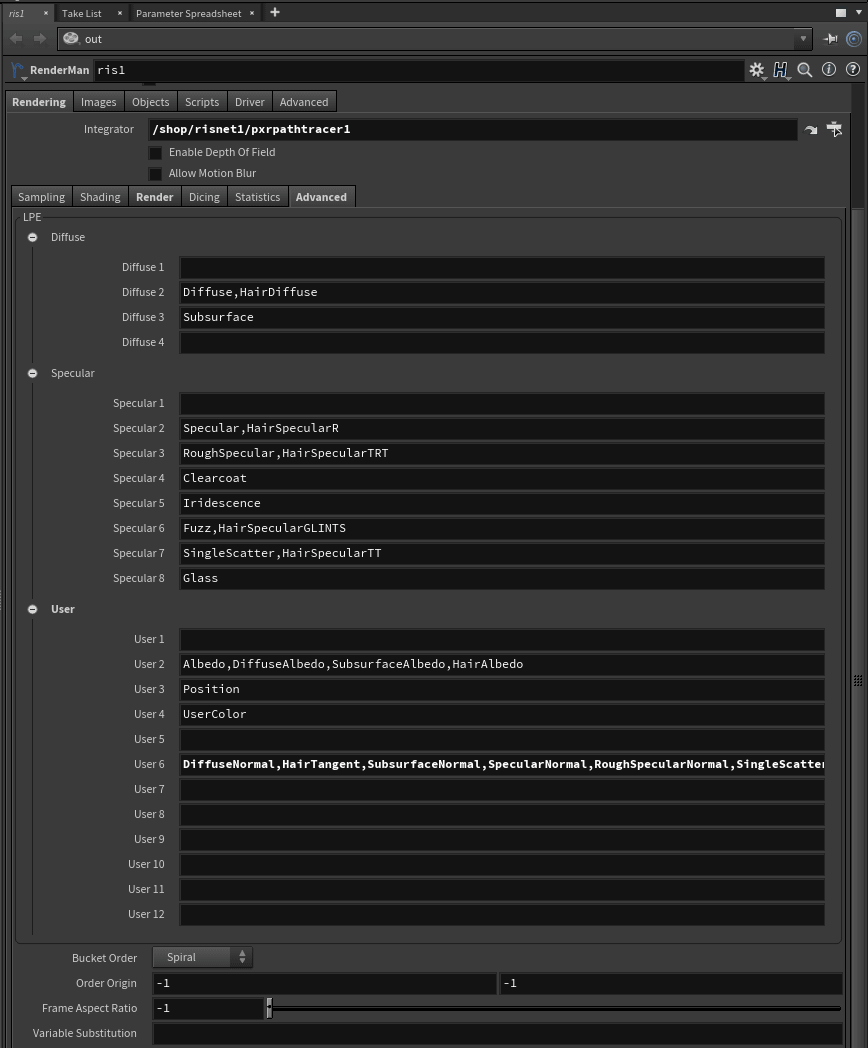
- Minimum Width - Minimum pixel width to render hair/fur/curves. A small amount may improve anti-aliasing of fine curves
- Offscreen Multiplier - The multiplier of the dicing rate for objects offscreen that may appear to have poor shape in reflections or cast shadows that are from obviously under-diced objects
- Triangle - Method when dicing triangles (usually a simulation mesh)
- Trim - Dice a quad into a triangle
- blp - Use a quad with coincident points on one end
- Ref Warning - Enable warnings on poorly stitched meshes
Statistics
See also Renderer Options for more details
- Debug - Allow shading debug messages
- Render Statistics - Output render stats on render completion
Advanced
See also Renderer Options for more details
- LPE - This section defines lobes for output to LPE, this includes the lobes from PxrSurface and PxrMarschnerHair. Custom materials may also define lobes for output here as User lobes. Note that the 1 position for each set, Diffuse, Specular, and User is empty as a fall through
- Bucket Order - Render bucket order. Supported values: horizontal, vertical, zigzag-x, zigzag-y, spacefill, random, spiral, circle
- Order Origin - Specify the first bucket/tile rendered when using Spiral or Circle choices
- Frame Aspect - The aspect ratio of the rendered output image
- Variable Substitution - Meant for RIB file parsing only