Contents

© Disney/ Pixar
In partnership with Pixar's Studio, we are delivering a way for the renderer to automatically switch from a bump map to a roughness value depending on the size of a feature in the camera. This, in turn, will also improve your render times due to the lower sampling rates needed to render such details.
One such example is Louise Nash (shaded by Yeon Kang) from Cars 3. Here you can see extensive wear of the clear coat on the paint job, which creates micro-scratches and breaks up the specular in interesting ways.
A Bump Roughness map helps keep those micro details in the wide and medium shots as shown in this closeup example below.
This is not only is this an improvement in technology, but this technique allows you to enhance your storytelling with wear and aging.
Photorealism is all in the details !
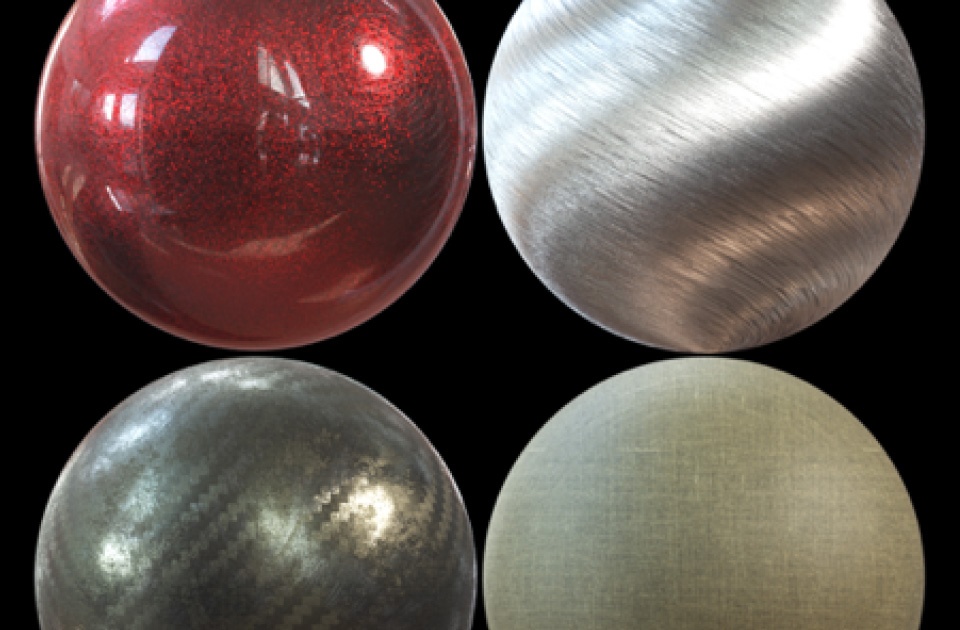
There are many other types of materials that benefit from the added detail that Bump Roughness maps bring, such as carbon fibre, metals, plastics and fabrics.
© Disney/ Pixar
PxrBumpRoughness
b2r Texture
This expects the first derivative map, let H be a height field, then each channel are defined as r=dH/du, g=dH/dv, b=dontcare
Texture Type
Map type to be used as your Bump Roughness Map
TxMake Icon
Show settings in Texture Manager
Manifold
Connect a manifold node here to control the position, rotation and tiling of your Bump Roughness map
Multi Manifold
Connect a PxrHexTileManifold or PxrRoundCube Manifold here.
Bump Roughness
Base Roughness
This is the roughness of the base surface when fully zoomed into the detail
Texture Roughness
Set the texture roughness to be provided by the input textures when fully zoomed out from the detail. It is combined with the base roughness. The default of -1.0 lets the texture provide its natural roughness.
Gain
This is a multiplier to the aggregate roughness
Bump Normal Gain
multiplier to the normal map magnitude
Anisotropy Gain
This is a multiplier to the aggregate anisotropy
Advanced
Adjust Amount
Amount to adjust the normals when they are facing away from the camera
Surface Mix
The amount to mix the resulting normals with the surface normals
Blur
Amount of blur to apply to texture lookup.
Filter
Which filter to use. (unfiltered/closest not advisable for displacement.)
Filter Scale
Multiplies the size of the texture filter, less than one for sharper textures.