Contents
This is a displacement plugin that displaces the surface point P in the current space (typically object space). It supports both scalar and vector inputs. It sums up all the connected scalar and vector inputs before it does the actual displacement.
All displacement transform related functions are in PxrDispTransform pattern.
All displacement layering function are PxrDispScalarLayer and PxrDispVectorLayer pattern.
Instead of including all the functions in one big displacement plugin, this modular design separates the transform and layering, providing more flexibility and efficiency for supporting different production displacement workflows.
You need to set your displacement bound in order to see displacement. For performance reasons one is not always set by default. Use small values at first, if you have clipping, increase the value slowly.
To match Displacement from previous version of RenderMan, the following conversion may be of use:
To get a similar tessellation level, using a shading rate (deprecated) value of X would translate in using a micropolygonlength value of sqrt(X):
shading rate = 0.25, micropolygonlength = 0.5
shading rate = 1, micropolygonlength = 1
shading rate = 4, micropolygonlength = 2
Displacement Space
We offer two rendering spaces for specifying displacement, world and object space. These are specified in the PxrDispTransform node but explained here.
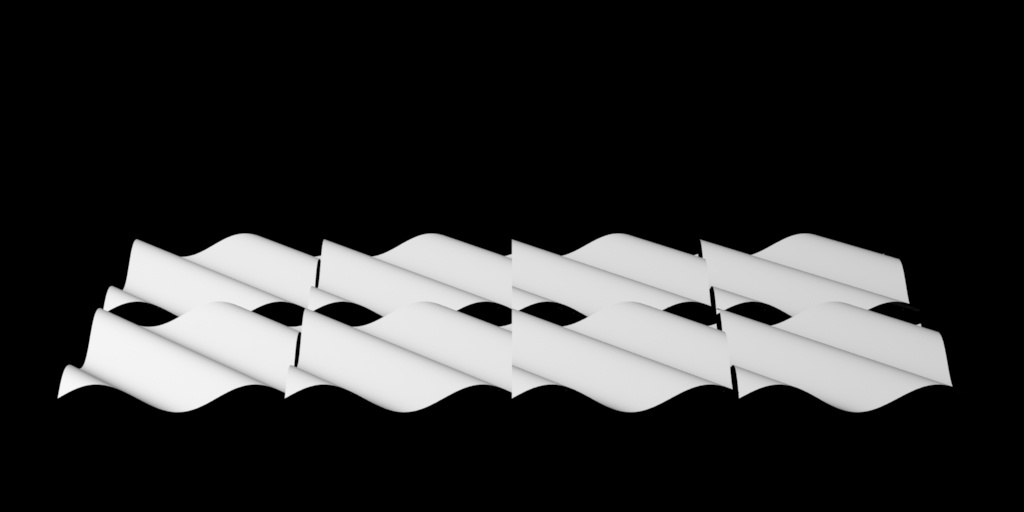
By default, RenderMan will displace in Object space. This is typically desired for sculpted models. But for some objects this can result in discontinuities. For example, a set of objects displaced together like a set of planes made into an environment piece. In object space these may result in gaps or discontinuity between patches like below.
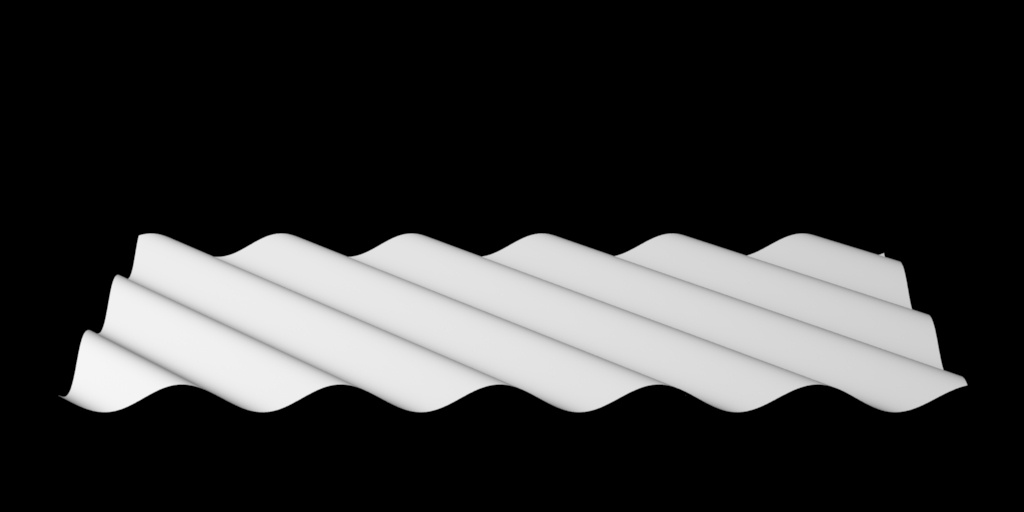
To correct for this particular scenario, you can select World Space to achieve the result below using the same eight patches. This will solve issues like ocean planes, cliffs, and rocks, where displacement is shared across the shapes.
Displacement Types
There are two types of displacement, scalar and vector: The source of both types of displacement can be procedural or textured.
- Scalar displacement is a float displacement. It has only one float value. Thus it displaces P either up or down.
- Vector displacement displaces P in all three dimensions, XYZ.
These examples below show using the same source of displacement values yield different result using the scalar (using a float, e.g. resultF, resultR, ...) vs vector displacement (using a vector, e.g. resultRGB, resultXYZ).
Input Parameters
Enabled
If checked, displacement is enabled. This is useful for debugging where we sometime want to turn off displacement.
Gain
Gain for the displacement. If it is zero, there will be no displacement. Higher amounts create larger displacement. Be aware this may cause problems if it exceeds the set Displacement Bounds and it will print a warning at render time.
Scalar Displacement
Scalar displacement input. This is a float displacement. We can connect this to a PxrTexture pattern node or any float pattern node.
Vector Displacement
Vector displacement input. Vector displacement data is a three channel data file, XYZ. We can connect this to a PxrTexture pattern node or any pattern node that outputs a vector or color.
Model Displacement
Model Displacement is a vector displacement for the model. This is added to the Vector Displacement above.
It is not uncommon where the modeler sculpts the model with either Mudbox or ZBrush. Then the shading artist look develops it by procedurally creating the vector displacement for more details. So providing both Model Displacement and Vector Displacement allows this flexible workflow.
Hints on performance:
Should you need better quality from the render camera (at the correct location for your final frame) you may decrease the size of the polygons by using Micropolygon Length and reducing this number slowly (decreasing the size of the resulting polygons for finer details).
Always use the smallest bounding box setting that produces the correct and full displacement.