Contents

The Preset Browser in Blender allows you to save and re-use assets such as materials, light rigs, and environment maps (HDR images). RenderMan already comes with a library of pre-made assets. More assets can also be downloaded from the RenderMan website, in the Resources section.
Starting the Preset Browser
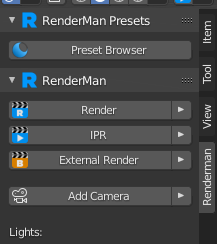
To bring up the Preset Browser, press 'n' in the viewport to bring up the side panel, click the Renderman tab, and you should see a RenderMan Presets panel. Clicking on the Preset Browser button will bring up the UI.
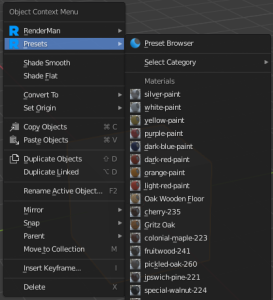
You can also bring up the Preset Browser from the right click menu in the viewport:
UI
Info
By default, the preset browser will use the factory library that comes with RenderMan. At the top of the window, you will see the name of the library, and the full path to the library on disk:

The lock icon ![]() indicates that this library is read-only. Assets can be imported into the scene, but assets cannot be written to the library.
indicates that this library is read-only. Assets can be imported into the scene, but assets cannot be written to the library.
Top
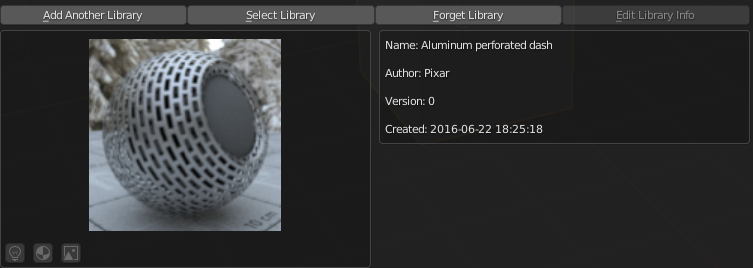
The preview image shows a preview of the current selected preset. On the right, is the meta information for the current selected preset.
Below the preview image, are buttons that allow you to save a light rig from the currently selected lights, a material from the currently selected object, or an environment map.
For the top row:
Add Library - this button will allow you to add a new library to the preset browser. If an empty folder is selected or an existing library cannot be found in the selected folder, the factory library will be copied over to that folder.
Select Library - this button allows you to select from the existing libraries that were added to the preset browser.
Forget Library - this button will tell the preset browser to forgot/remove the current library from the list of libraries saved.
Edit Library Info - this button will let you edit the meta information of the current library, including name and version.
Bottom

The left shows the categories for the assets. You can add or remove categories using the + and - buttons. Note, the top level categories (EnvironmentMaps, LightRigs, Materials) cannot be removed.
On the right, are the assets available for the currently selected category. Below that is the operations menu:
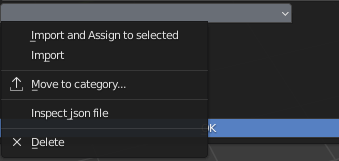
Import and Assign to selected: imports the current asset and Assign it the currently selected object. This only applies to materials.
Import: this simply imports the current asset to the scene.
Move to category: this allows you to move the current asset to another category.
Inspect json file: this allows you to view the .json file on disk for the current asset
Delete: deletes the current asset.
Shortcuts
Portions of the Preset Browser are also available from the right click, object context menu in the viewport:

Here, the assets for the currently selected category are available. In this case, if an object is selected and silver-paint was chosen, the silver-paint asset will be imported and assign to the object. You can also change categories, by using the Select Category menu.