RenderMan for Maya improves Alembic rendering workflows by consolidating existing functionalities.
There are now different ways to render Alembic archives in RFM. We will review them one by one.
This documentation uses an Alembic archive of the Rolling Teapot model from Brice Laville Saint Martin. You can download it here. |
Exporting geometry to alembic from Maya
First, you need to export your geometry so that RenderMan may render it correctly.
To make it easier, we have added a few export functions in RFM to guarantee correct results, but you can roll out your own based on our work if you need to customize it.
You can find it in the Archive section of the RenderMan menu...
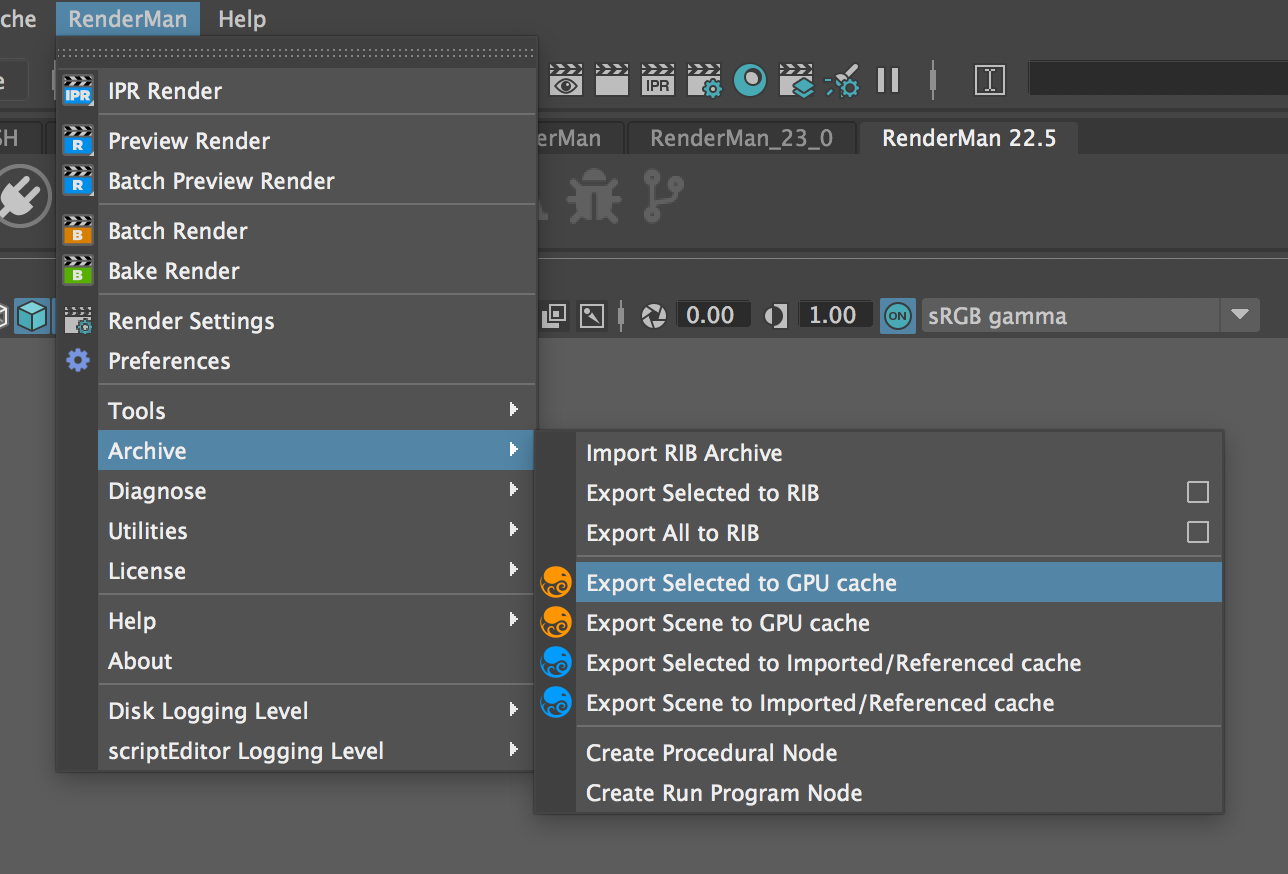
...or by right-clicking the archive icon in the RenderMan shelf.

We export many geometric options using our menu selection to provide enough data for other bridge products, such as:
    Constant real32 rman_micropolygonlength
    Constant int16 rman_watertight
    Constant uint8 rman_traceDisplacements
    Constant int16 rman_autoBias
    Constant real32 rman_traceBias
    Constant real32 rman_displacementBound
    Constant string rman_displacementCoordSys
    Constant uint8 rman_emitPref
    Constant uint8 rman_emitWPref
    Constant int16 rman_subdivScheme
    Constant int16 rman_subdivInterp
    Constant int16 rman_subdivFacevaryingInterp
    Constant uint8 rman_outputColorSets
    Constant uint8 rman_emitFaceIDs
    Constant uint8 rman_emitNref
    Constant uint8 rman_emitWNref
    Constant uint8 rman_preventPolyCracks
Constant int32 rman_motionSamples |
As you can see, there are different options depending on how the archive will be rendered:
Export for the gpuCache node
When exporting for the gpuCache node, the alembic archive will be sent directly to the renderer, without being processed by RfM. If your scene contains polygon meshes that are either smoothed (using the Smooth Mesh controls) or carry RenderMan's subdivision surface attributes, we need to make sure they will be exported as subdivision surfaces instead of poly meshes. This menu includes a pre-processing step before calling the usual Alembic export dialog.
We use the gpuCache node to reference, display and render regular, high quality Alembic archives. It is different from Maya's GPU cache workflow where you save a simplified version of your scene, simply to keep large scenes more interactive. Always use our Alembic Export menus for best results. If you try to render alembic files saved via the Cache > GPU Cache > Export... menu, we can not guarantee the results. |
Export for imported/referenced archives
When an alembic node is imported or referenced in a Maya scene, the archive's nodes will be rebuilt as Maya shapes and must carry their original RenderMan attributes to render as expected. Our export menus include a setup step to make sure all relevant attributes will be saved in the alembic cache, as well as uv sets and subdivision surface creases and corners.
Rendering Imported or Referenced Caches
Alembic archives can either be imported or referenced in Maya. You can attach materials to them and they will render exactly like any other piece of Maya geometry.
They are great to light and shade animated characters without the burden of evaluating complex rigs. They are not so great when the archive contains a large number of nodes with heavy geometry, in which case you might consider rendering a GPU cache instead.
Rendering gpuCache nodes
Creating a new gpuCache node
The easy way
Right-click the archive icon in the RenderMan shelf and select "Import GPU Cache...". A file picker will open, the node will be created and made visible to indirect rays.

The hard way
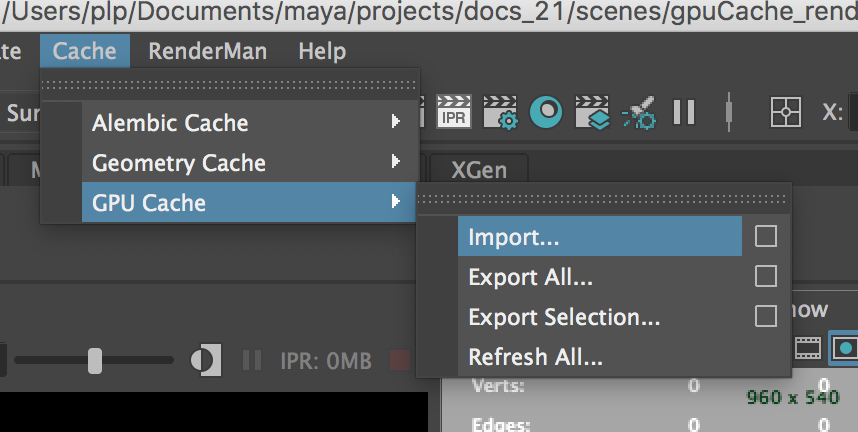
Start by importing your alembic file via the GPU Cache menu. If the menu doesn't appear in your Maya, go to the Plug-in Manager window to enable it.
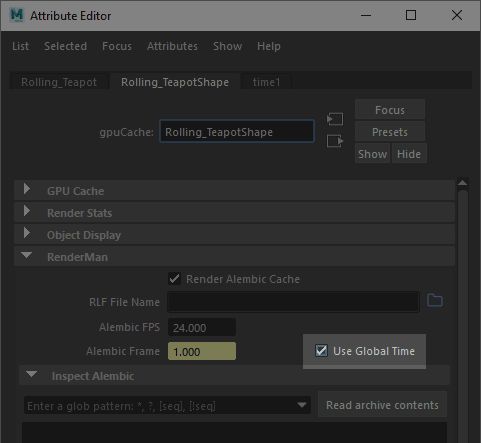
By default, a gpuCache node is invisible to indirect rays! Go to the Render Stats section in the Attribute Editor and enable Visible in Reflections and Refractions. For animated GPU caches please select: Use Global Time |
In this example, I imported the Rolling Teapot model. Note that the whole model is now a single node in Maya, which by default will not be rendered by RenderMan.
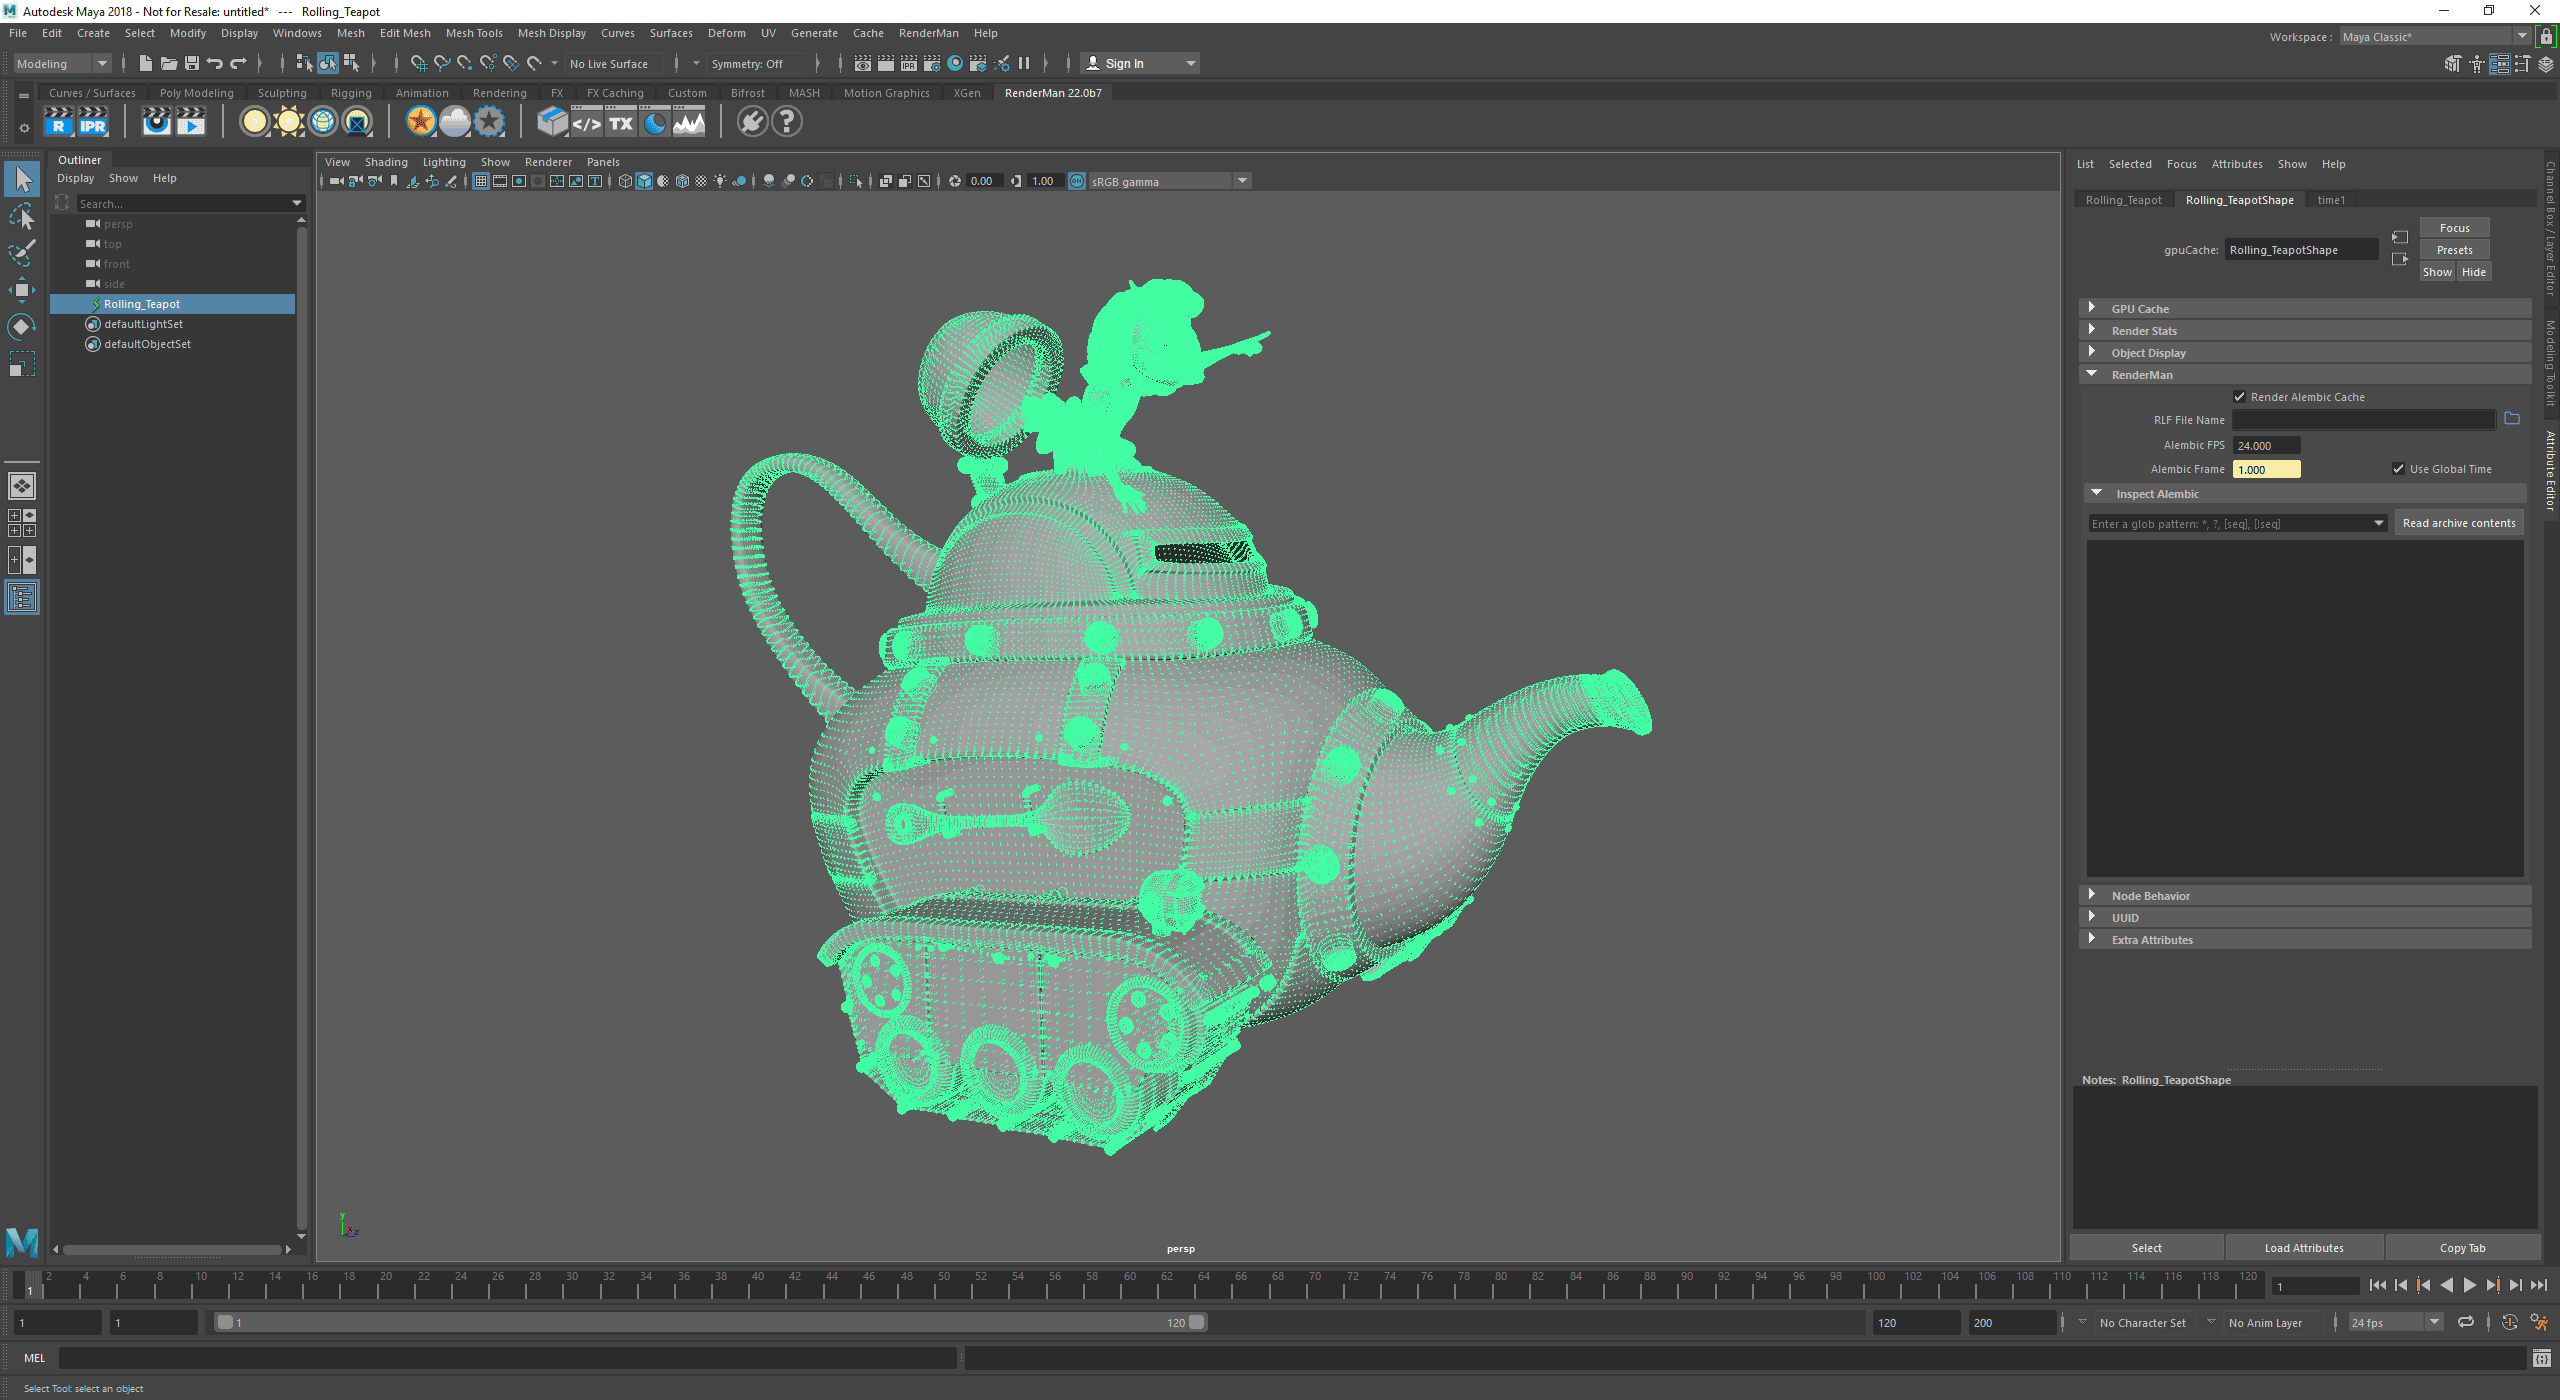
The default attributes will appear in the RenderMan section:
- Render Alembic Cache
- MUST be enabled to render.
- RLF File Name
- The full path to a RenderMan Look File that will be applied to the Alembic file. You can use the editor described further down the page to create and save RLF files.
- Inspect Alembic section
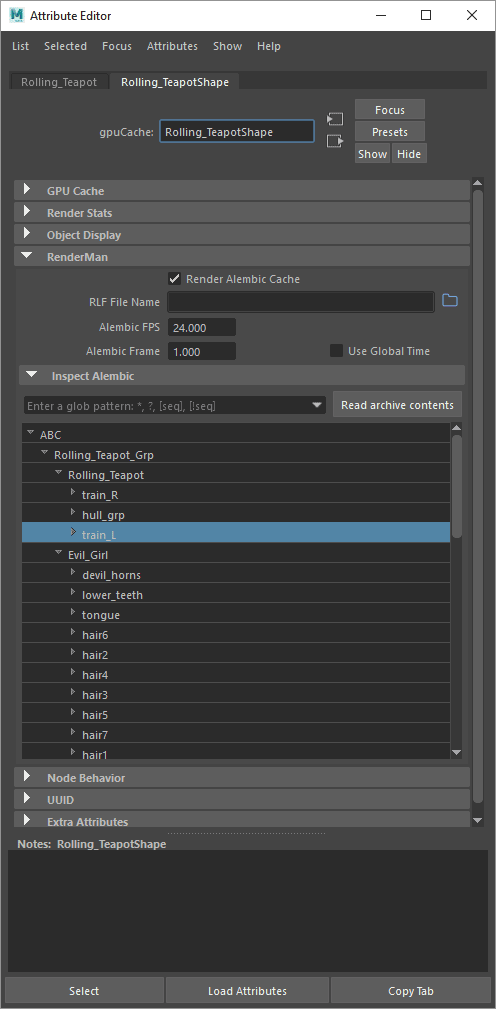
Read archive contents
This button to parse the contents of the archive and display it the node lists.
Large alembic archives may take many seconds to parse. Be patient...
The node list may incorrectly display large number of deeply nested nodes. To work around this Maya bug, we only expand the first 3 levels by default and suggest using the filter field to explore the archive.
The parsed data is saved on the node so it may be displayed quickly without having to re-parse the file, but you will have to re-parse the archive if anything has changed in it.
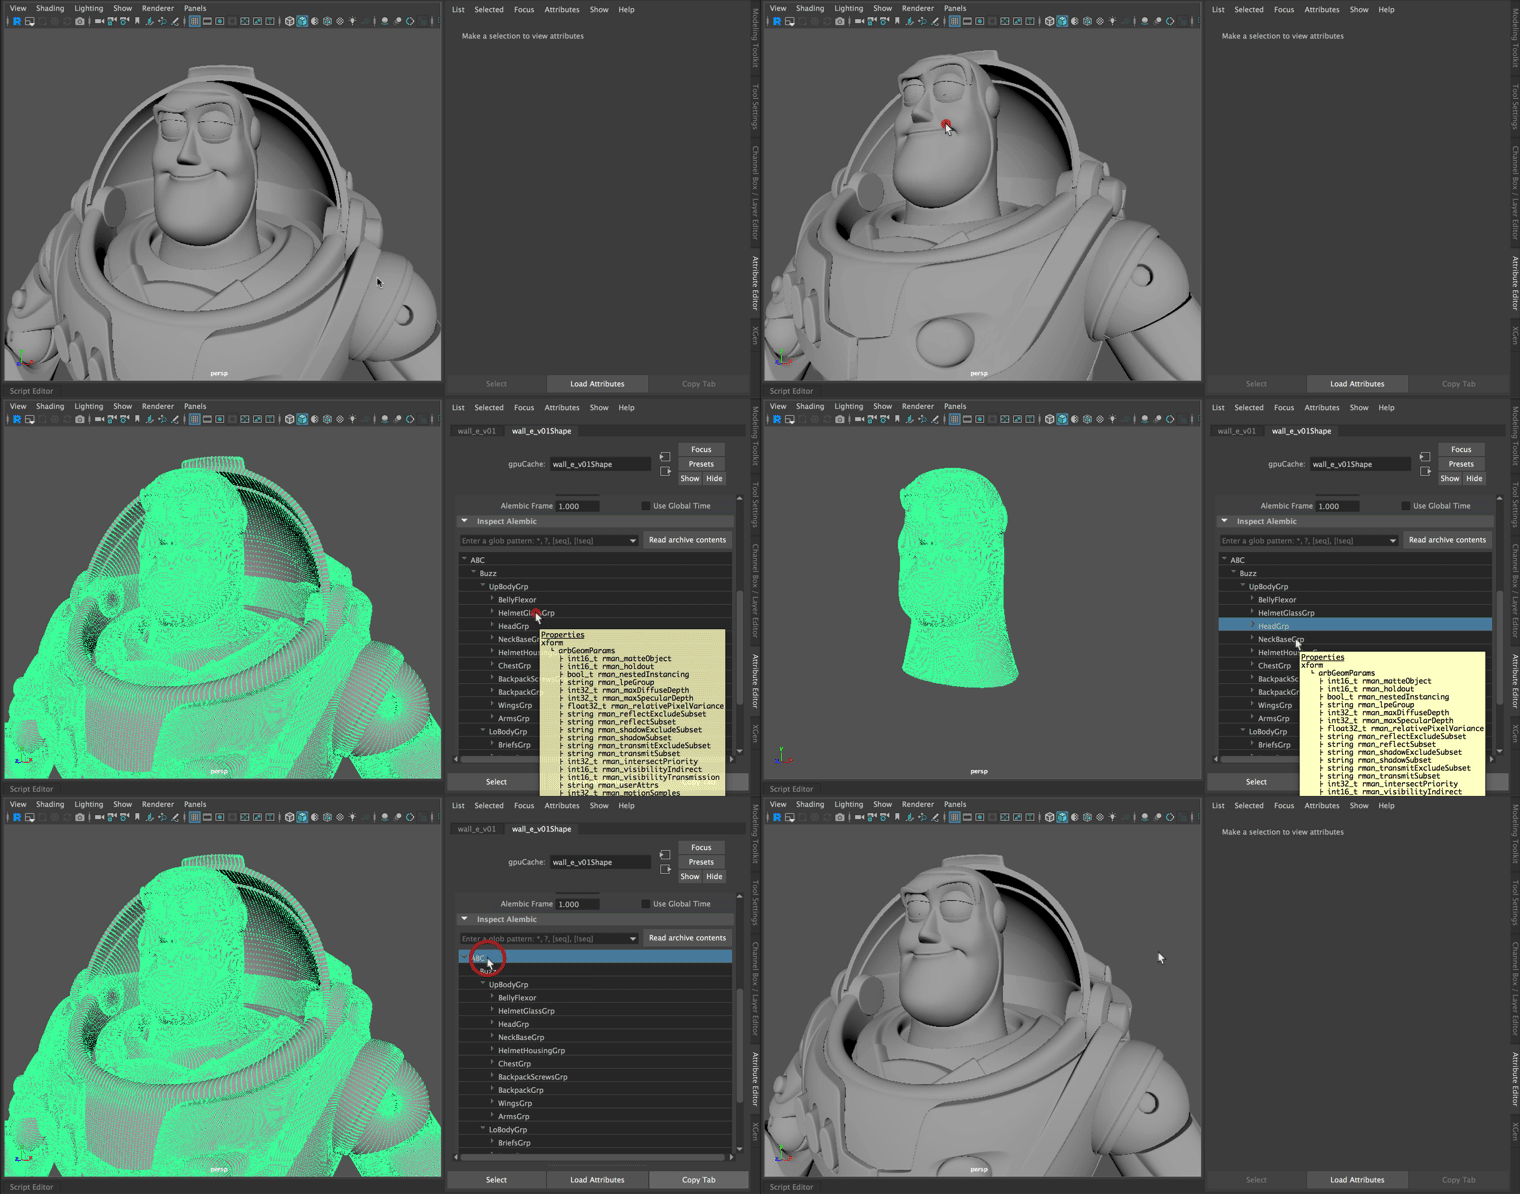
You can "solo" any point in the hierarchy (display only the selection) by double-clicking in the list. To display everything again, double-click the top node (ABC). This has no impact on the final render.
- Render Alembic Cache
- Filter
The contents of the node list can be filtered using a glob expression.
Pattern Meaning *
matches everything ?
matches any single character [seq]
matches any character in seq [!seq]
matches any character not in seq
- Filter
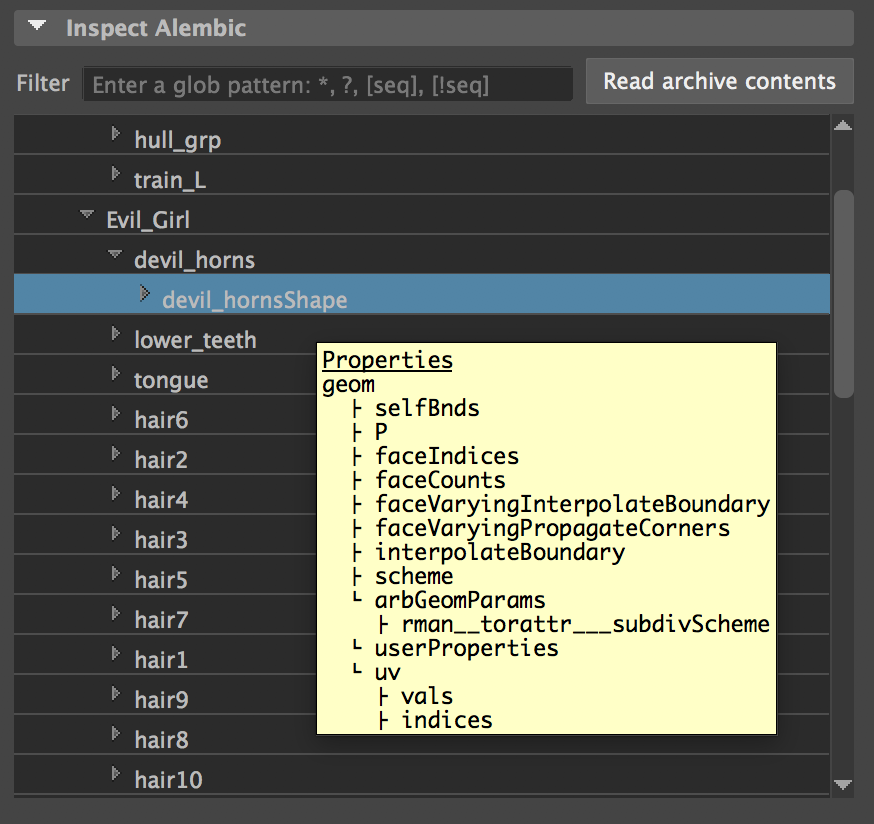
- Node list
- A hierarchical view of the archive's contents.
- Each node will display its properties as an annotation. This is useful to check if your archive contains the properties you need.
- Node list
Shader Assignments
A gpuCache is a single shape in Maya, so it is impossible to assign materials as usual. But we can use RenderMan's Dynamic Rules Editor to assign materials at render-time, with the following limitations:
- IPR material edits don't work when using Dynamic Rules
- Any rule change will require an IPR restart to take effect.
- These limitations will be lifted in an upcoming release.
In-scene shading
Open the Dynamic Rules Editor (the double angle bracket icon) and let's see how it works.

Dynamic rules are written using glob expressions, similar to a shell. See the Dynamic Rules CookBook below for more info.
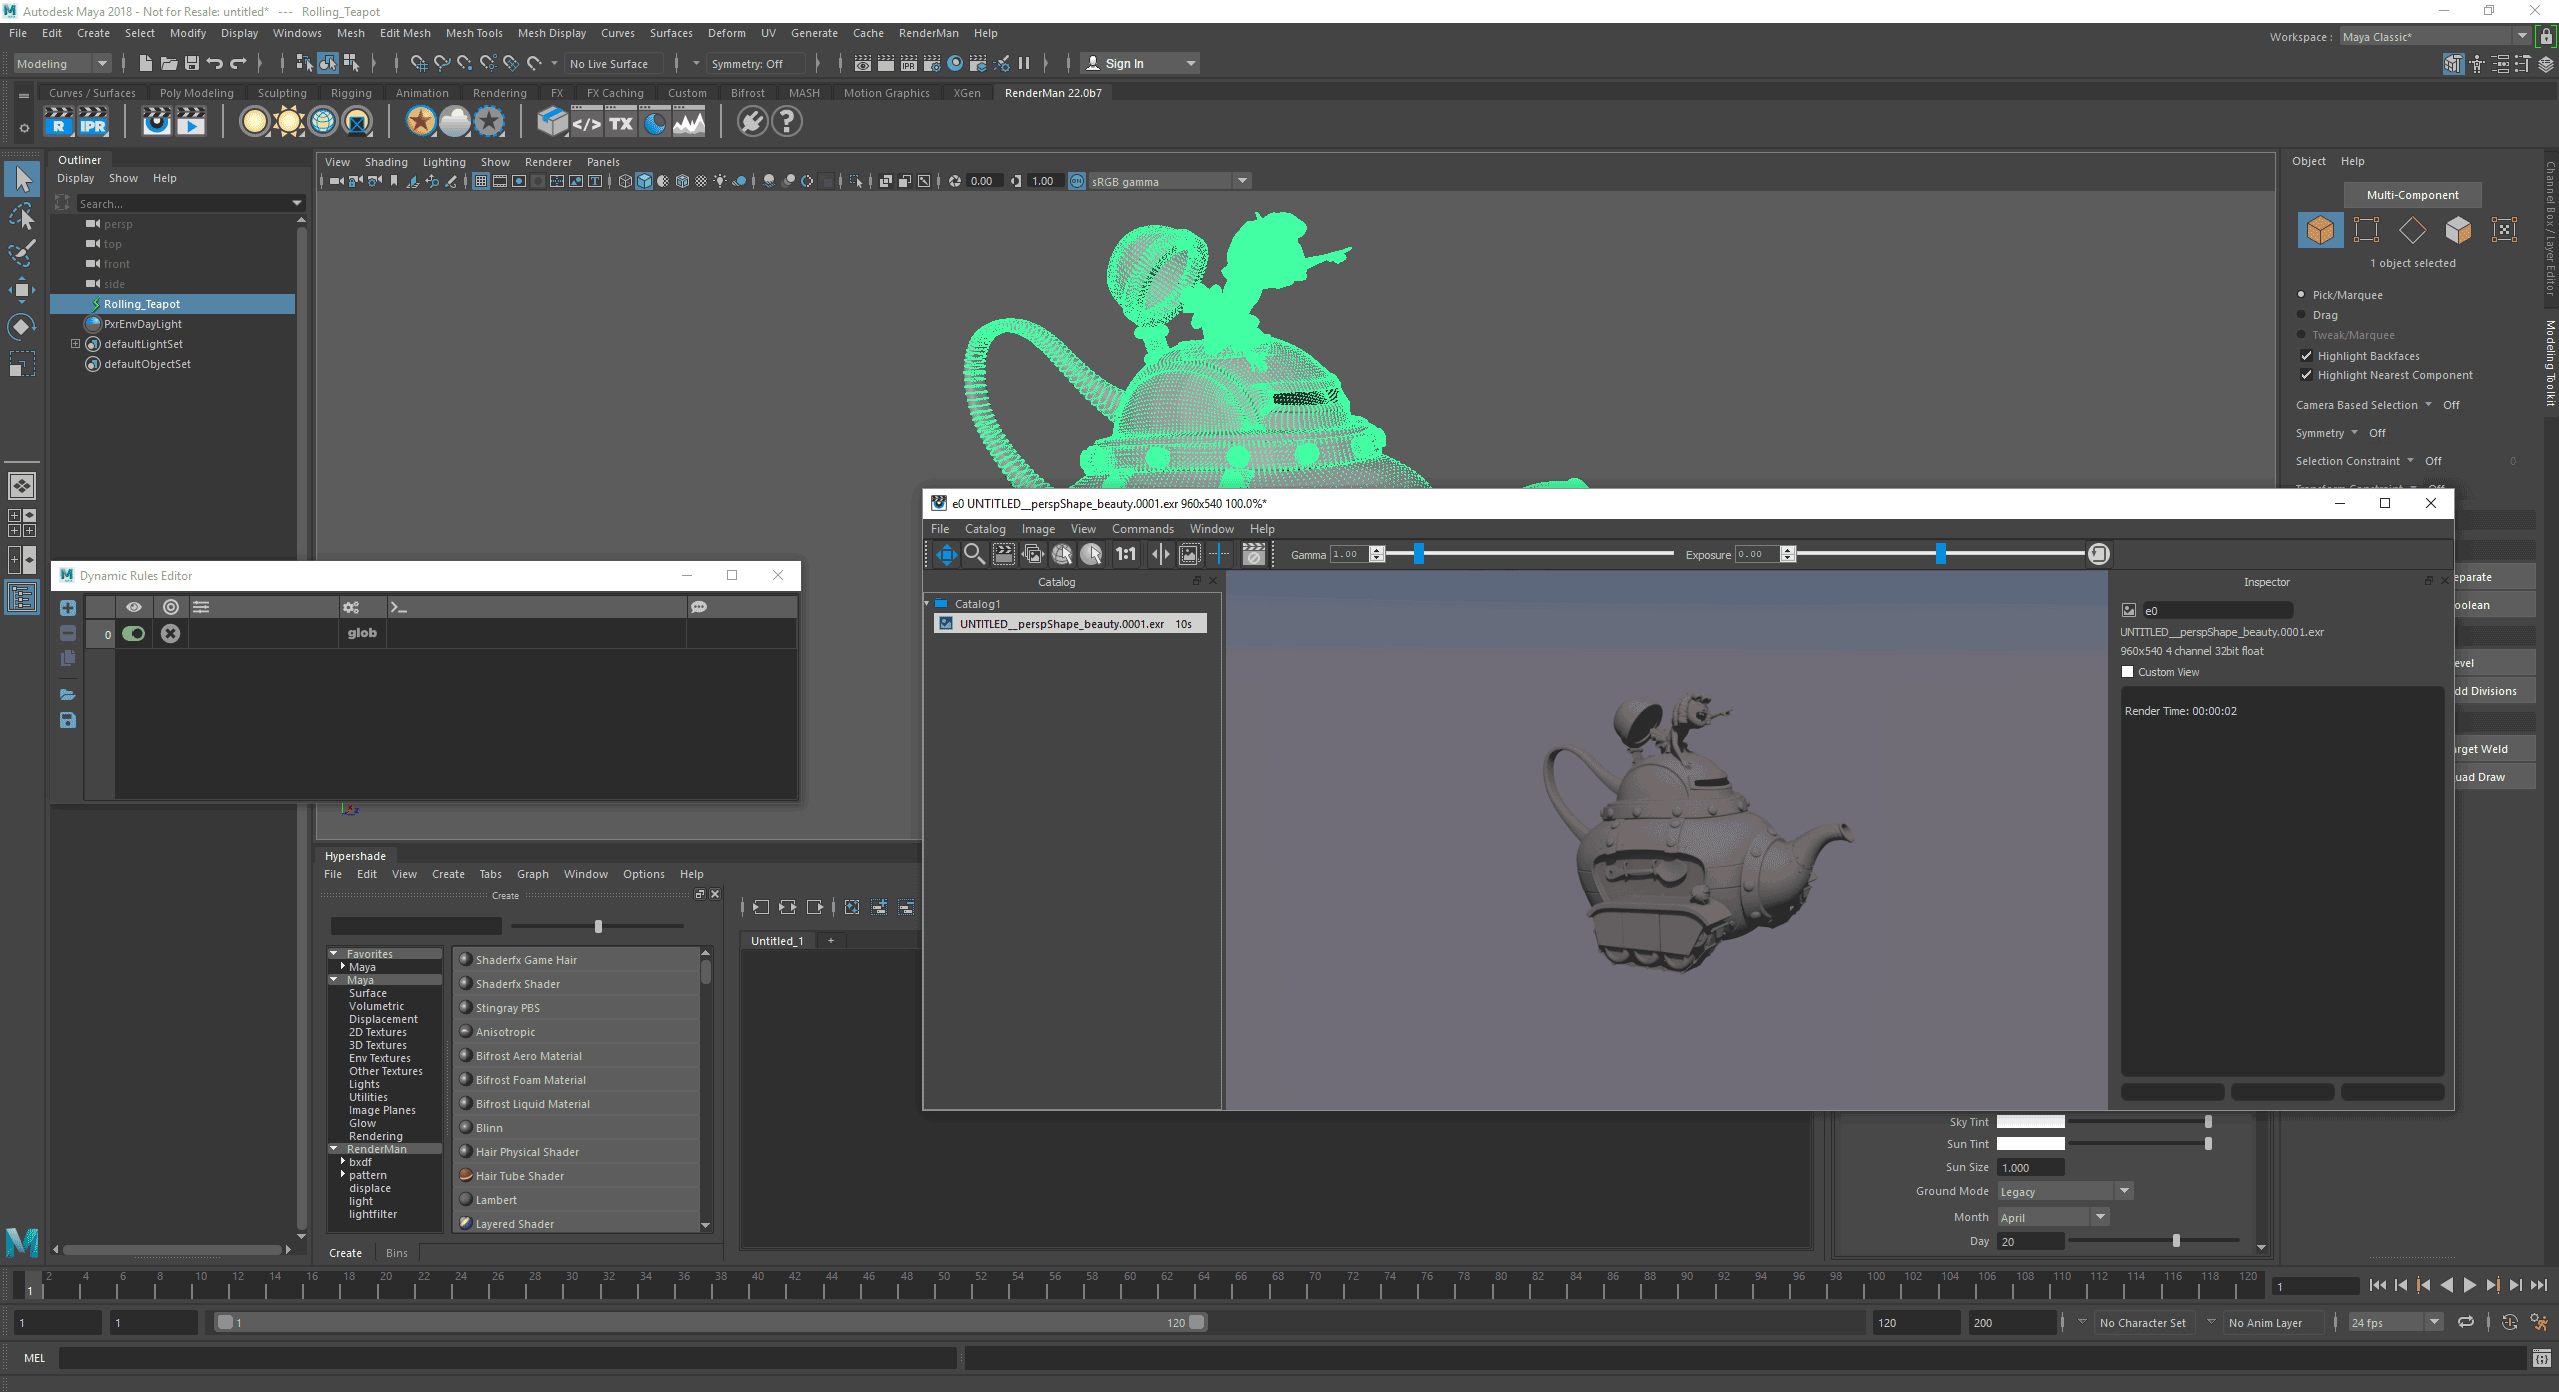
This is our starting point: the gpuCache node renders with the default material:
Assign a base material to part of an archive
We have prepared a number of basic materials to assign. Let's start by assigning the hull_srf material to the whole teapot and write our first rule:
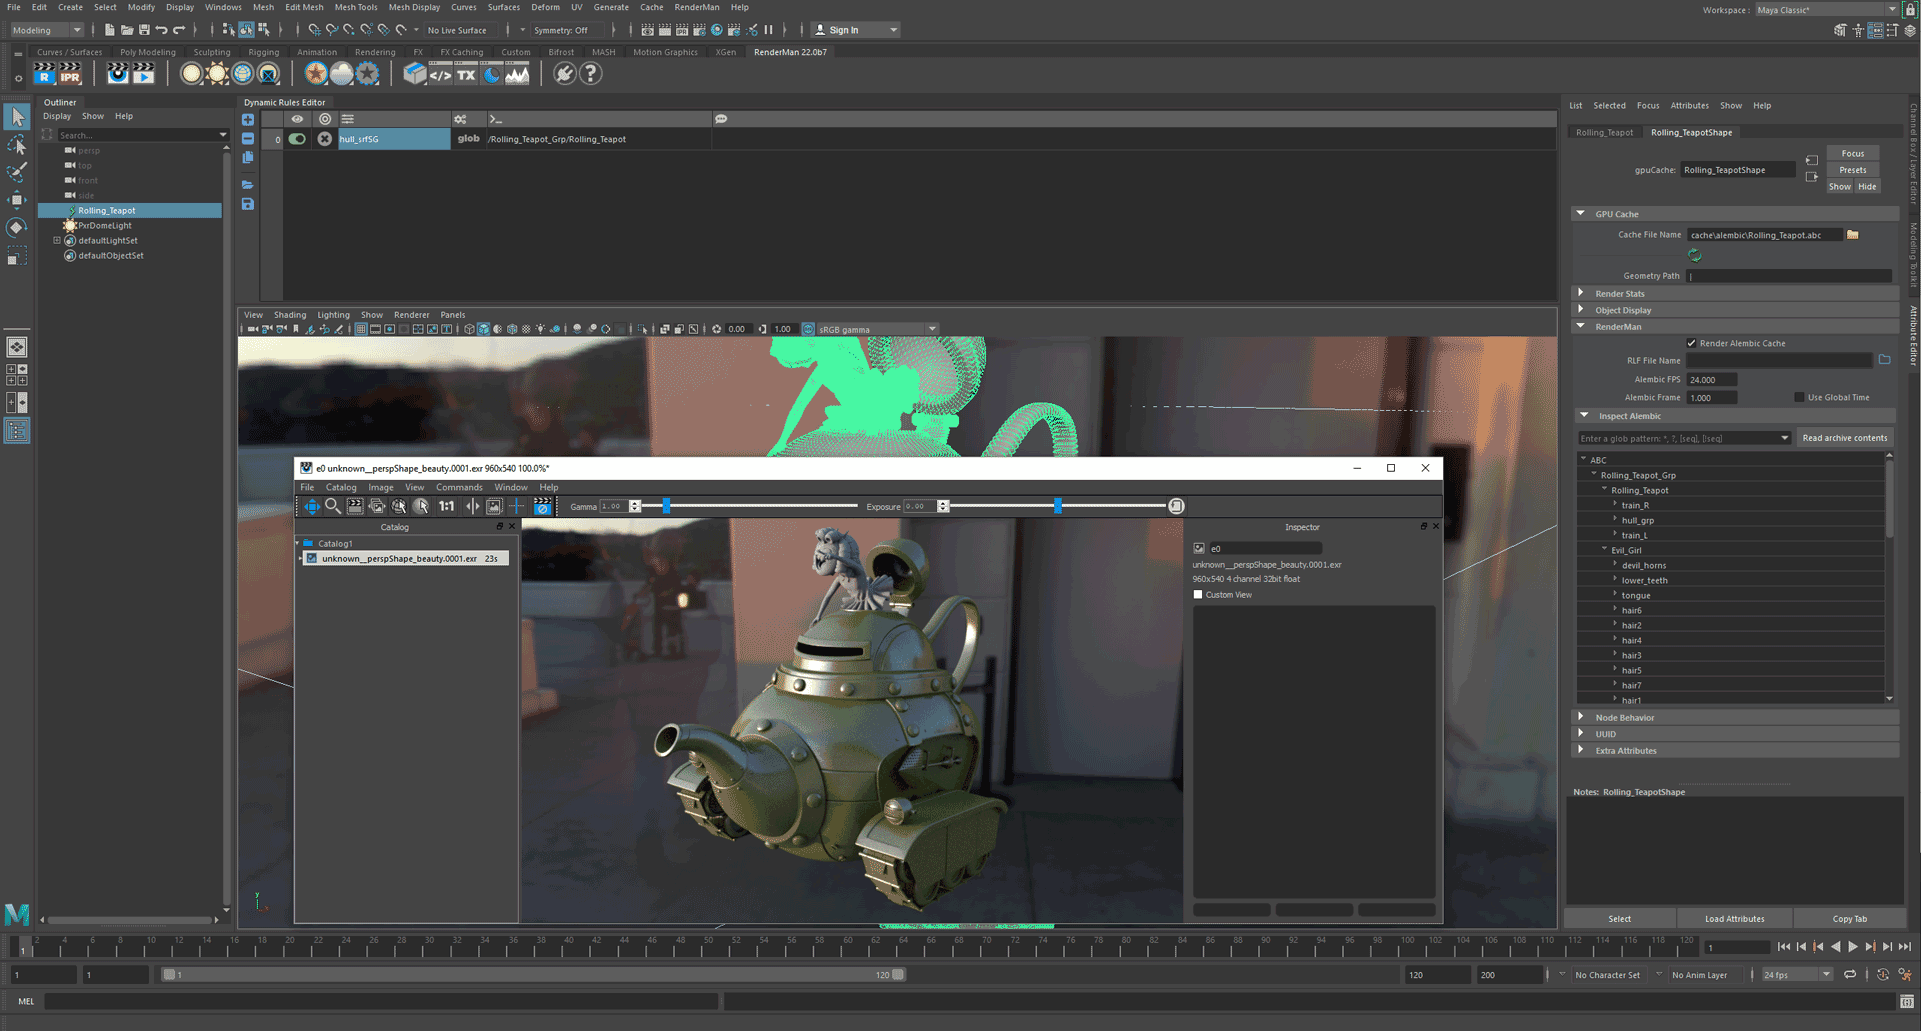
- In the node list, select the top node of the hierarchy we want to assign to: Rolling_Teapot.
- Click Add Rule (the blue + icon) to create a new rule or use the initial empty rule
- Double-click the expression field to put it in edit mode. This field is the >_ column.
- Go to the Alembic node list and middle-mouse-drag the selected node into the expression field.
- Please note that you must select an item in the list before drag-and-dropping. (Your windows must also be docked and not floating on the Windows OS is the switching focus will not allow you to middle mouse drag.)
Edit the expression from this /Rolling_Teapot_Grp/Rolling_Teapot to the below:
/**/Rolling_Teapot
- ** means match any depth of nesting (including none) whereas * will only match characters between the / separator
- Press enter to validate.
- Right-click the Payload field (with the icon of sliders) and select
hull_srfSG. - Launch the IPR to test.
Match sub-strings in a hierarchy
Now we will shade the rivets on the teapot. We will need a more complicated expression.
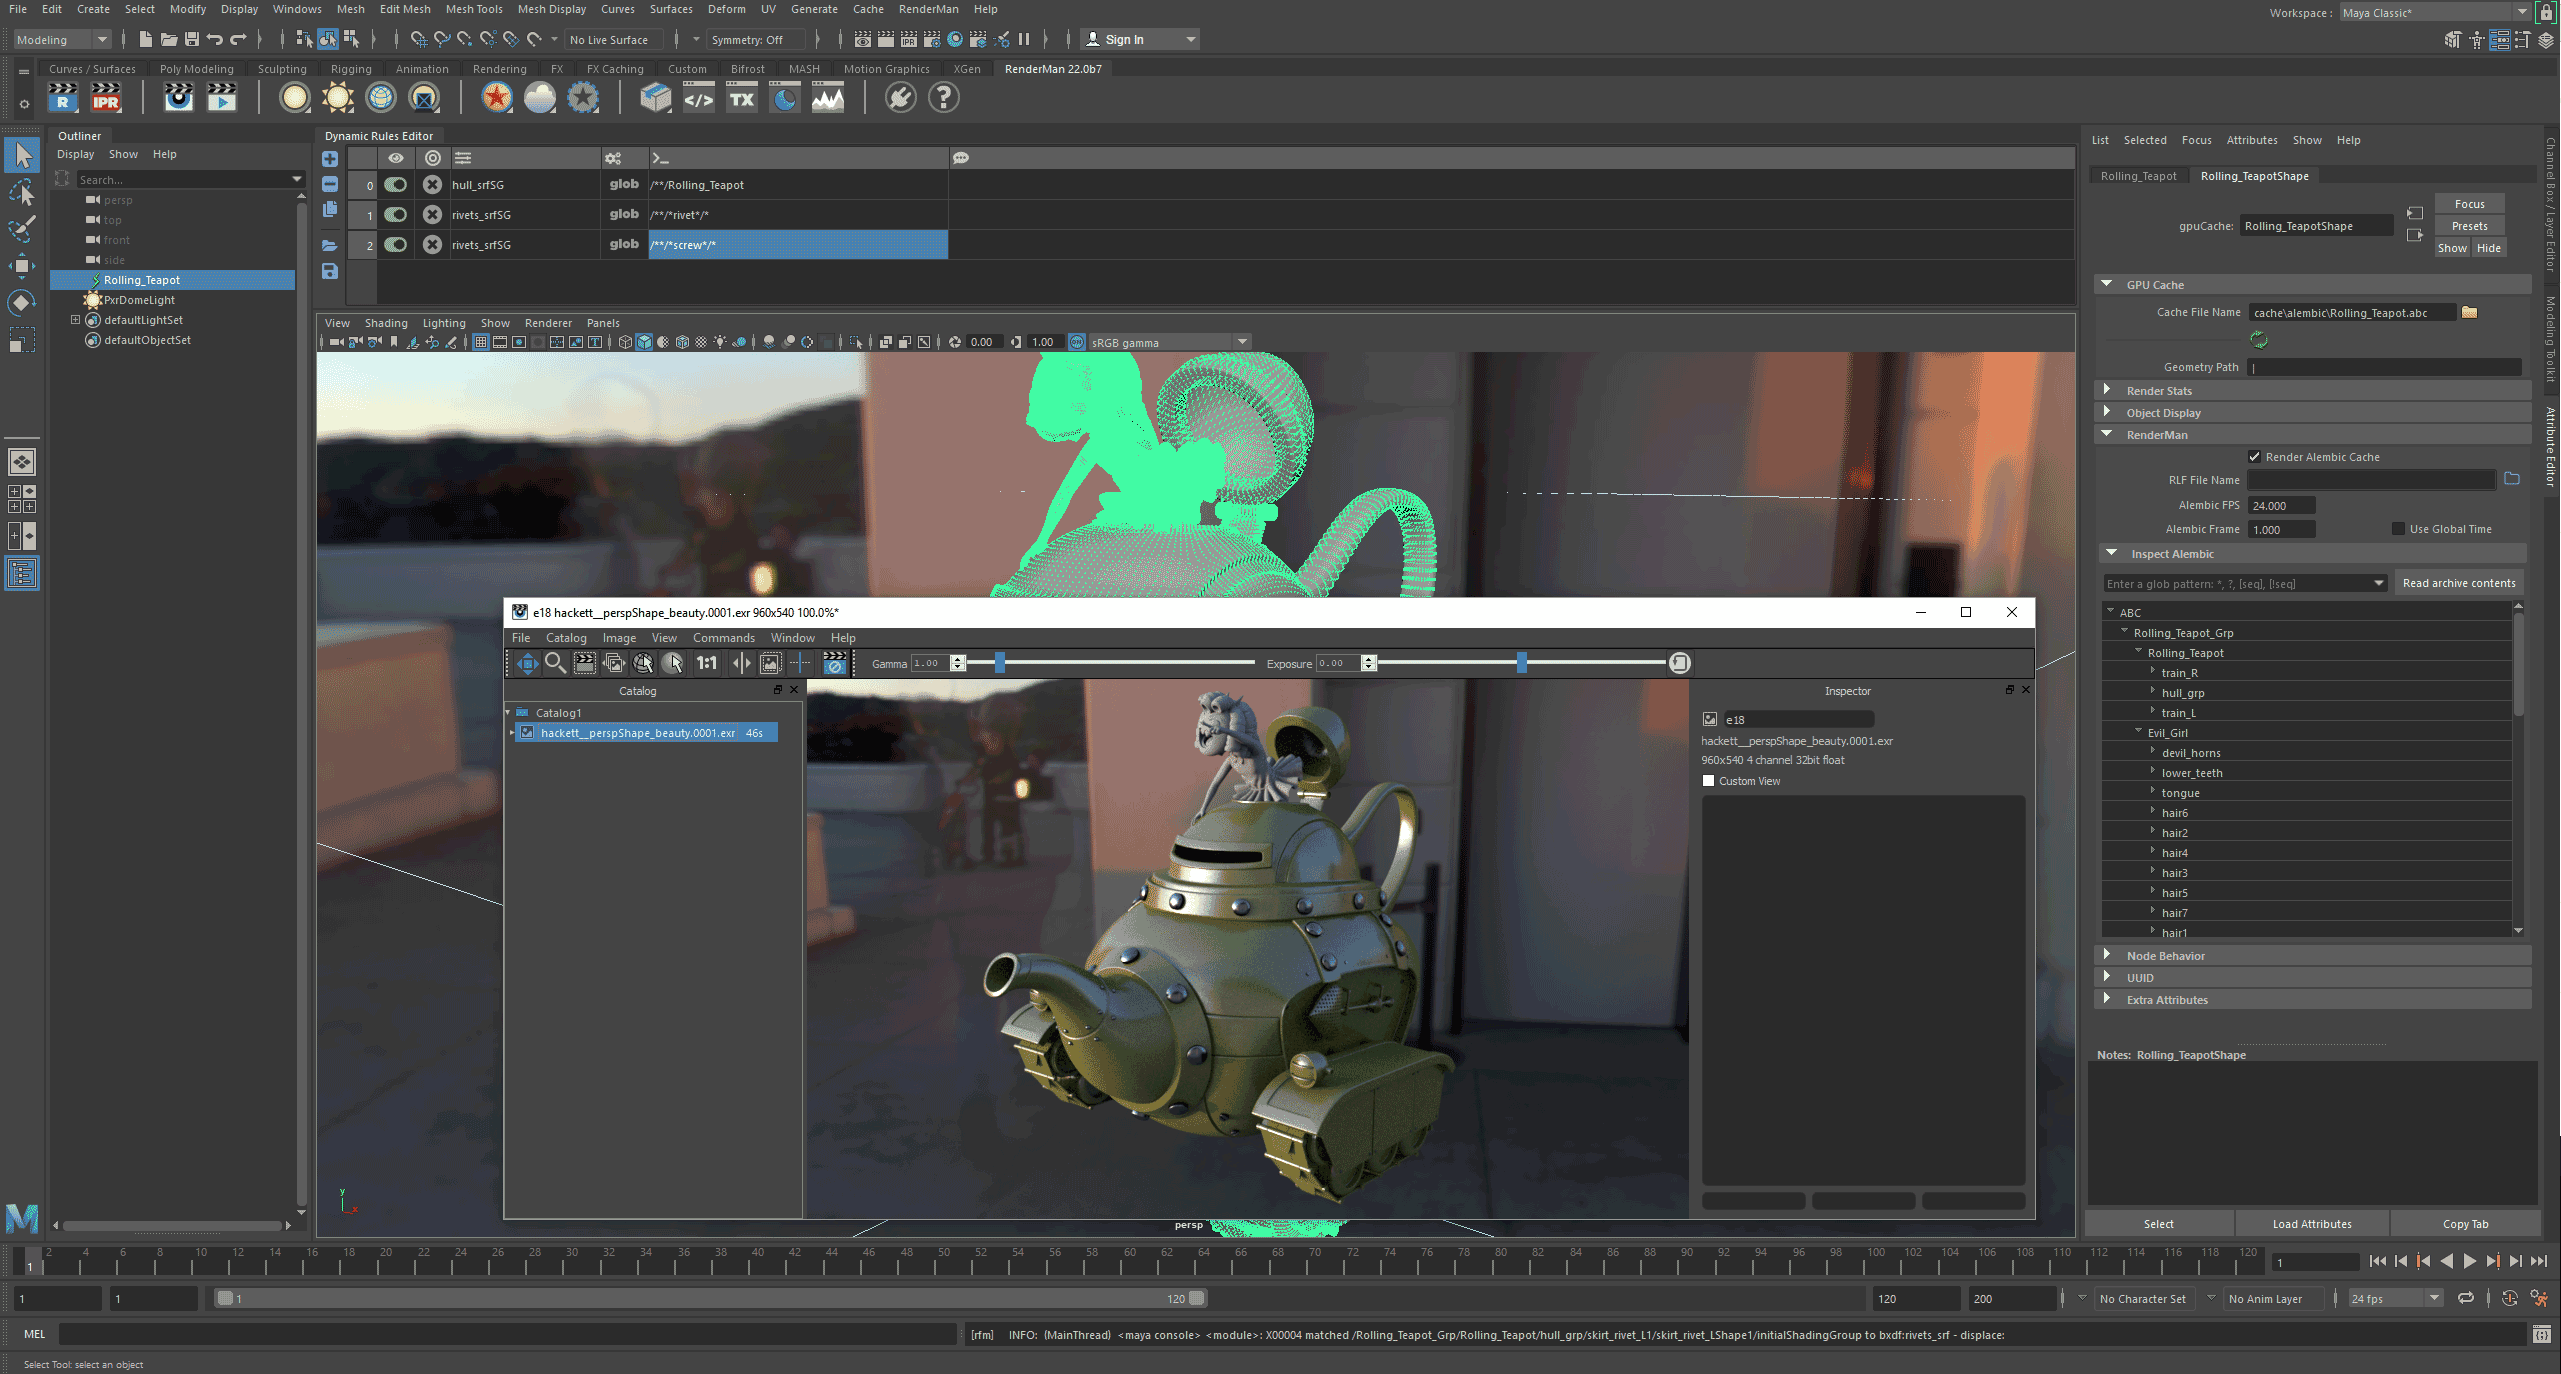
- Duplicate the first rule
- Right-click on the rule number (0 in our case) and select Duplicate Rules (the copy icon just below the "-" minus icon).
Extend the previous expression to match any object containing the word "rivet".
/**/*rivet*/*
- The second ** means the rivet object can be nested at any level under the teapot
- * rivet * matches if rivet appears in node name. "rivet", "Arivet" and "Brivet2" would all match.
On that model, there are also screws that could use the same material. Copy the expression to match those too.
/**/*screw*/*
Rule execution order
Let's assign a material to the teapot's rings.
We use the same workflow: duplicate the rule, replace "rivet" with "ring" and set the Payload to ring_srf. But it doesn't quite work because, as you can see in the node list, some shapes have both "rivet" and "ring" in their name and rivets on the rings are now using the wrong material.
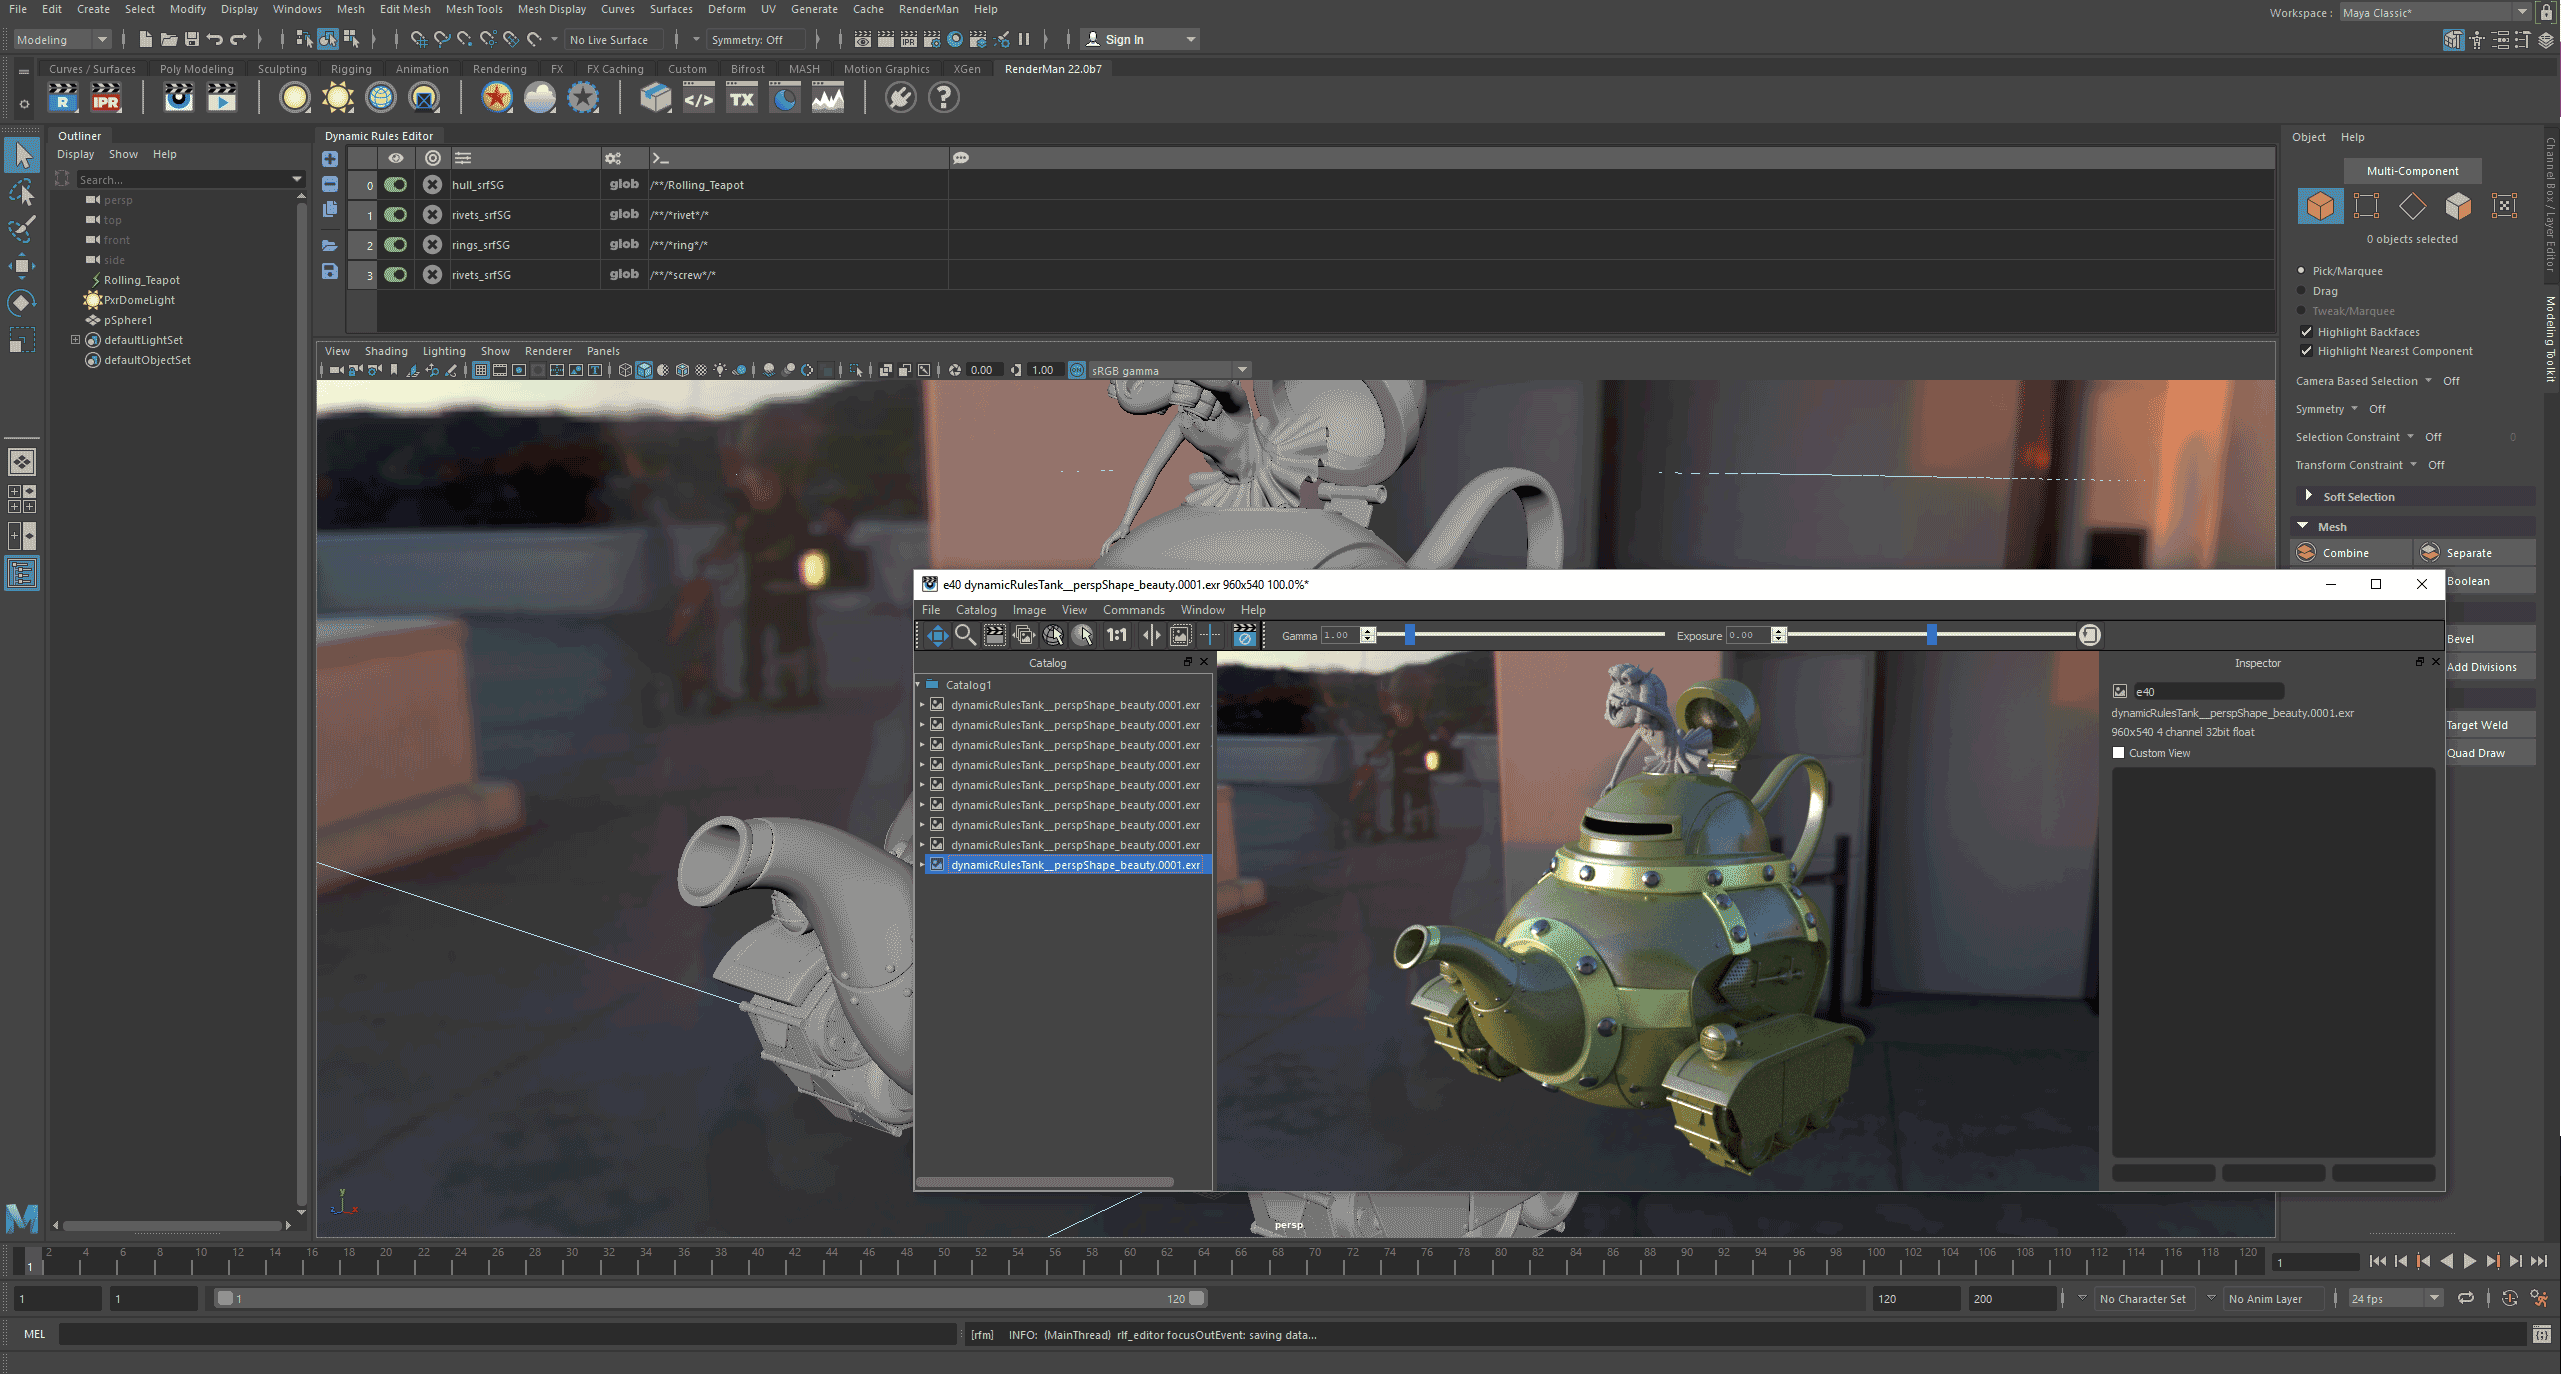
We can change the rule execution order if the result is incorrect (maybe your order is different than mine in the image): if we match rivet first, the matching engine will stop when it finds a match and then only shapes only containing "ring" will match the second rule.
- Position the cursor over the rule's number and left-button-drag rule 1 (rivets) above rule 0 (ring).
- Render to check.
Of course, we have only scratched the surface and we recommend that you read up on Regular Expressions for more sophisticated use.
If you're done shading, select the disk/save RLF (RenderMan Look File) icon. This can be used in the import of the asset to assign the shading nodes each time. This can then be part of your asset publishing scheme.
Self-contained Asset Shading
If you want to import fully shaded assets, there are 2 options:
- When RfM finds a RLF file in the same location and with the same name as the archive, it will automatically apply it.
- This is not always very flexible in a pipeline, but may be useful for archiving assets.
- If the RLF File Name field of a gpuCache node contains a path to a RLF file, RfM will apply it to that gpuCache node.
- It becomes easy to script look assignment and updating.
| Note that you can still override automatic RLF assignments in the scene with the Dynamic Rule Editor ! |
Notes about RLF export
When you reference multiple RFL files in a scene, you must make sure that all shading nodes have unique names. If you define the same name multiple times, the renderer will use the first in line and you will get unexpected results.
You can export a RLF file by clicking the ![]() icon in the RLF Editor, or write a simple Python script that will save the scene's current RLF data to a file:
icon in the RLF Editor, or write a simple Python script that will save the scene's current RLF data to a file:
import rfm2.api.nodes as apinodes


def save_scene_rlf(filepath):
    """Load the rlf data from the rmanGlobals node and save it to a file.

    Arguments:
        filepath {str} -- Full path to the final RLF file
    """
    rg = apinodes.rman_globals()
    if rg:
        json_str = mc.getAttr('%s.rlfData' % rg)
        try:
            with open(filepath, 'w') as fhdl:
                fhdl.write(data)
        except Exception, err:
            print 'Failed to write %s: %s' % (filepath, err)
    else:
print 'Warning: Could not find rmanGlobals node in the scene !' |
Dynamic Rules CookBook
Imagine we have a gpuCache node named Rolling_Teapot...
Everything in the scope, i.e. the Maya scene:
/**/* |
All nodes in the gpuCache node:
/**/Rolling_Teapot |
All nodes of the gpuCache with "rivet" in their name:
/**/*rivet*/* |
All shapes of the gpuCache under a transform starting with "ring_":
/**/ring_*/* |
