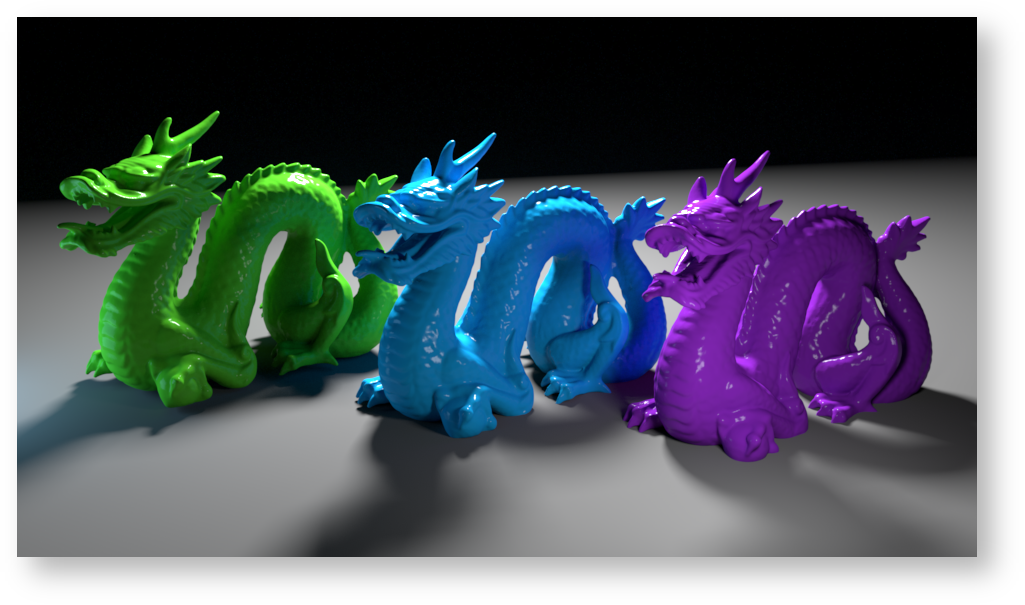
If you have geometry in your scene that is reused in multiple places, instancing provides you with the ability to reduce the memory footprint of your renders if you do a little bit of extra work. For example, if your scene is composed of multiple buildings, each rotated a bit differently, you can use instancing to only load one copy into memory.
RenderMan for Katana supports multiple approaches to instancing. The first is a very deliberate approach where you set up an object master and then explicitly instance it. The second is where you give all of your instances the same "instance.ID" RenderMan for Katana will automatically use the first as the master, and then will create instances for the others. The second approach is a bit simpler in that it only depends on naming instead of having to know scene graph locations. This makes it easier to instance objects across shots, or to instance them irrespective of where they end up in the hierarchy.
For a more in-depth discussion about instancing, please read the Instancing in RenderMan documentation. It provides some great background information as well as some tips you should know about if you are instancing subdivision surfaces.
Below are two examples for how to set up your Node Graph to produce instancing. It shows that you can override certain attributes on each instance – in this case, the material – to give each instanced object a different look.

In this example, the green and the purple dragons are instances of the blue dragon. The materials have been overridden at the instance level. If you don't have a copy of the dragon, you can use any geometry you like. Just change the path to the Alembic_In node.
The file has three different approaches to instancing that you are likely to see in production.
You may find that your scene is taking a lot of memory, and you think that because your scene has lots of repeated geometry, that you may be able to take advantage of instancing. In this case, you go through the scene and manually set up the instancing. The HierarchyCopy node in the example represents some arbitrary set of complex operations that got your Scene Graph into the state that it is in. The best that you will want to do is instance large chunks of geometry and set up Transform3D nodes to move the instances in to place.
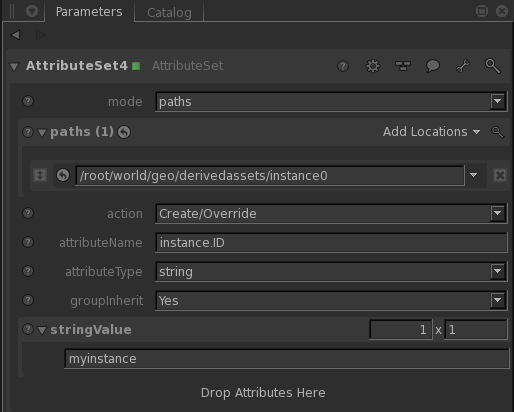
This approach uses the instance.ID attribute to tell RenderMan for Katana that each location in the Scene Graph that shares the name used within the instance.ID attribute should be instances of one another.
The section below explains how to use the instance.ID attribute to create instances.
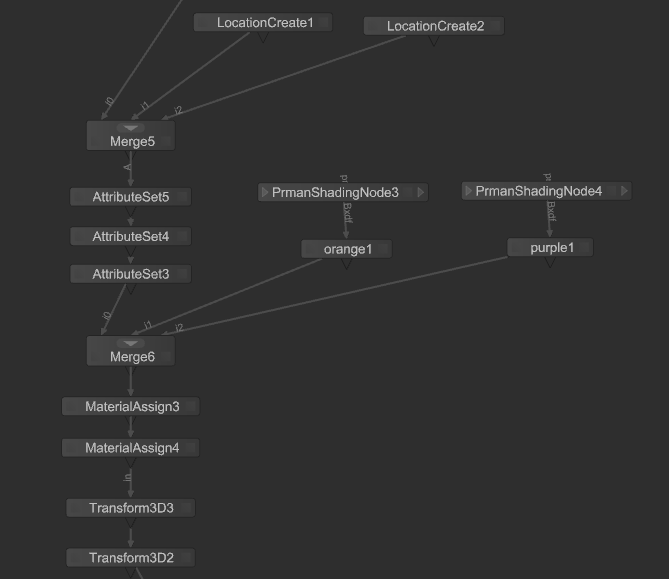
This approach uses the same instance.ID approach that the above method uses. However, if you are creating the geometry import yourself, you will save lots of processing time within Katana if you create your instances up-front. The LocationCreate nodes show you what to do if you want to instance geometry as it is brought in to Katana.
There are three steps needed to get this approach to instancing working.
Once you have created your instances, you can then override the material if you so desired using the standard Katana mechanisms for applying a material to a Scene Graph location.
Below I have taken a screen snapshot of your your Node Grpah should look, as well as how your AttributeSet nodes should look.
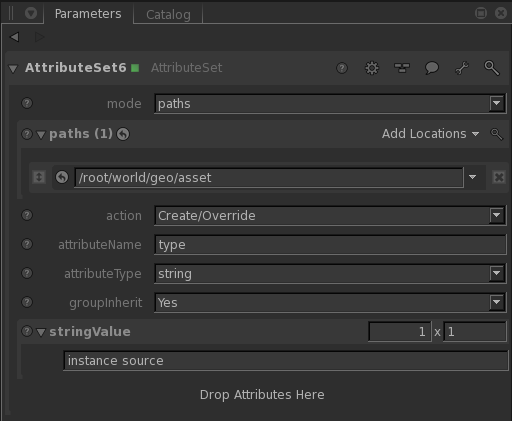
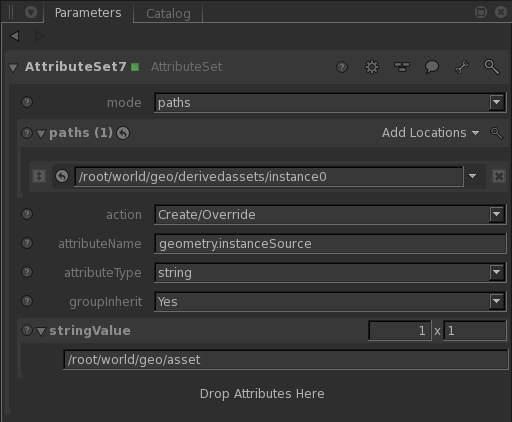
The last approach in the file is the one where specific instance source/object masters are called out via their Scene Graph locations and are then referenced in to their instance locations. This approach is good if you have several different kinds of instances you need to create, but don't want to worry about naming collisions.
The steps to creating instances using this approach are as follows.
Once you have created your instances, you can then override the material if you so desired using the standard Katana mechanisms for applying a material to a Scene Graph location.
Here I have taken a screen snapshot of how your AttributeSet nodes should look.
Shading overrides can be accomplished in multiple ways. In the example file, a simple approach is taken where a completely new Bxdf is assigned to each instance. Fancier ways to vary the shading on each instance are possible with RenderMan for Katana. One such approach is to create a unique "user" attribute per instance. Within your master material, you would create a PxrAttribute pattern that reads the user attribute, and then use the output to drive one of the parameters on the Bxdf.
Instancing in the Katana User Guide. Open it from the Help menu within Katana.