Contents
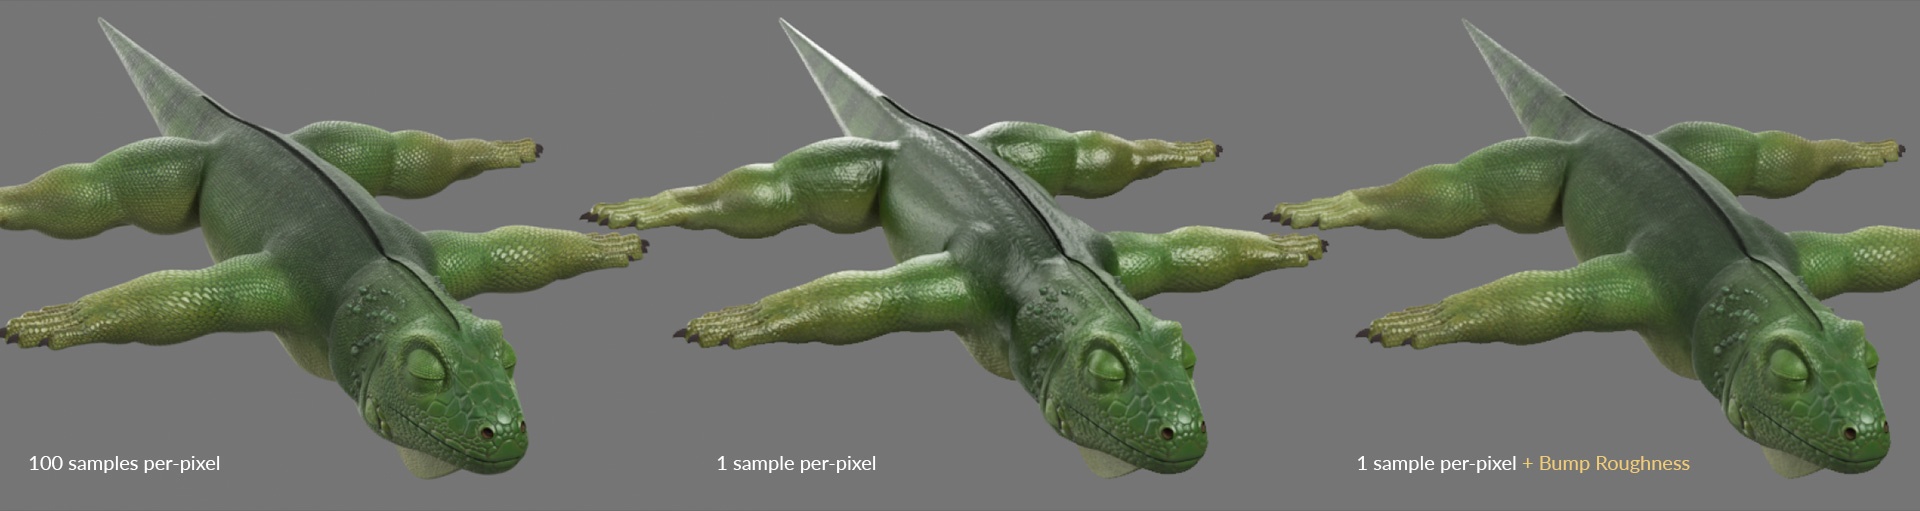
Bump Roughness was created for efficiently sampling micro details. With this pattern, RenderMan automatically switches from a bump map to a roughness value depending on the size of a feature in the camera, effectively improving your render times by lowering the sampling rates needed to render such details.

© Disney/ Pixar
One such example is Louise Nash (shaded by Yeon Kang) from Cars 3. Here you can see extensive wear of the clear coat on the paint job, which creates micro-scratches and breaks up the specular in interesting ways, also driving the anisotropy in ways which more accurately reflect the intended look-development.
© Disney/ Pixar
A crucial feature of Bump Roughness is to see micro details when objects are far from the camera. In the example above, you can see how we can get very close to the intended look-development with only 1 sample, instead of having to fire hundreds of rays to visualize the intended level of detail in the textures.
In the example above we can see how we can drive roughness, anisotropy, and bump with a single texture. When zooming 4X we can appreciate how Bump Roughness maintains detail where bump generally gets lost due to filtering.
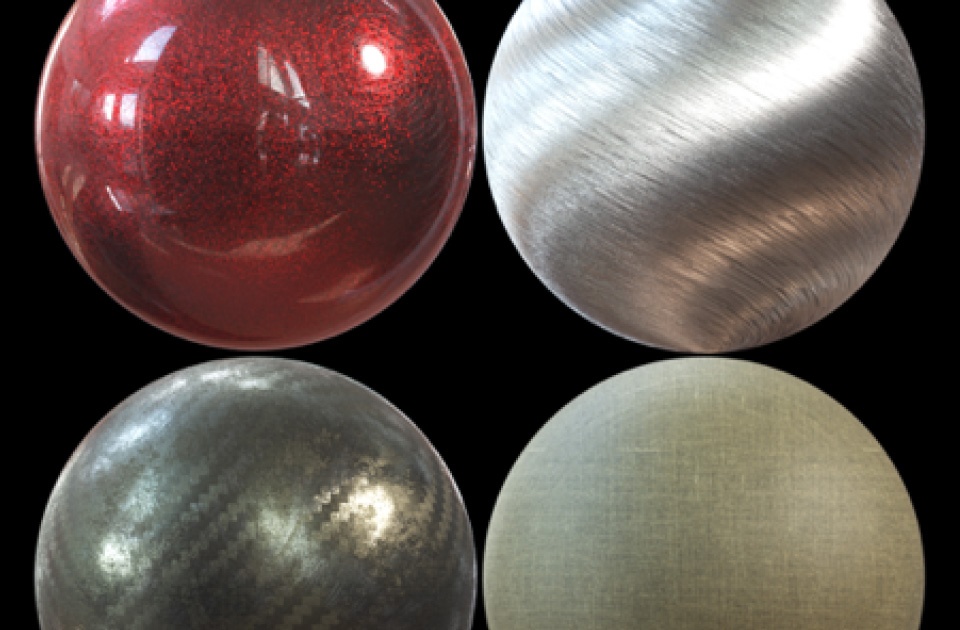
There are many other types of materials that benefit from the added detail that Bump Roughness maps bring, such as carbon fibre, metals, plastics, and fabrics.
© Disney/ Pixar
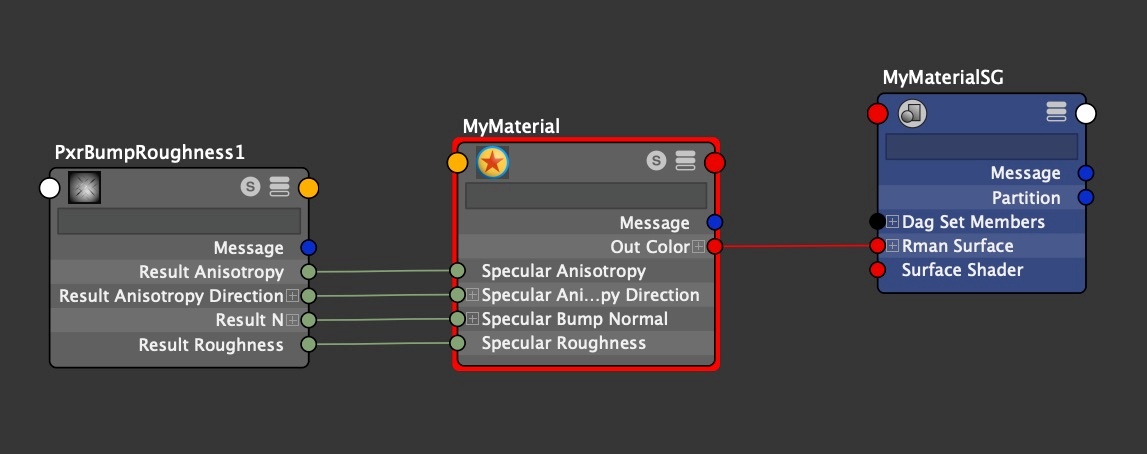
Network Connections
For Bump Roughness to work appropriately, it needs to be connected to the following material inputs:
- Roughness
- Bump Normal
- Anisotropy
- Anisotropy Direction
Input Parameters
b2r Texture
This expects a b2r texture generated by txmake. If you are using RFM, RFH or RFB, the Texture Manager can take care of that for you.
See the txmake documentation for details.
Texture Type
Map type to be used as your Bump Roughness Map
TxMake Icon
Show settings in Texture Manager
Manifold
Connect a manifold node here to control the position, rotation and tiling of your Bump Roughness map
Multi Manifold
Connect a PxrHexTileManifold or PxrRoundCube Manifold here.
Bump Roughness
Base Roughness
This is the roughness of the base surface when fully zoomed into the detail.
Texture Roughness
Set the texture roughness to be provided by the input textures when fully zoomed out from the detail. It is combined with the base roughness. The default of -1.0 lets the texture provide its natural roughness.
Gain
This is a multiplier to the aggregate roughness
Bump Normal Gain
multiplier to the normal map magnitude
Anisotropy Gain
This is a multiplier to the aggregate anisotropy
Advanced
Adjust Amount
Amount to adjust the normals when they are facing away from the camera
Surface Mix
The amount to mix the resulting normals with the surface normals
Blur
Amount of blur to apply to texture lookup.
Filter
Which filter to use. (unfiltered/closest not advisable for displacement.)
Filter Scale
Multiplies the size of the texture filter, less than one for sharper textures.