Contents
In much of visual effects and animation work, scenes are primarily lit through a High Dynamic Range Image or HDRI. This is usually captured on-set and later used for replicating that lighting in your scene. In many ways, this gets your lighting 80% (or more) of the way to finished. All that's left for the artist to do is further polish the lighting for a great final shot!
When we talk about HDRI lighting, we mean full floating point (or half-float) images with light values well above 1.0 to produce lighting. Using low dynamic range or 8-bit images like JPEGs might produce acceptable reflections but the lighting will be dull and mostly flat. To avoid this we suggest EXR, HDR, or TIFF floating point images captured with multiple exposures. Understand that light sources (even man-made sources) are relatively high energy compared to their surroundings. If you find your shadows are too soft or too light in density, it's because the light sources in your HDRI are not sufficiently powerful enough. This can be solved by using an image editor to selectively increase the exposure of these light sources or mapping these light sources to area lights and altering their Exposure or Intensity.
This light simulates environment lighting. It works via Image Base lighting (IBL) to illuminate sets and characters with an environment map. Note that scaling and translation for this light will be ignored as it's considered nearly infinite or at least very far away. Only rotation matters so you can position your lighting accordingly. You may also have more than one in a scene for flexible lighting and linking to objects and portal lights.
To confine the illumination to a specific area for optimization purposes, you can use the PxrPortalLight with a PxrDomeLight to focus sampling for things like interiors with windows and skylights.
You will see mention of "non-physical" controls. These controls are designed to help artists make art-directed imagery by ignoring certain laws of physics we usually simulate.
Avoid skewing the shape of the dome by scaling non-uniformly. Your render may never converge or take much longer.
Parameters
Basic
Intensity
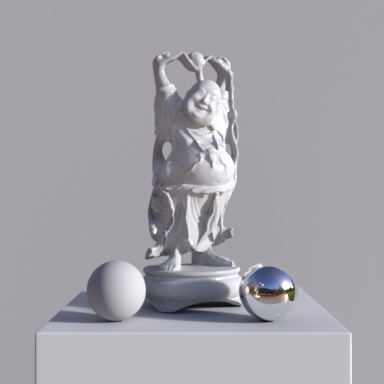
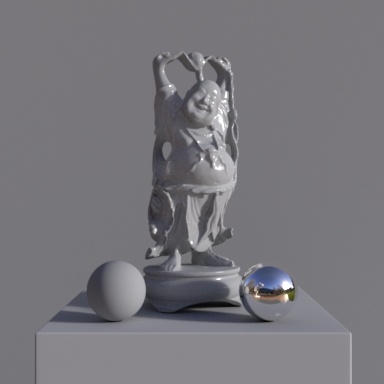
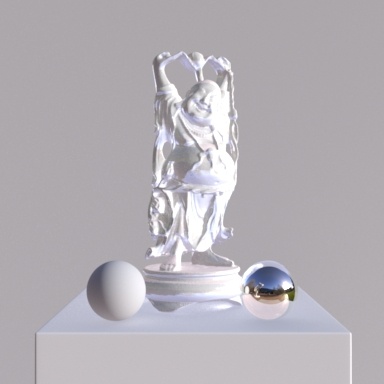
Scales the contribution of this light linearly. This high dynamic range image (HDRI) has been edited where the sun is naturally bright and produces nice dark shadows and bright highlights. Notice that intensity 2.0 is quite bright in the sun! Other HDRIs with less range may benefit from values above 1.0.
Exposure
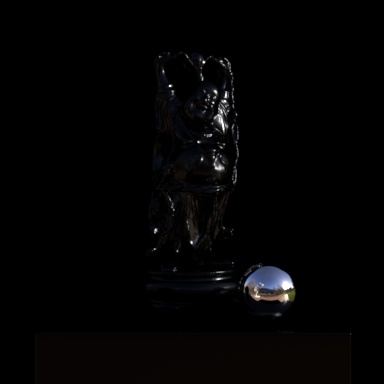
Specifies the exposure of the area light as a power of 2. Increasing the exposure by 1 will double the energy emitted by the light source. A value of 0 produces an intensity of 1 at the source, -1 produces 0.5. Note this looks just like the above images. You may wonder why you might use Exposure, and the answer is that real world lighting has high energies and typical exposures are low values while you may have to type a really large number for equivalent Intensity. This is also comfortable to artists familiar with photographic measurements.
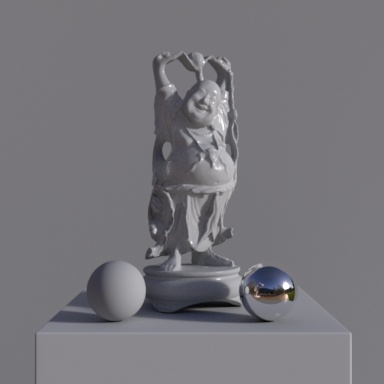
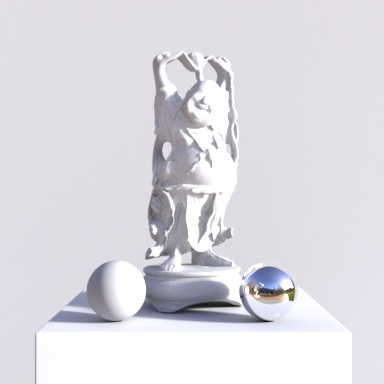
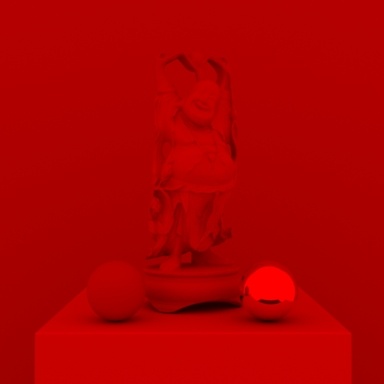
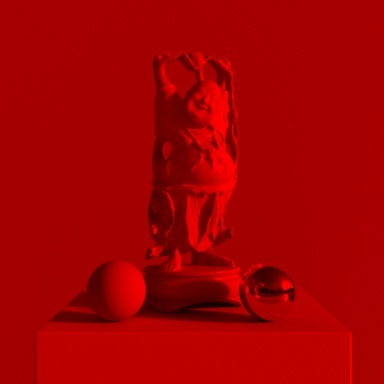
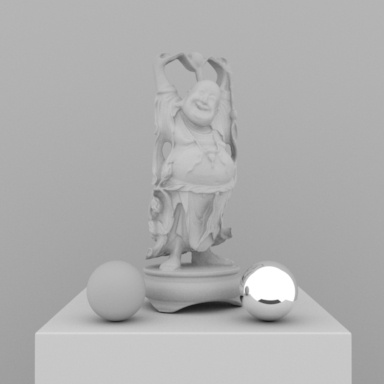
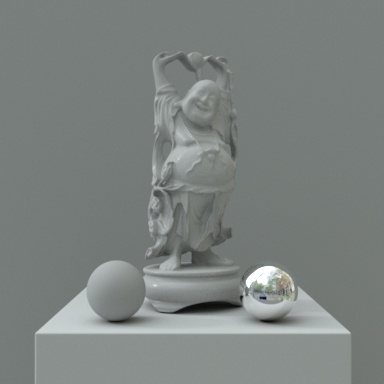
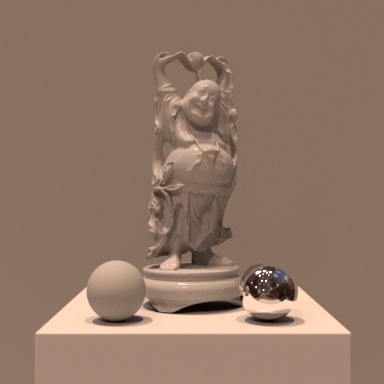
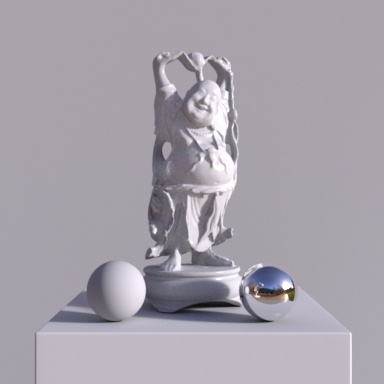
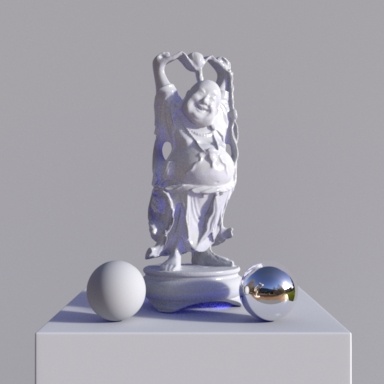
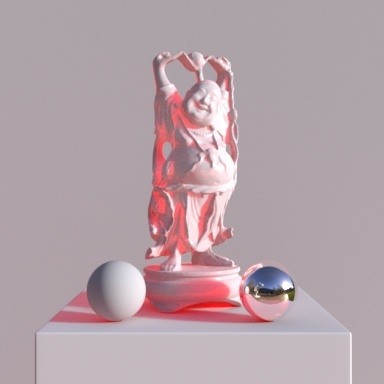
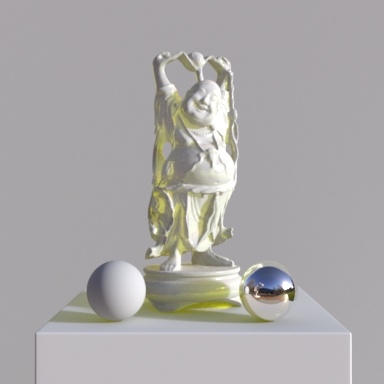
Color
The color of the emitted light. If a color map is specified, this tints the color map. Below we have no map (defaults to white), red, and red tinting an HDRI. Note that tinting with a pure, saturated color may overpower textures as shown here.
Color Map
Filename of the dome texture. Below are examples of different HDRIs used as the Color Map.
Map Gamma
Gamma-correct the texture. Each channel (RGB) can be adjusted independently.
Enable Temperature
Turns color temperature on or off. Below we use the same Luxo/Pixar HDRI.
Color Temperature
The effect will be less pronounced on fully saturated mono-chromatic lights.Defaults to 6500K, which should be very close to white on most monitors (D65 illuminant used by sRGB and Rec 709).
Primary Visibility
The light is directly visible to the camera by default. Turning this off makes it invisible to the camera.
Refine
The below options are non-physical controls used to art direct your images. For example: You could use a light with Diffuse Amount 0.0 to act purely as a source of highlights for your scene objects.
Specular Amount
Amount of specular light that is emitted. This is a non-physical control. You could use a light with Specular Amount 0.0 to act purely as a source of diffuse light for your scene objects and avoid adding highlights.
Diffuse Amount
Amount of diffuse light that is emitted. This is a non-physical control. You could use a light with Diffuse Amount 0.0 to act purely as a source of highlights for your scene objects.
Shadows
All shadow parameters will be ignored if the light's Trace Light Paths is enabled in Advanced. The below options are all non-physical controls when used out of their default state. If Trace Light Paths is enabled then their physical nature is enforced.
Enable Shadows
Enable raytraced shadows.
Shadow Color
The color of the shadows cast by emitted light.
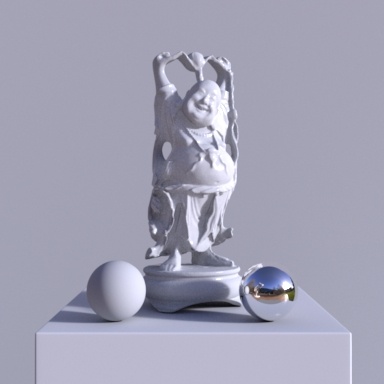
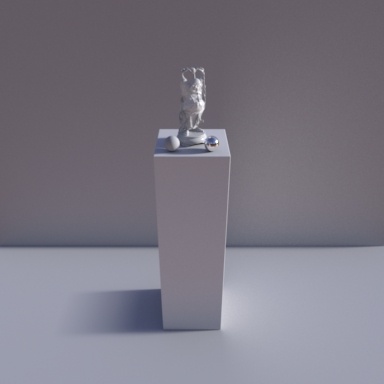
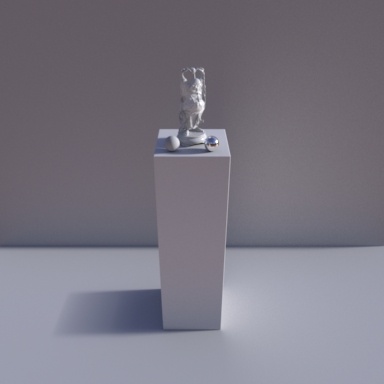
Shadow Max Distance
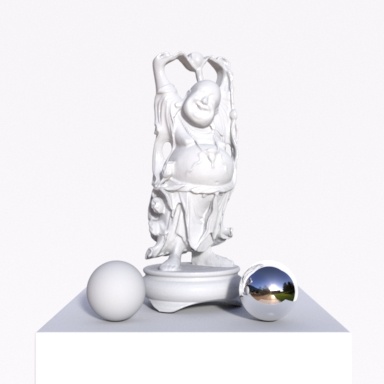
The maximum distance of the shadow starting from the position of the point being shaded. -1.0 is unset which will use the distance between the point being shaded and the point on the light. You may use this control to artificially reduce the distance shadows are cast. This may also increase render speed by not calculating shadows outside this distance. The below example uses a distance that prevents the statue from casting a shadow on the wall behind it while preserving other shadows.
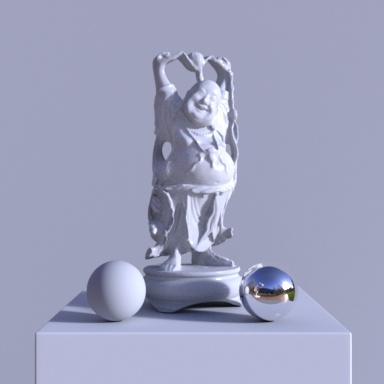
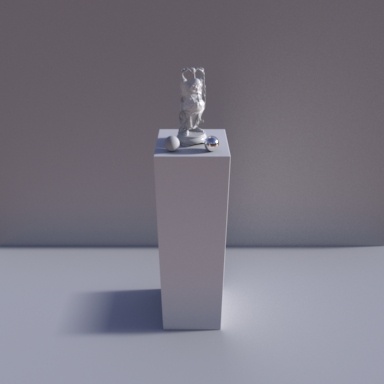
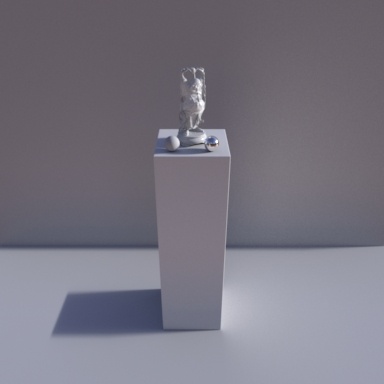
Shadow Falloff
The distance from the light at which shadow falloff begins. -1.0 turns off shadow falloff. This is used along with Shadow Max Distance to create a false fade for shadows that are reduced or cut off by the Shadow Max Distance parameter. Below is an example with both parameters being used and the falloff is increased. Note this parameter may impact performance on complex lighting setups.
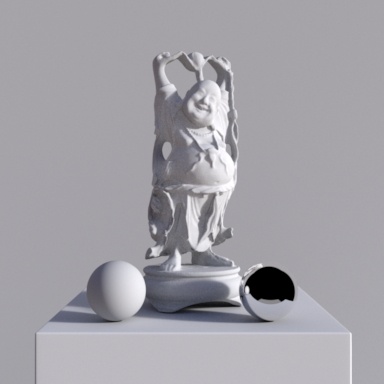
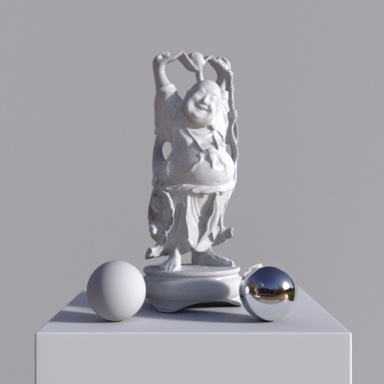
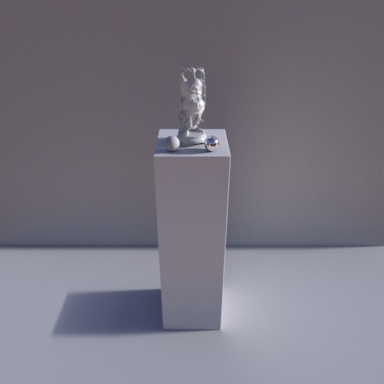
Shadow Falloff Gamma
The gamma of the shadow strength in the falloff zone. This requires the use of Shadow Max Distance and Shadow Falloff. The falloff is more obvious as the value decreases.
Trace Subset
Set of geometry to consider for traced shadow intersection. If this is not specified, all geometry are considered for traced shadow intersection.
Don't Trace Subset
Set of geometry to ignore for traced shadow intersection. If this is not specified, all geometry is used for traced shadow intersection.
Advanced
Enable light and photon tracing from this light. This value enforces a physically-based light and as a side-effect disables the above Shadows controls. Users may use this feature to selectively decide which lights emit photons when using the PxrVCM or PxrUnified Integrators.
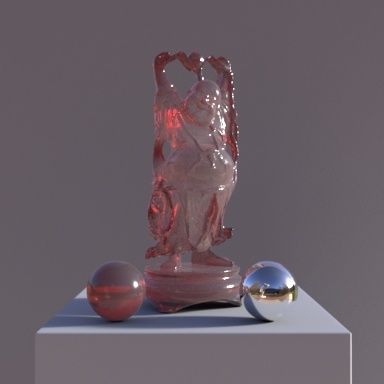
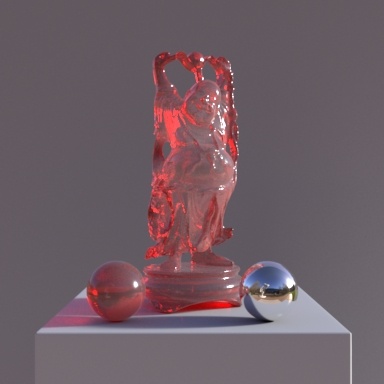
Thin Shadow
Enable thin shadow and disable refraction caustics for this light. This parameter will ignored if Trace Light Paths is enabled. This is a non-physical control that creates "fake" colored shadows for transmissive objects without needing to generate photons for caustics. Below we go from On (default) to Off (opaque shadowing). Notice we lose the colored shadows and interior colored reflection choosing Off, but we gain some render speed instead.
Visible in Refraction
Make a light visible through transmission effects like glass and windows by turning this on.
Manifold Walk
Used with the PxrUnified Integrator and enabling Enable Manifold Walk to create inexpensive caustics. Note: You must disable Thin Shadows
Manifold Walk Exclude Group
Used with the PxrUnified Integrator and enabling Enable Manifold Walk, this trace set is ignored during manifold exploration to avoid stopping or shadowing manifold exploration rays
Light Samples
Specifies an override of the number of light samples to be taken for this light source. If set to something other than zero, it will override the sampling performed by the integrator. It's recommended to leave this at the default unless you experience unsolvable noise from the light.
Light Group
Specify the light group name used for light group LPEs. This is useful to generate per-light AOVs for later adjustment in compositing.
Importance Multiplier
Rather than setting explicit Light Samples, users can change the amount of samples the light will be assigned internally by changing this value. RenderMan creates a set of samples at render time for all lights in the scene and changing this value rebalances the samples across the lights. Note that increasing this value will cause more samples to be selected from this light while reducing it for others in the scene. Lower than the default will decrease the samples while providing more to others in the scene.