Contents
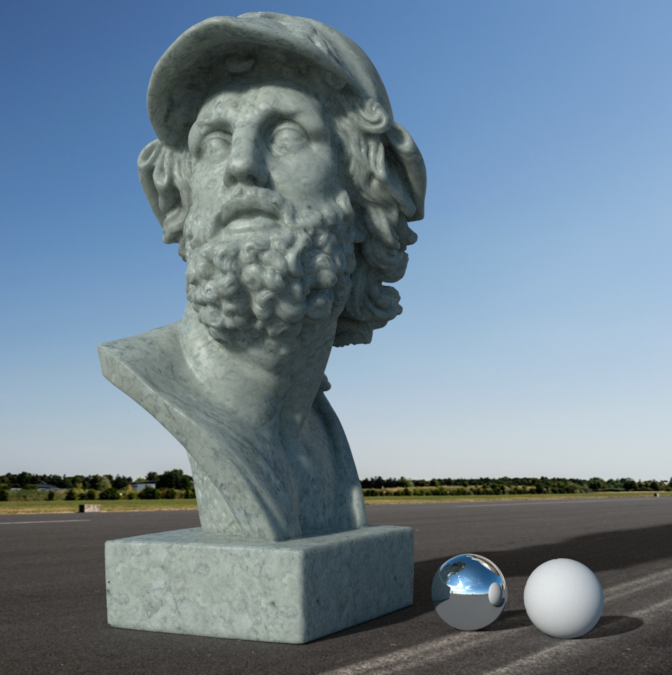
This is a projection manifold for tri-planar mapping. This technique is also sometimes called "blended cube". It is often used to texture a large environment without having to worry about UVs.
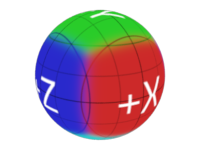
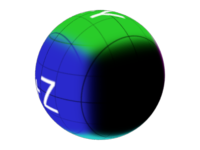
PxrRoundCube computes texture coordinates (UV) based on an object's surface position and orientation and can handle up to 6 sets of coordinates. It also outputs blending weights to be used by PxrMultiTexture.
The sculpture on the left was 3d-scanned and the irregular topology of the mesh makes it tricky to create nice UVs. This is a perfect use case for PxrRoundCube.
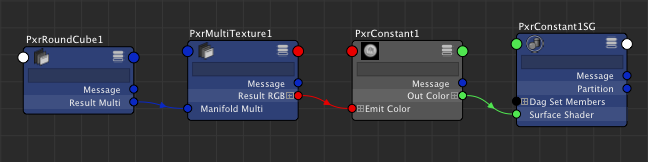
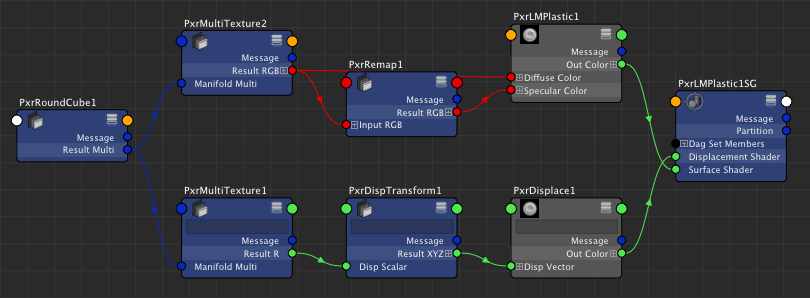
PxrRoundCube only defines texture mapping coordinates and MUST be connected to a PxrMultiTexture pattern. To do so, connect PxrRoundCube.resultMulti to PxrMultiTexture.manifoldMulti. See Maya example below.
You will need to modify your shading networks when importing old scenes.
Input Parameters
Number Of Textures
You can choose to project 1, 3, or 6 images. The table below shows which textures will be used by the PxrMultiTexture node.
| Number of textures | +X | +Y | +Z | -X | -Y | -Z |
|---|---|---|---|---|---|---|
| 1 | 0 | 0 | 0 | 0 | 0 | 0 |
| 3 | 0 | 1 | 2 | 0 | 1 | 3 |
| 6 | 0 | 1 | 2 | 3 | 4 | 5 |
Manifold
Frequency
The frequency at which the texture will repeat. A value of 1 indicates that the texture will not repeat.

Transition Width
This controls how much the per-axis projections blend. We use a very smooth looking blending function to make natural textures blend nicely. The valid range is from 0 to 1.
Pref
The name of the reference position primvar (Maya uses __Pref). The position reference may be used to keep the texture anchored to the surface while the object is deforming. If your deforming object is textured with PxrRoundCube, you need __Pref AND __Nref !

Nref
Coordinate System
Name of coordinate system transform (e.g. place3dtexture node in Maya). You can either use one of the predefined spaces ("world", "object", "current", etc) or the name of a coordinate system node in your scene. If empty, PxrRoundCube use "object" space.
Use Undisplaced Position
When an object is displaced using PxrRoundCube, textures used during shading by the bxdf will not line up correctly with regard to the displacement map. The reason is simple : the displacement shader has moved P and the patterns attached to the bxdf are using the displaced P instead of the original. To avoid this problem, enable useUndisplacedPosition and the pattern will use the undisplaced position (Po) instead of the current position (P). Note that, under the hood, PxrRoundCube also uses the original normal (Non) instead of the current normal (N) when this is enabled.
Randomize
Sometimes, it is useful to randomize some of the parameters to make things look more natural...
Random Source
For each object to get a different variation, you need to select something unique about them to create a unique seed. You have a choice between the object's id and the object's name. These attributes are created by the software outputing the RIB and depending on your host, one may work better than the other.
| Value | Meaning | Depends on |
|---|---|---|
0 | Object ID | Attribute "identifier" "float id" |
1 | Object Name | Attribute "identifier" "string name") |
Extra Seed
When set to zero, all PxrRoundCube patterns operating on the same node will compute the same random seed. If you want one of these patterns to compute a different variation, set the randomExtraSeed to a non-zero value.
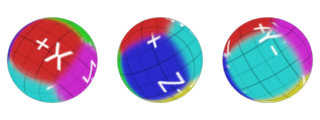
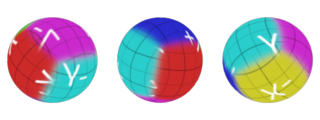
Random Orientation
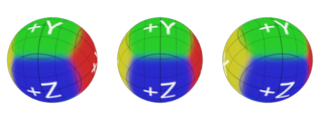
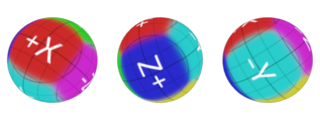
Set this parameter to 1 to randomly rotate the tri-planar projection. By default, the axes will be in object-space. This means that 3 spheres with the same PxrRoundCube pattern will look exactly the same. When you randomize the axes' orientation, they all look different, even though they might have the same transform. Typically, this is useful to control random variations of a lot of objects (think "rocks on the ground") from a single source.
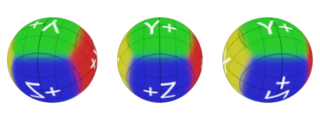
Random Flip
This switch will randomly flip st coordinates of each axis of the tri-planar projection.
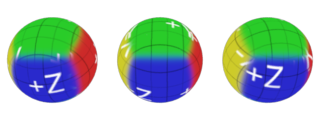
Random Offset
This switch will randomly offset st coordinates of each axis of the tri-planar projection. You should probably make sure seams are not visible your texture is tiling.
X Axis
Enable X
Enable or disable textures on the X axis.
|
|
|
Original
|
Axis Disabled
|
Project a label
You can create a simple label projection by enabling only one of the axes.
Scale S
Scale the textures on the X axis in the s direction (horizontal).
Scale T
Scale the textures on the X axis in the t direction (vertical).
Offset S
Offset the textures on the X axis in the s direction (horizontal).
Offset T
Offset the textures on the X axis in the t direction (vertical).
Invert S
Flip the textures on the X axis in the s direction (horizontal).
Invert T
Flip the textures on the X axis in the t direction (vertical).
Swap ST
Swap the s and t direction on the X axis. This is equivalent to a 90 degree rotation.
Pivot S
Position in s of the scaling center on the X axis.
Pivot T
Position in t of the scaling center on the X axis.
Y Axis
Same controls for Y axis.
Z Axis
Same controls for Z axis.
Output Parameters
resultMask
The blending weights of the 3 axes, as an RGB output. Useful to tweak the projection result either in comp or further down the graph.resultMulti
Tutorial
Making rocks on the cheap
We start with one piece of geometry (a cube interpreted as a subdivision surface), duplicate it 3 times and scale each of differently them to get different shapes.
We setup a texturing network using PxrRoundCube...

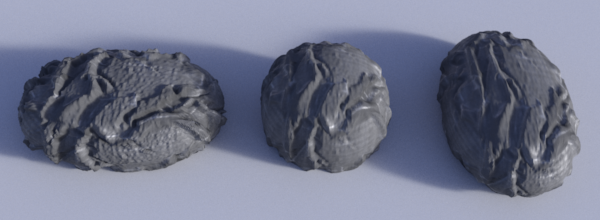
...and make our first render.
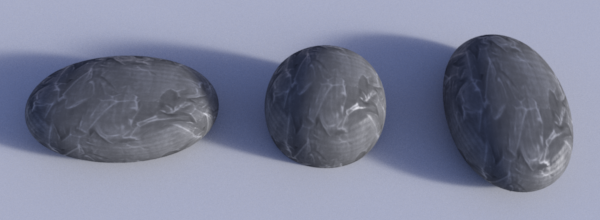
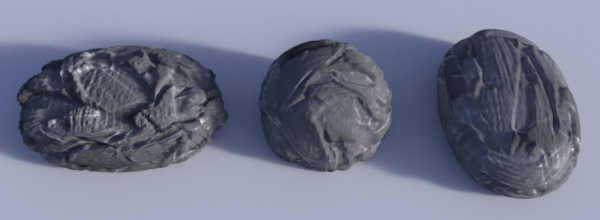
As we are using a single stone texture, we can see similarities between our rocks. We could use more textures but we are doing it on the cheap ! Let's add displacement, using the same PxrRoundCube.
Now, the similarities are much more obvious, so we will randomly flip and offset our textures (See Randomize section).
This is starting to look better : our stones all look different now ! Still, if you look at the bottom of the right-most stone, the stone grain is not oriented the same way as the top of that rock. It looks a bit un-natural.
This is easy to fix. That area corresponds to the Z axis, so we go to "Z Axis" section and toggle "swap ST". This is equivalent to a 90 degrees rotation of the texture on the Z axis.
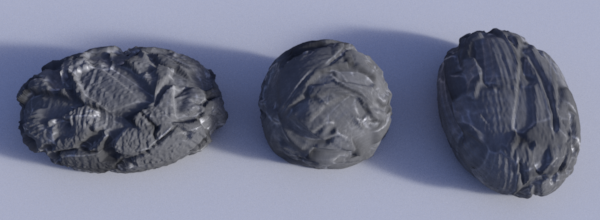
They all look different and reasonnably natural (for a 10 mn job). We've earned that coffee !