Contents
Arbitrary Output Variables (AOVs) are the secondary images produced by the renderer. There can be any number of them generated simultaneously and each one may go to a different file, a different display driver, or use different pixel filter settings. In some cases, special pixel filter modes may be used to avoid mixing values from different samples in a non-sensical way; typically these select a single sample to be representative of the whole pixel.
Broadly speaking, AOVs in RIS fall into these main categories: built-in, integrator (global), custom, and light path expressions.
For users interested in what is typically referred to as "render passes" for compositing a beauty image, look at the page on light path expressions (LPE).
AOVs Manager
By default, RenderMan for Blender will attempt to translate the default outputs that come with Blender. If you click on the view layer properties ![]() , the UI should more or less look familiar to veteran users.
, the UI should more or less look familiar to veteran users.
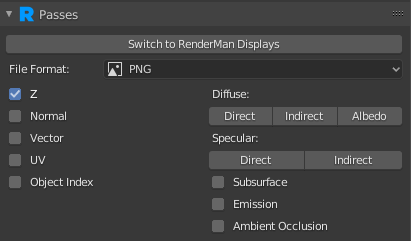
However, we can switch over to using RendeMan for Blender's AOVs manager by clicking on "Switch to RenderMan Displays". After clicking the button, the UI should look something like this:
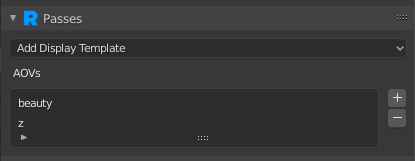
The button will also attempt to create the equivalent AOVs from the outputs selected from the previous UI. Each item under the AOVs list is a single output with a number of channels. Selecting an item from the list will display the file format options for that AOV along with the channels.
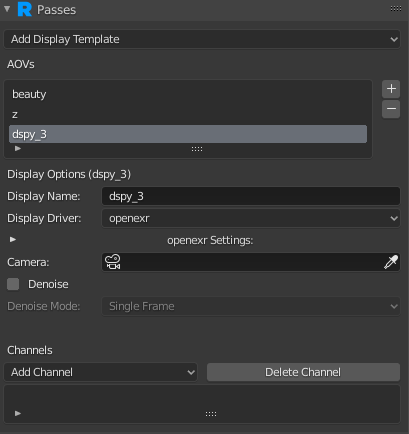
Here we can see dspy_3 will output to OpenEXR. Opening the openexr Settings section will show the options for the OpenEXR display driver, such as compression and the type (float or half float). Camera allows you to render the AOV from a different camera than the main scene camera. The Denoise option will tell RenderMan to denoise the AOV during external/batch rendering.
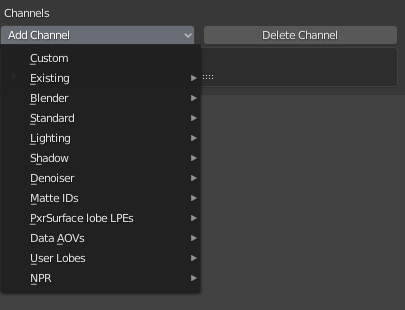
To add channels to the AOV, use the Add Channel drop down menu.
You can remove a channel from an AOV by clicking on Delete Channel. Selecting a channel will also present a list of options that modify the behavior of the channel. It also shows the type and the source.
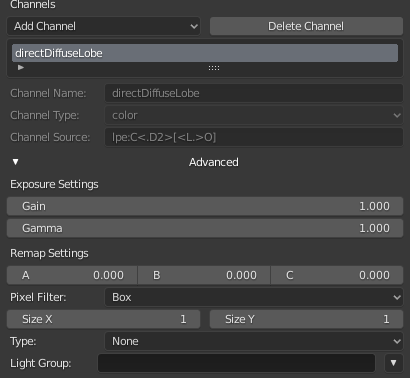
You can also create your own custom channel by clicking on Custom from the Add Channel dropdown. It is then up to you to give the channel a name, the type, and the source (Light Path Expression).