Contents
RenderMan allows for creating complex looks through layering materials. This means effects like car paint, labels on bottles, dirt or mud, can all be layered efficiently for rendering.
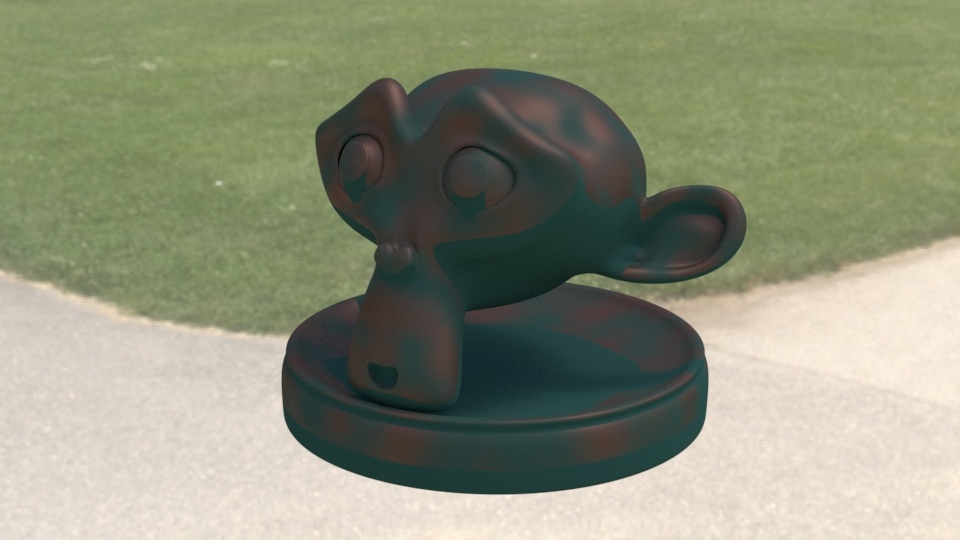
Below you can find a step by step example of creating a patina on a bronze monkey head, using PxrLayerSurface. PxrLayerSurface is the same as PxrSurface except that most of the parameters that don't apply to layering have been hidden from the UI.
Attach Material
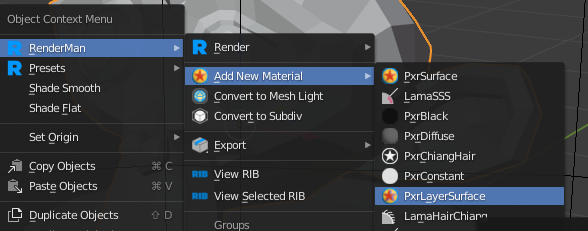
Attach a PxrLayerSurface material to your selected object. You can do this via the object context menu.
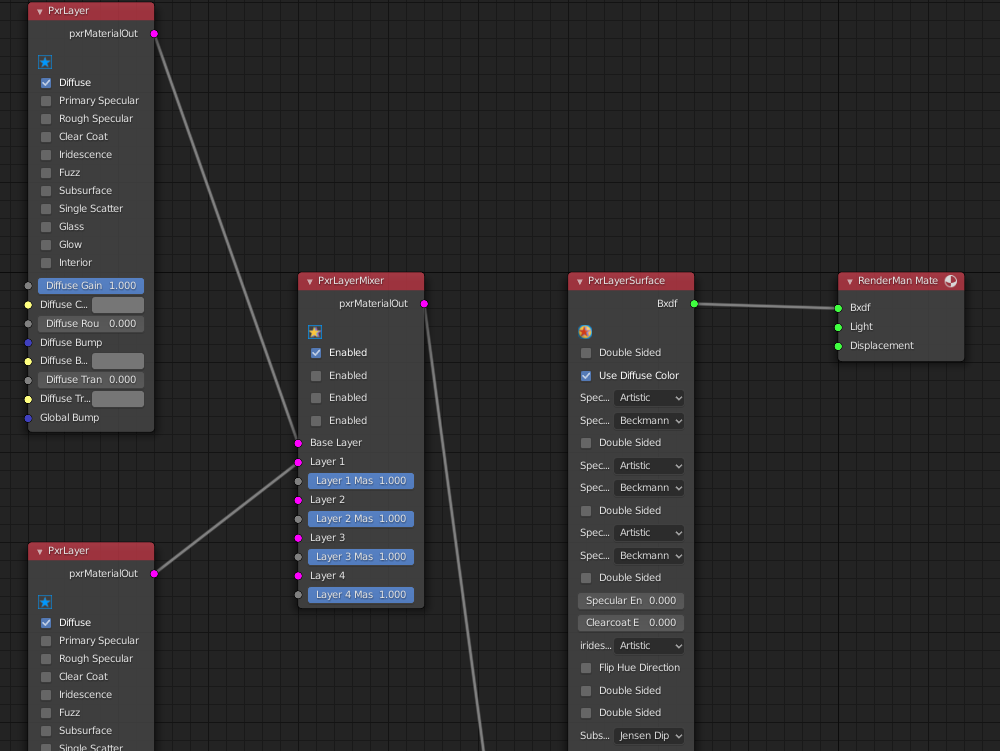
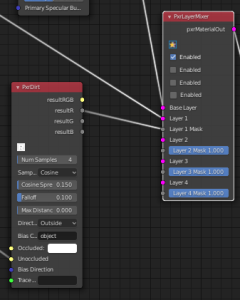
For PxrLayerSurface, RenderMan for Blender will automatically add a PxrLayerMixer node, along with two PxrLayer nodes that will act as a base layer and an upper layer. Here's what your network should look like at the start:
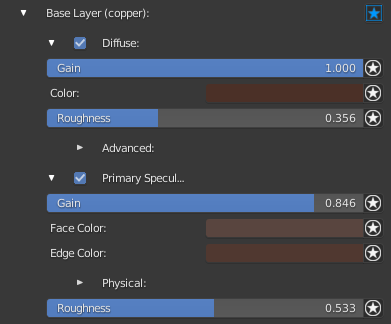
Base Layer (copper)
For the base layer, we will create a copper look. First, rename the PxrLayer node that's connected to the PxrLayerMixer's Base Layer parameter, to something like copper. Here are the settings for our copper layer:
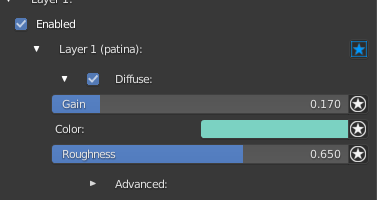
Layer 1 (patina)
For the upper layer, we will create a patina look. Like the base layer, rename the PxrLayer node to be called patina (this is connected to PxrLayerMixer's Layer 1 parameter). Here are the settings for our patina layer.
Masking
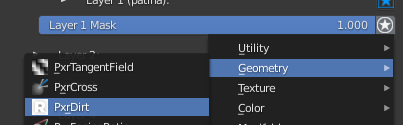
If you render your scene as is, you'll notice that only the patina layer is showing, and none of the copper layer. In order to mix the two together, we need to use a mask value. For the mask, we will use a PxrDirt pattern node. Start by creating a PxrDirt node and connecting the resultR output to the Layer 1 Mask parameter of PxrLayerMixer. You can do this in the shader editor, like the image below:
or use the connection widget in the material panel, like this:
Below are the settings we will use for our PxrDirt.
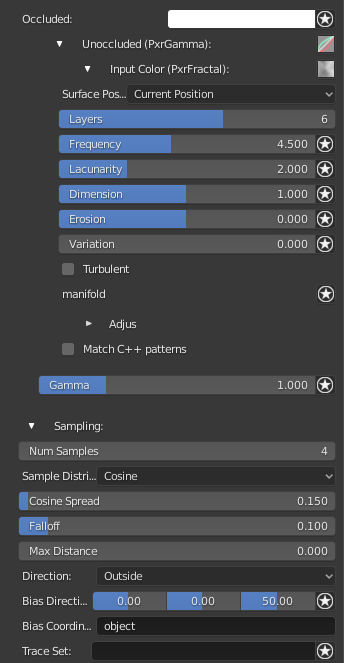
To help break up the mask a bit, we connected a PxrGamma to the Unoccluded parameter, and then connected a PxrFractal pattern to PxrGamma's Input Color parameter.
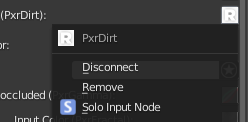
If you want to work on the mask value, independent of the whole network, you can use the Solo Node function. Click the connection widget on the material panel, then click on Solo Input Node.

Result
Here's the result of our layered material.
For more added realism, consider using a PxrBump pattern, connected to the Global Bump parameter of each layer to create a more uneven surface.