Contents
One of the best things about Houdini is the simplicity of creating explosions. This tutorial will go over the steps required to create, shade, and render great looking explosions in Houdini using RenderMan.
The first step is to get RenderMan setup work with Houdini. This video gives a great initial introduction to the initial setup for RenderMan for Houdini.
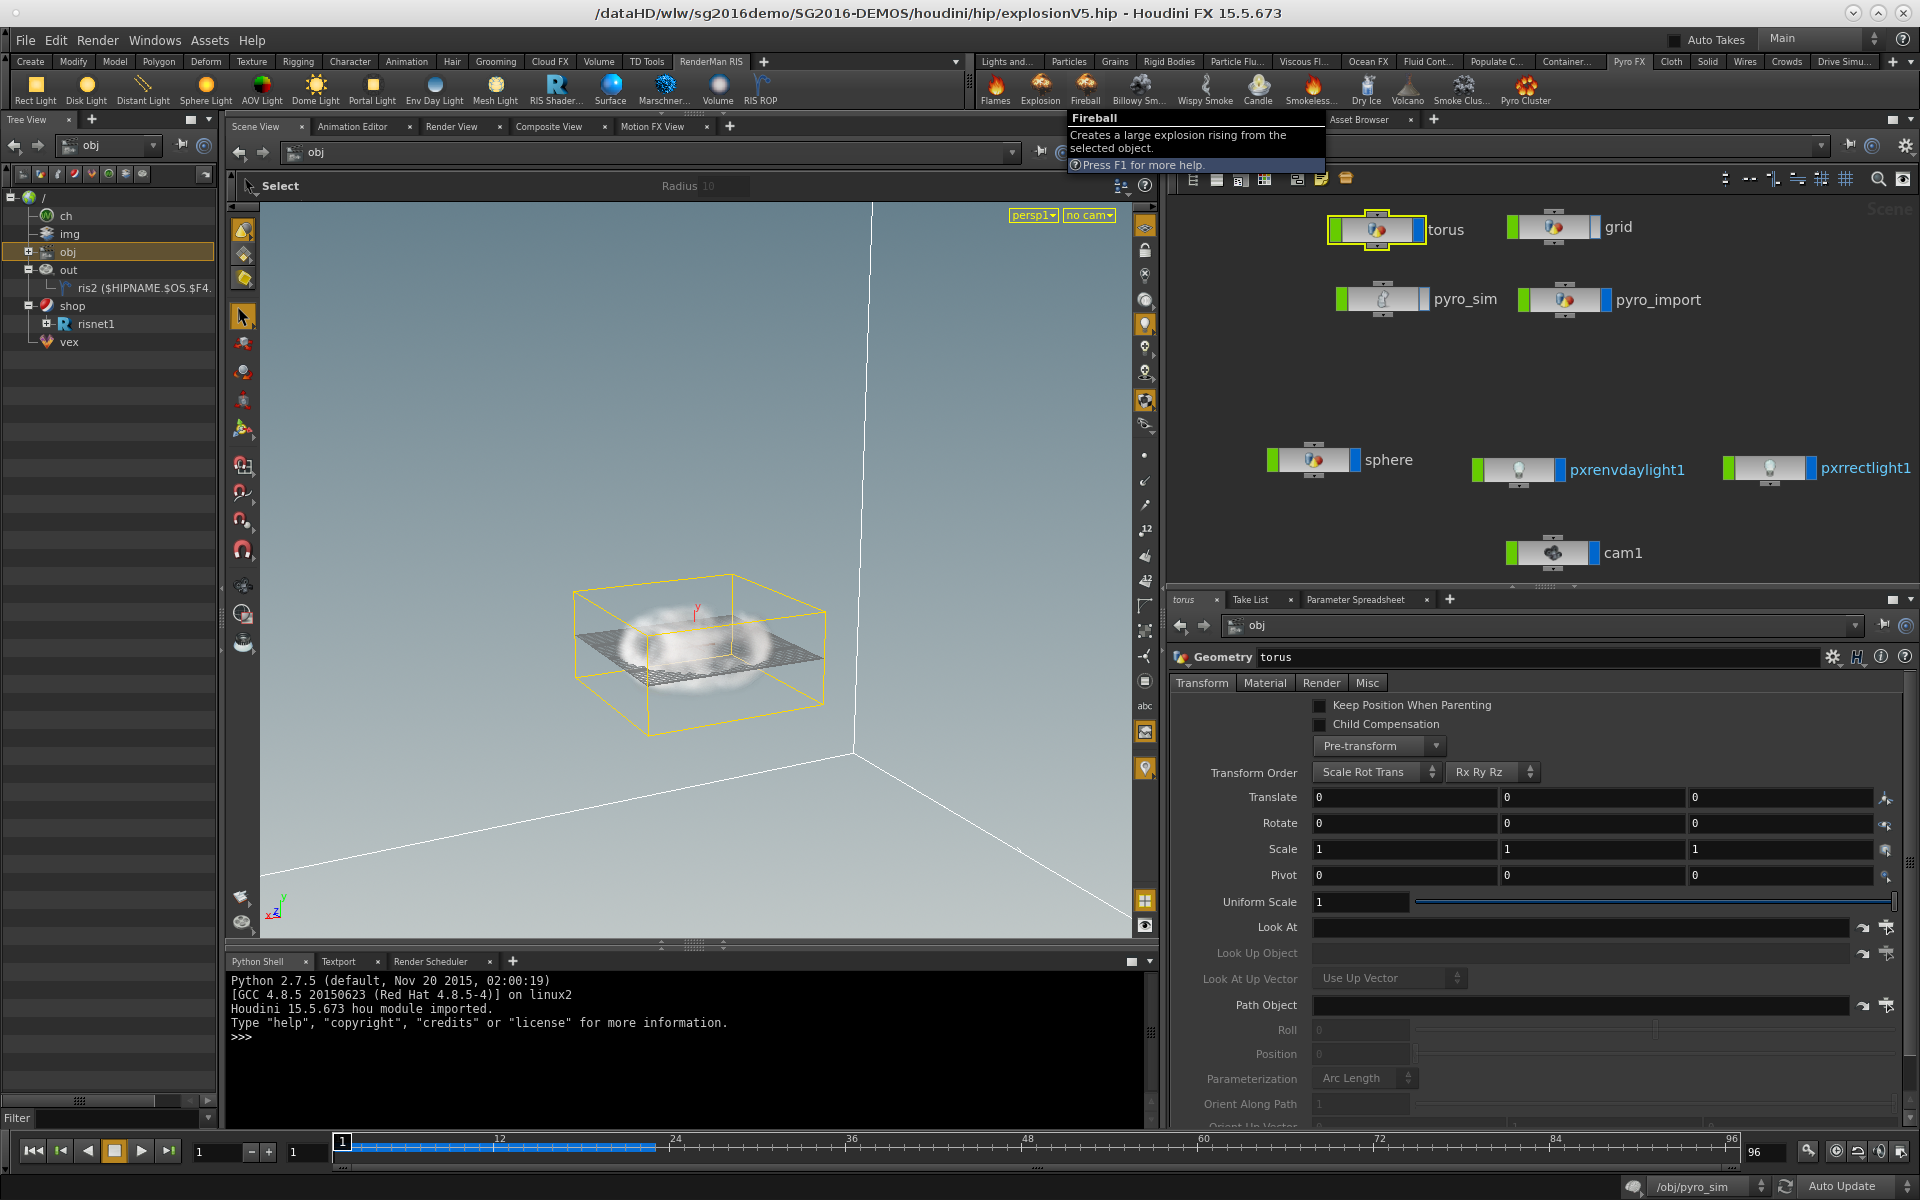
After getting started, you will want to create a torus, upon which we will add a Fireball pyro effect. You can add a torus, by hitting TAB in the Scene View and type out "Torus".

After you drop the torus at the origin, select the "PyroFX" tab from the options on the right hand side. Select the "Fireball" and apply it to the Torus and hit ENTER.
I've modified the default pyro_sim node to make the simulation look a little more "full". So dive into the pyro_sim node by clicking on it. Once inside the pyro node, you will want to first modify the pyro node attributes.
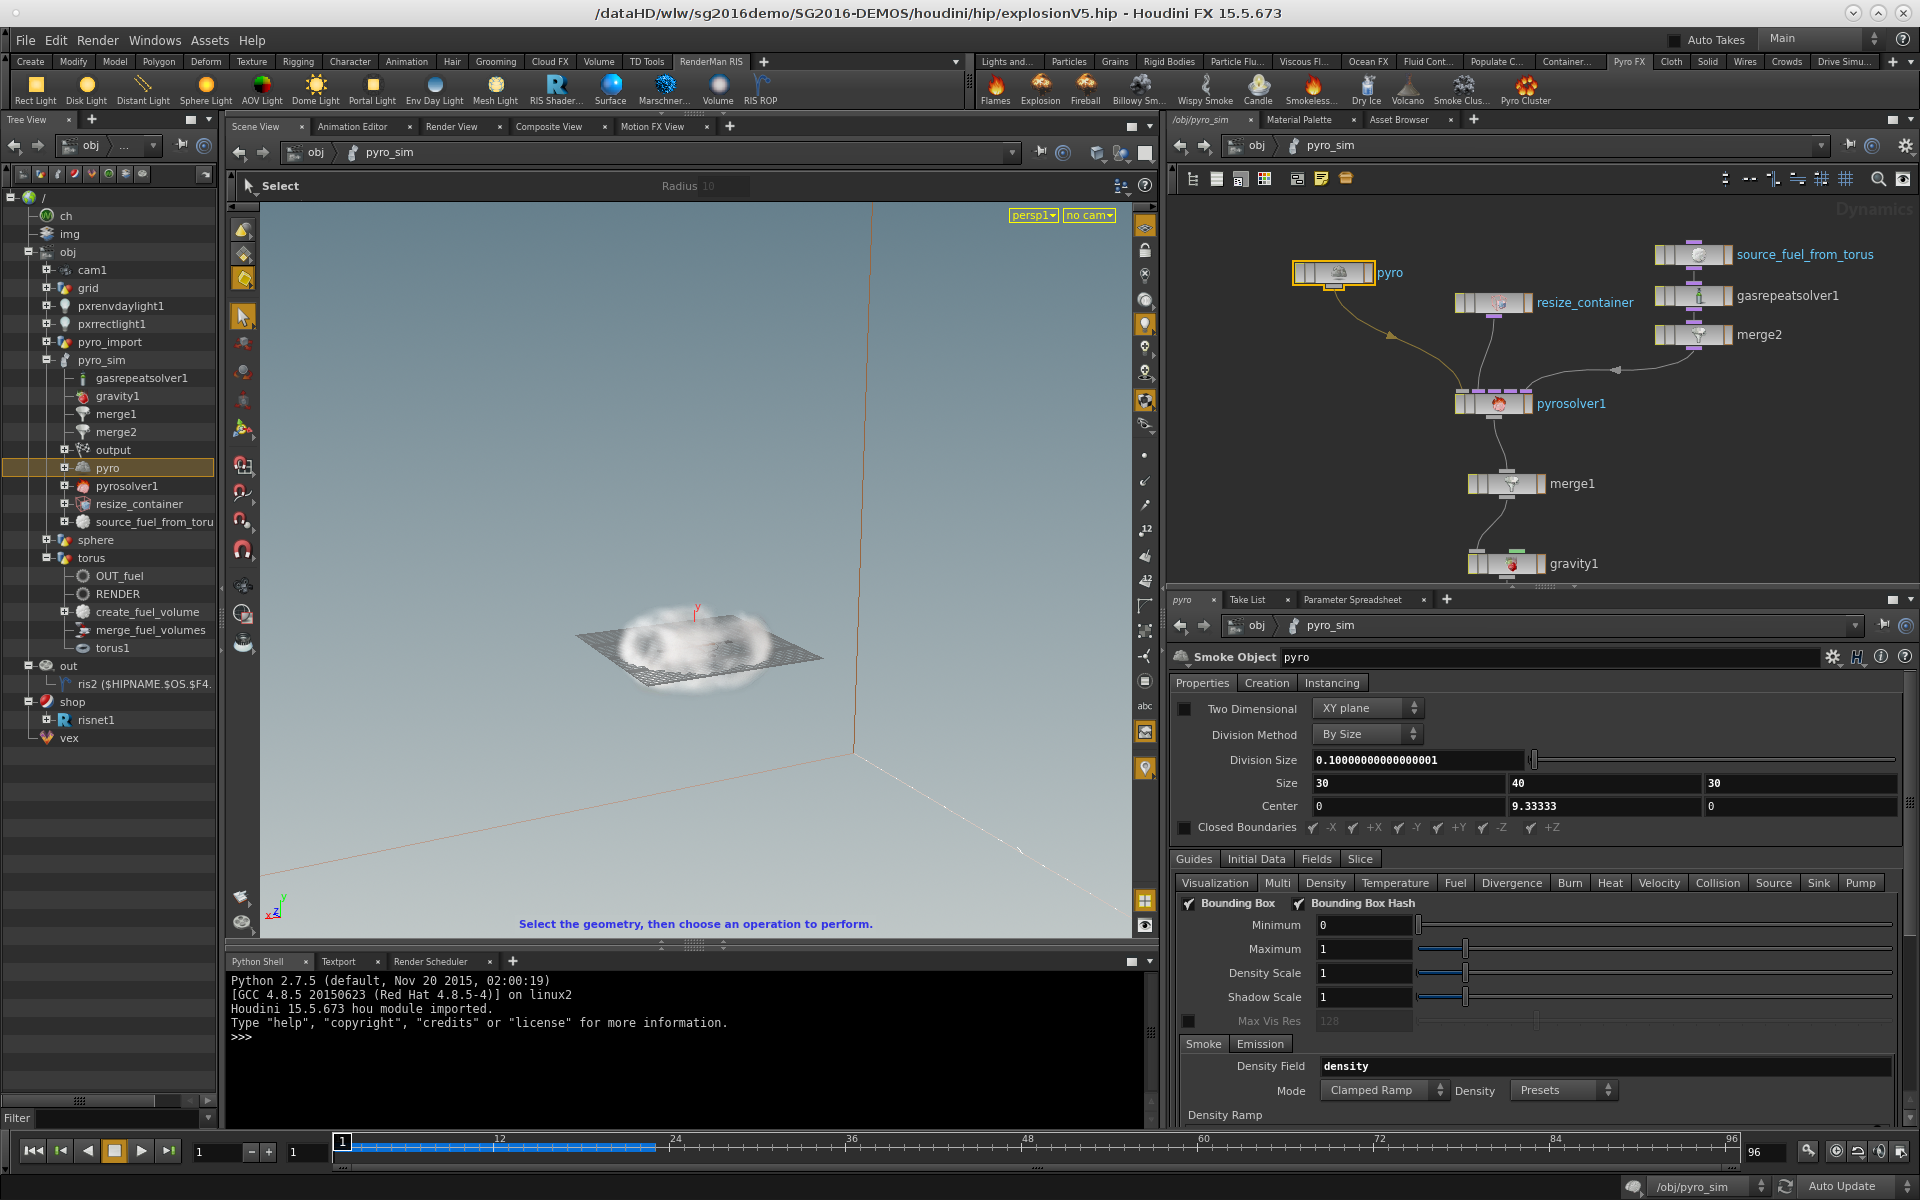
You will noticed I have dropped the "Division Size" down and I have upped the "Size" of the simulation to 30 x 40 x 30. I have also added a stock gasrepeatsolver node after the source_fuel_from_torus node to give the flame an extra boost. Set Minimum Pass to 1. Turn on Override Minimum with Data.
Finally I made a few modifications to the pyrosolver node as noted below:
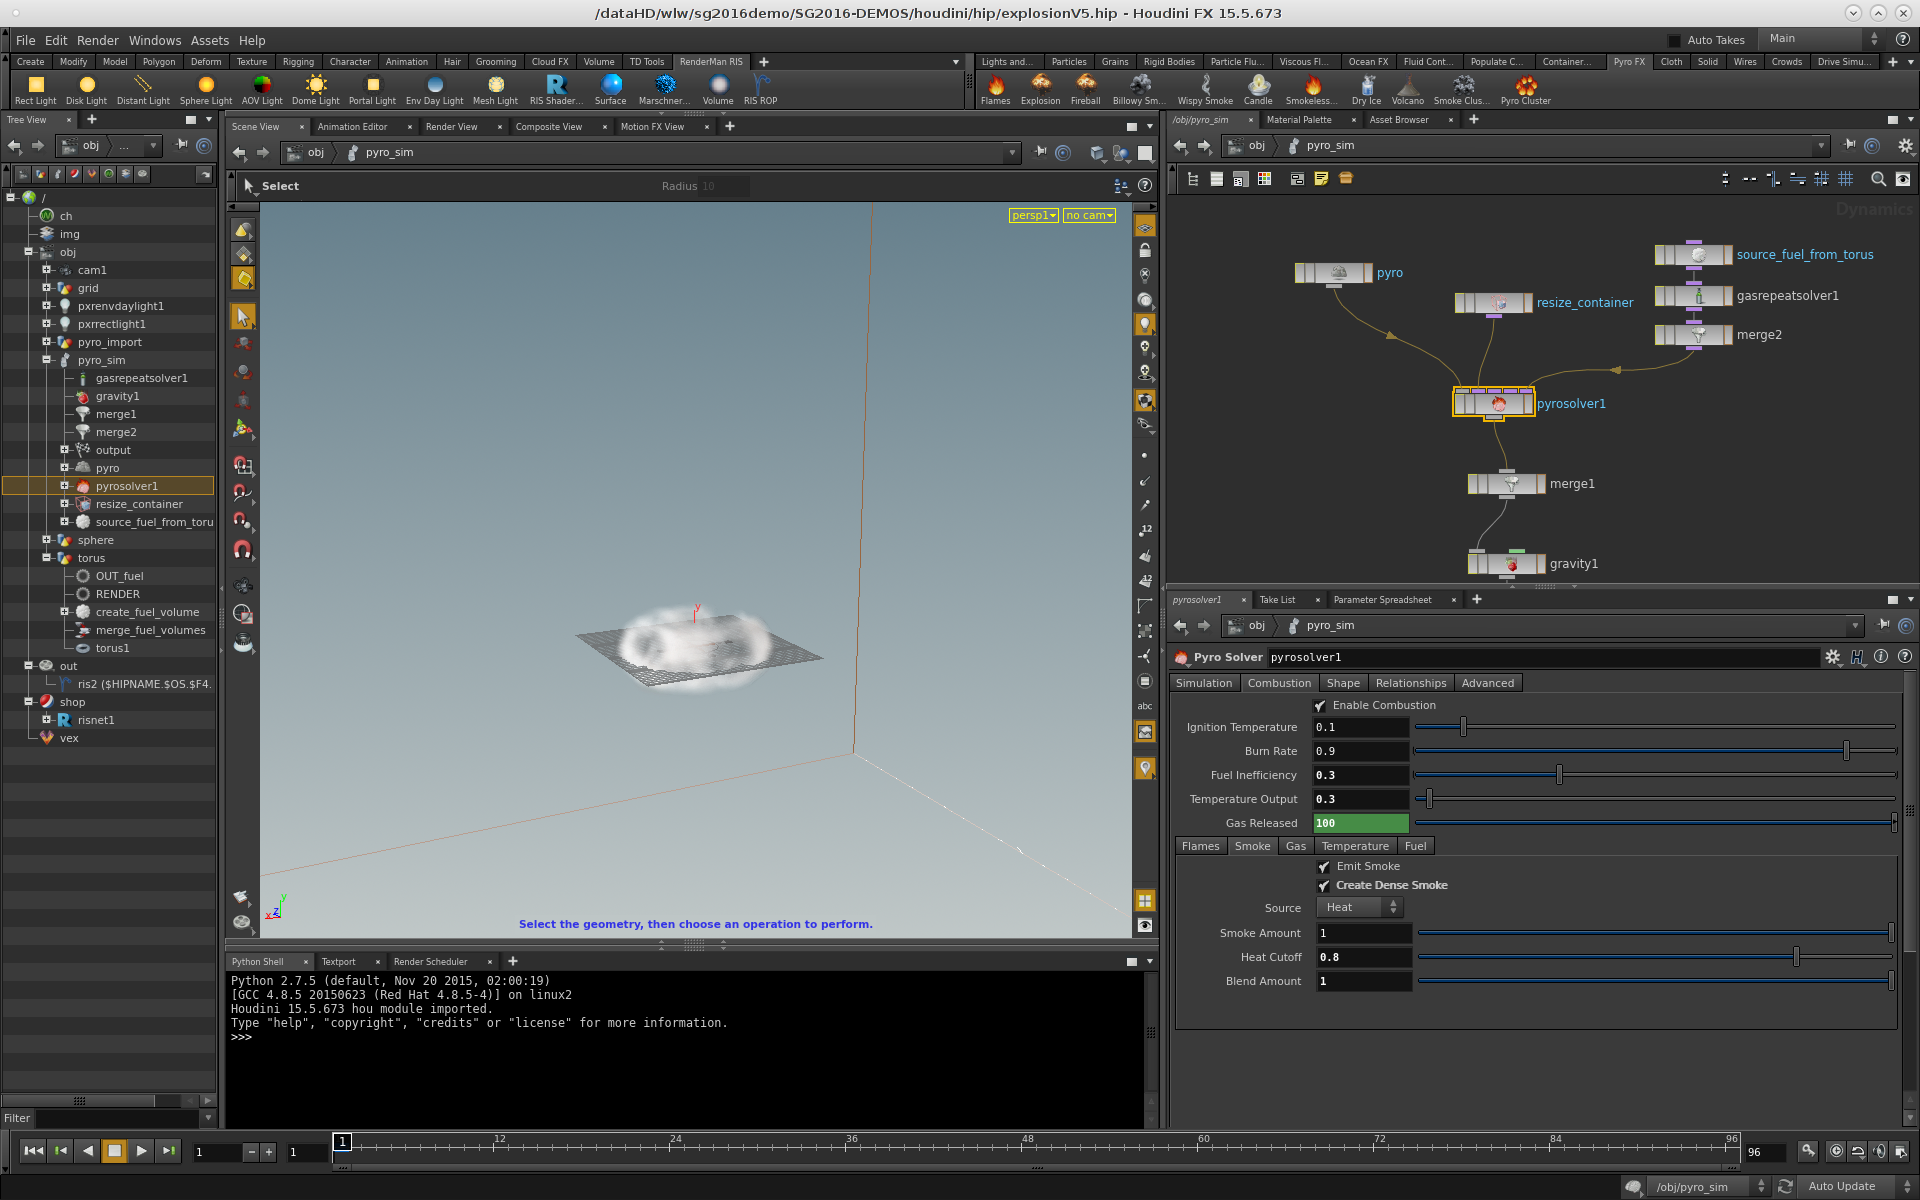
You can increase the Smoke Amount from 1 to 3 if you want the simulation to have more smoke.
Now you can hit the play button in the lower right and have the simulation run for a while. In this tutorial I used frame 21 for testing my shading and lighting.
One of the quick and easy steps for setting up RenderMan for use in Houdini is to use the RenderMan RIS shelf buttons. I next pressed the "RIS ROP" button on the shelf and that gives me a ROP (Render OPerator) and also places down a default path tracer intergrator and creates an RIS specific SHOP (RIS SHading OPerator network).
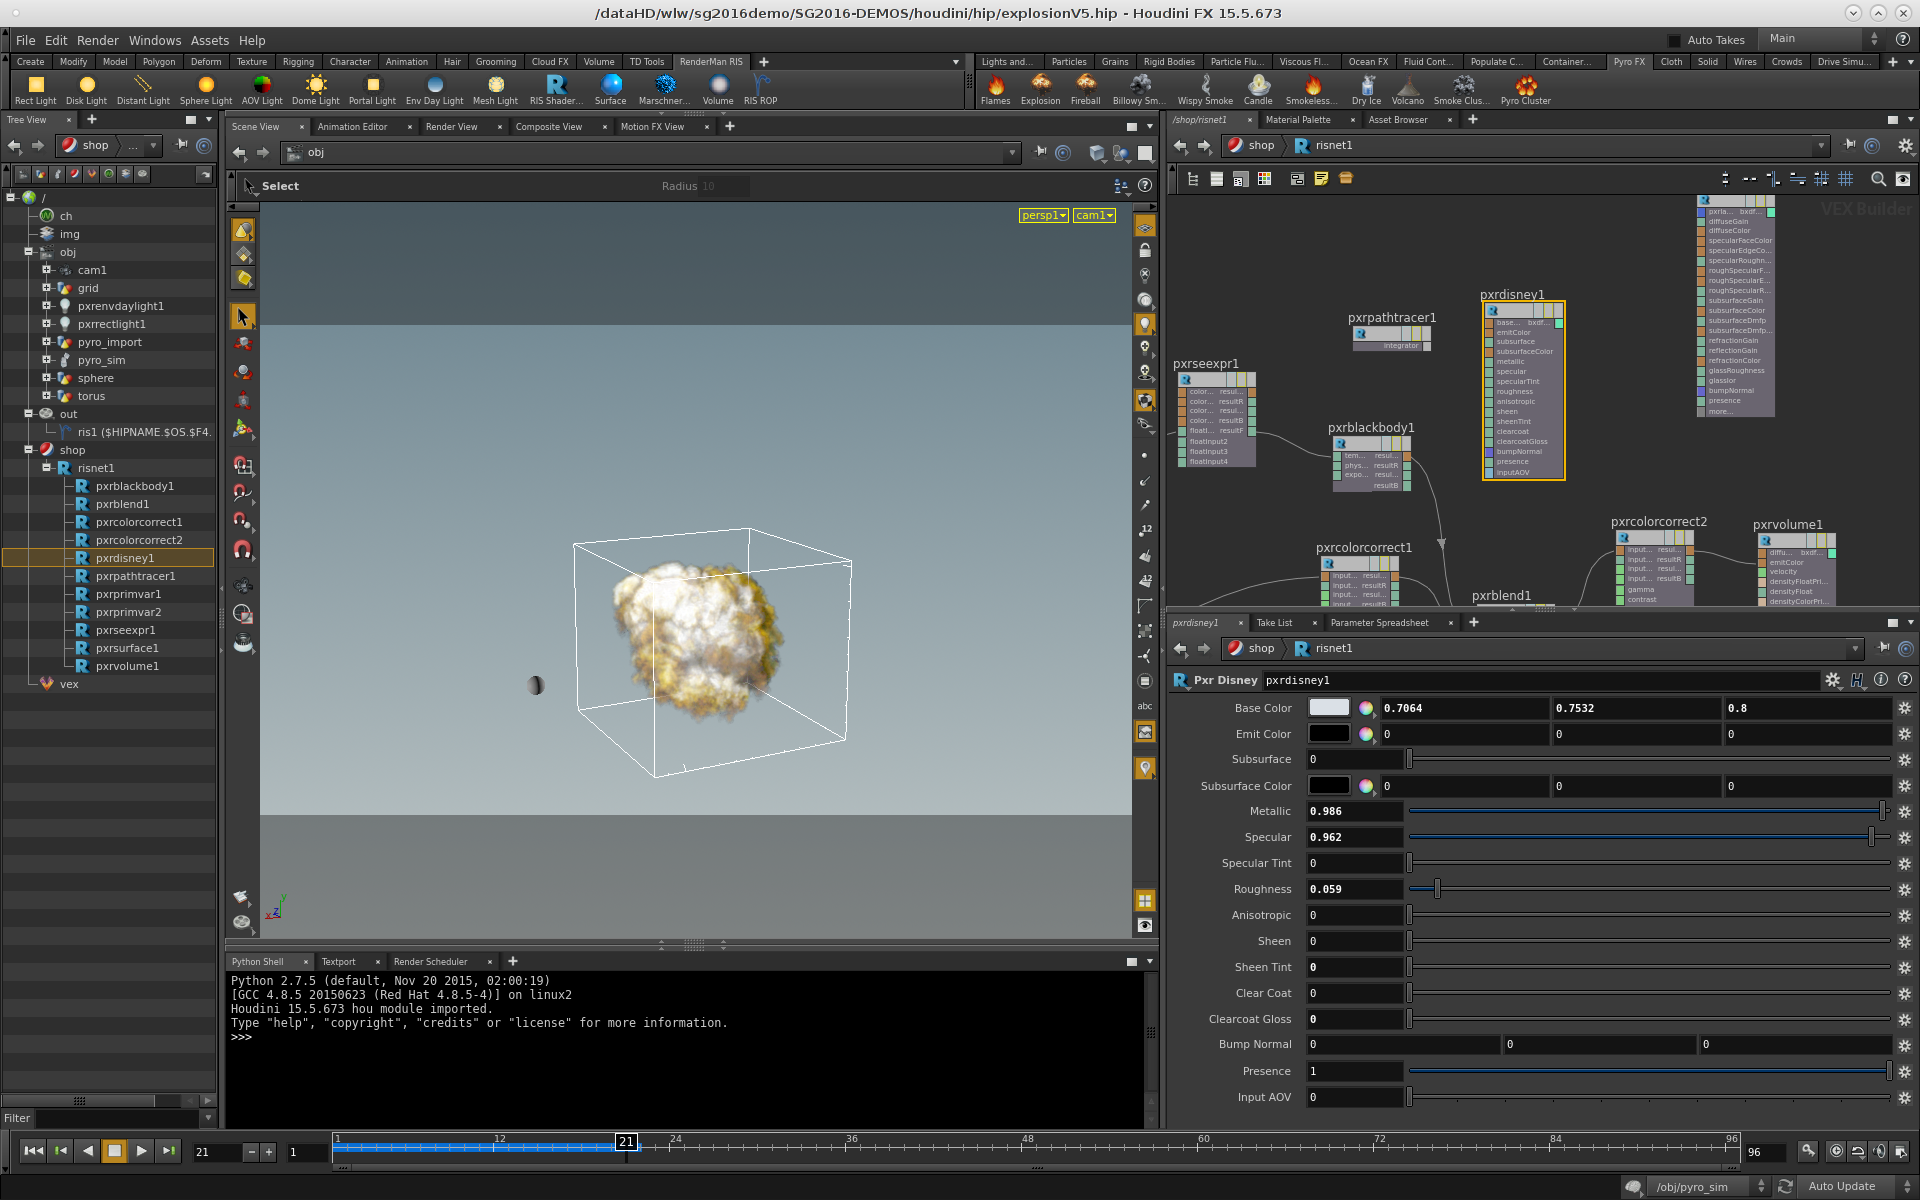
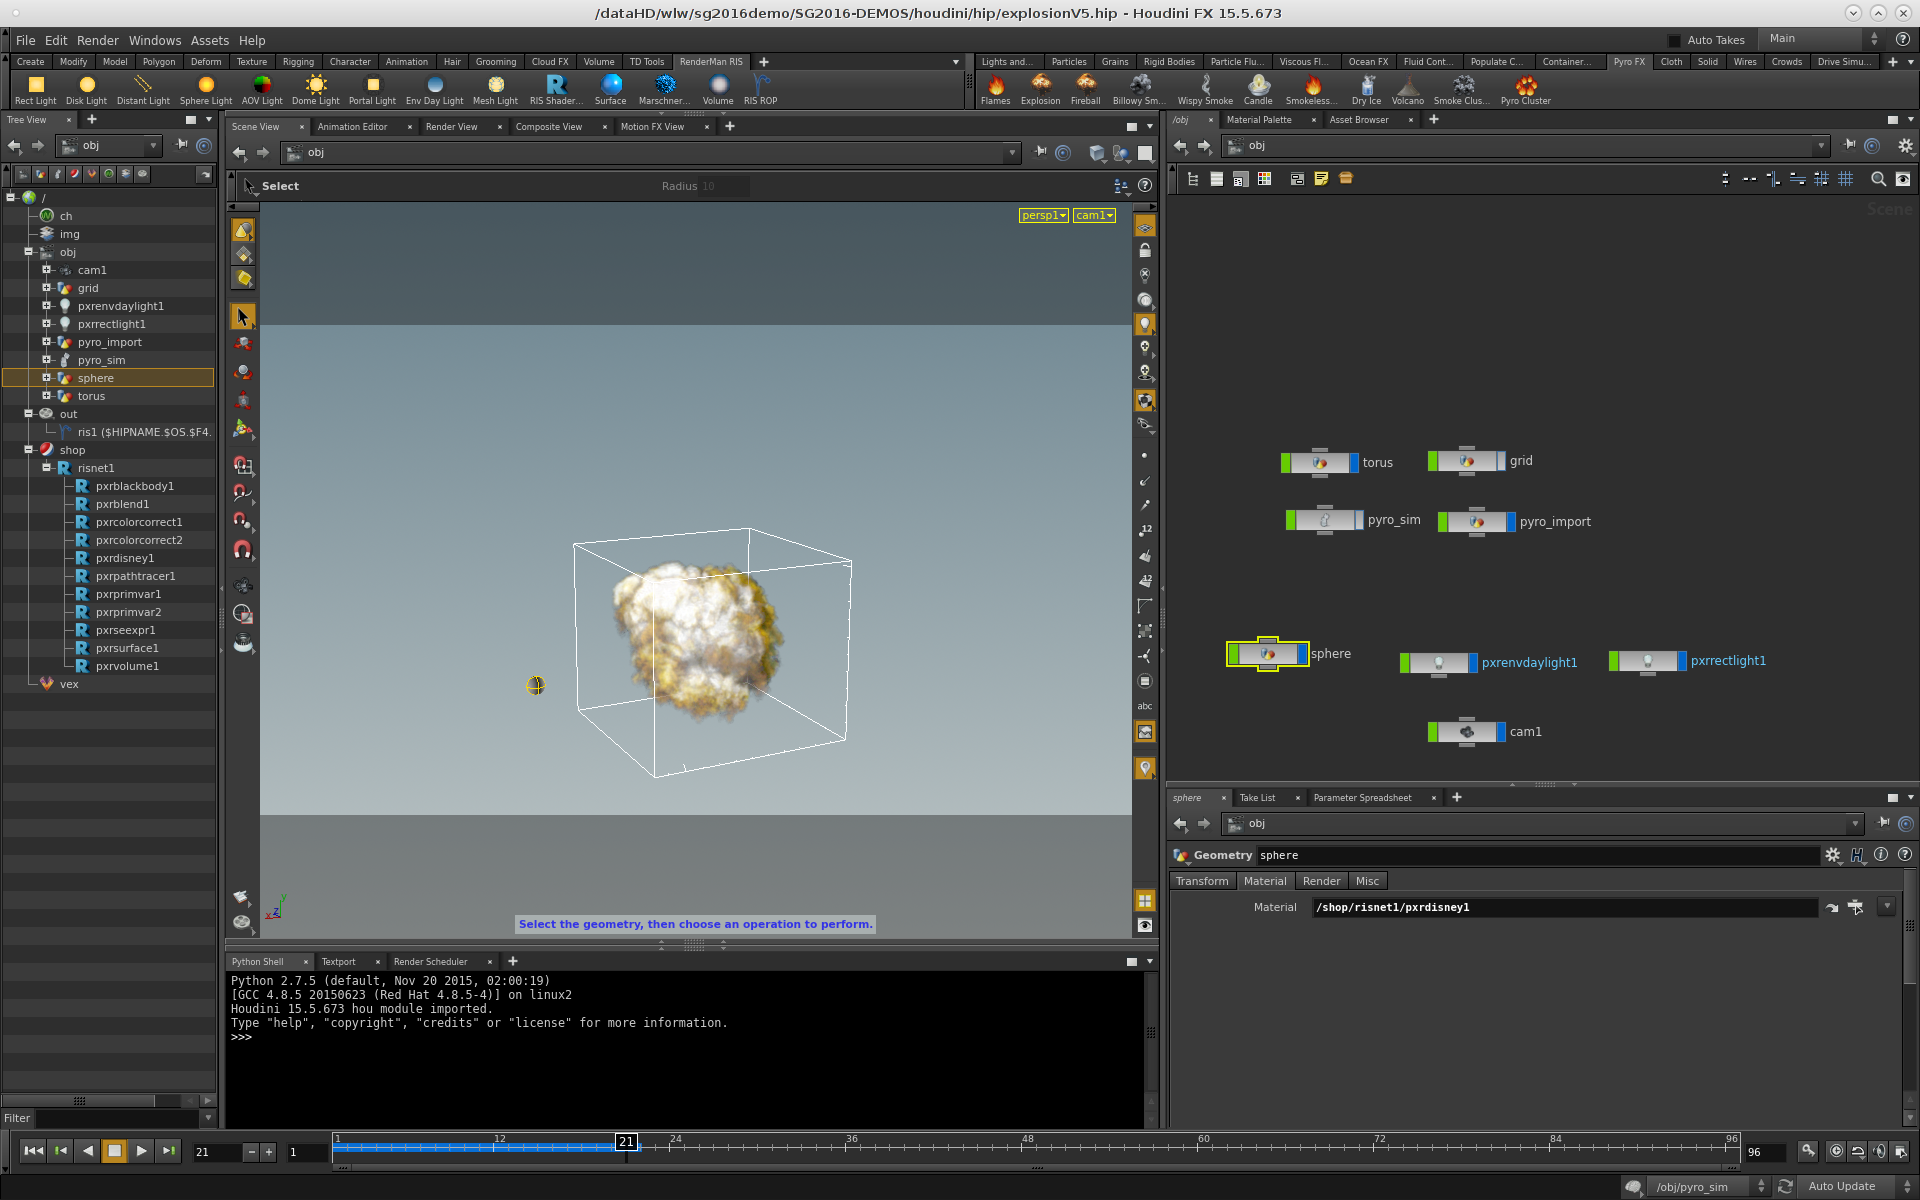
In order to help me gauge my lighting, I decided to drop a shiny sphere in scene for reference. I clicked in the scene view and hit TAB and typed "Sphere" to drop a sphere in the scene off to the left of the fireball. I then clicked into the "risnet1" SHOP network and hit tab and types "PxrDisney" to create a pxrdisney BXDF. I modified the paramaters of the PxrDisney shader to make it a shiny mirror ball as shown below:
Once I created my PxrDisney node, I need to assign that to the material slot on the Sphere object. I selected the Sphere object, then selected the Material tab in the properties and then selected and dragged the pxrdisney1 shader from the left hand Tree View and dropped it into the material slot.
As this point, I could start rendering my scene, but the fireball will be black and there are no lights in the scene, so it would look fairly boring at this point.
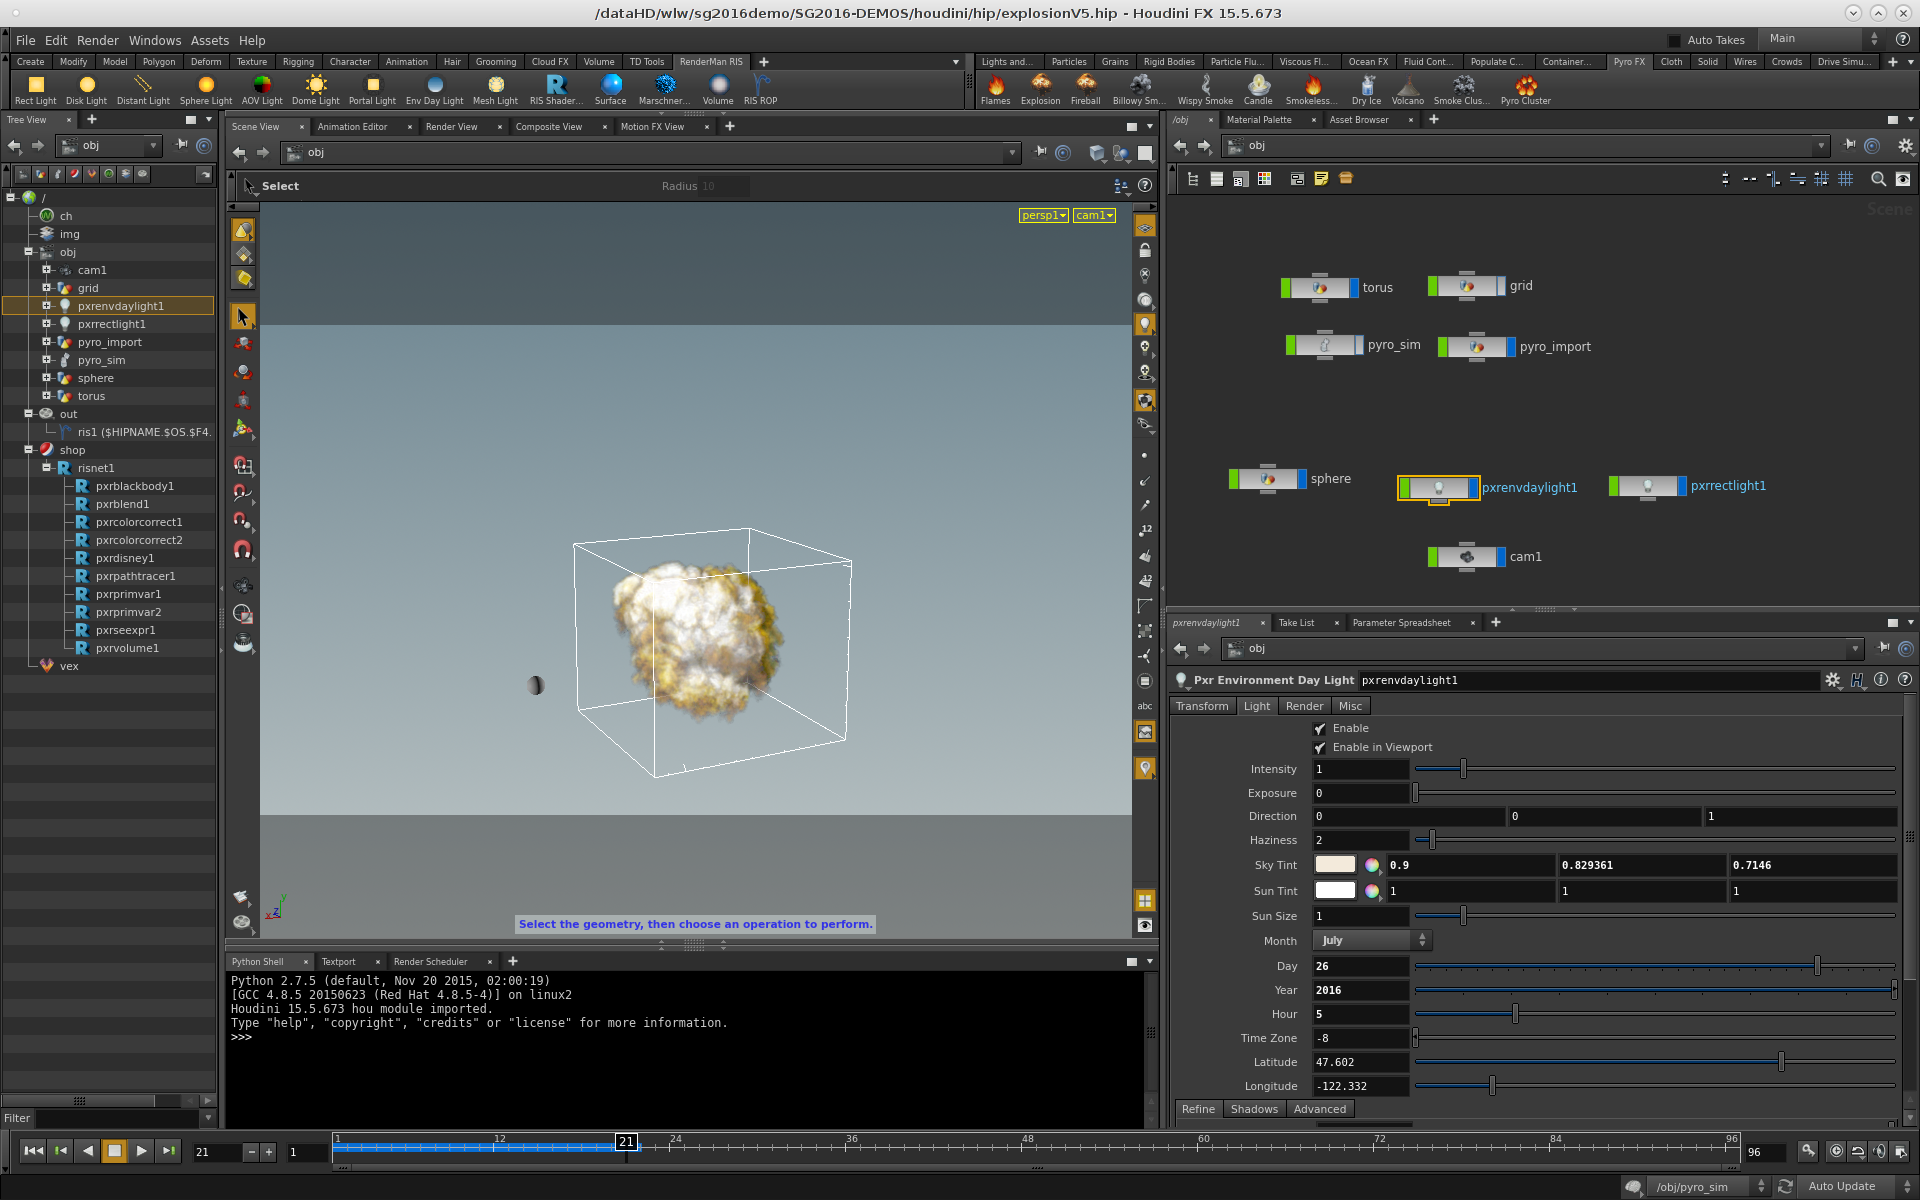
So we want to add some light sources. I decided to highlight the smoke of the fireball, so I added two lights, the first is a general "DayLight" providing a nice fill light source for the scene. I clicked on the "Env Day Light" shelf button, and then set the parameters of the day light source as shown below:
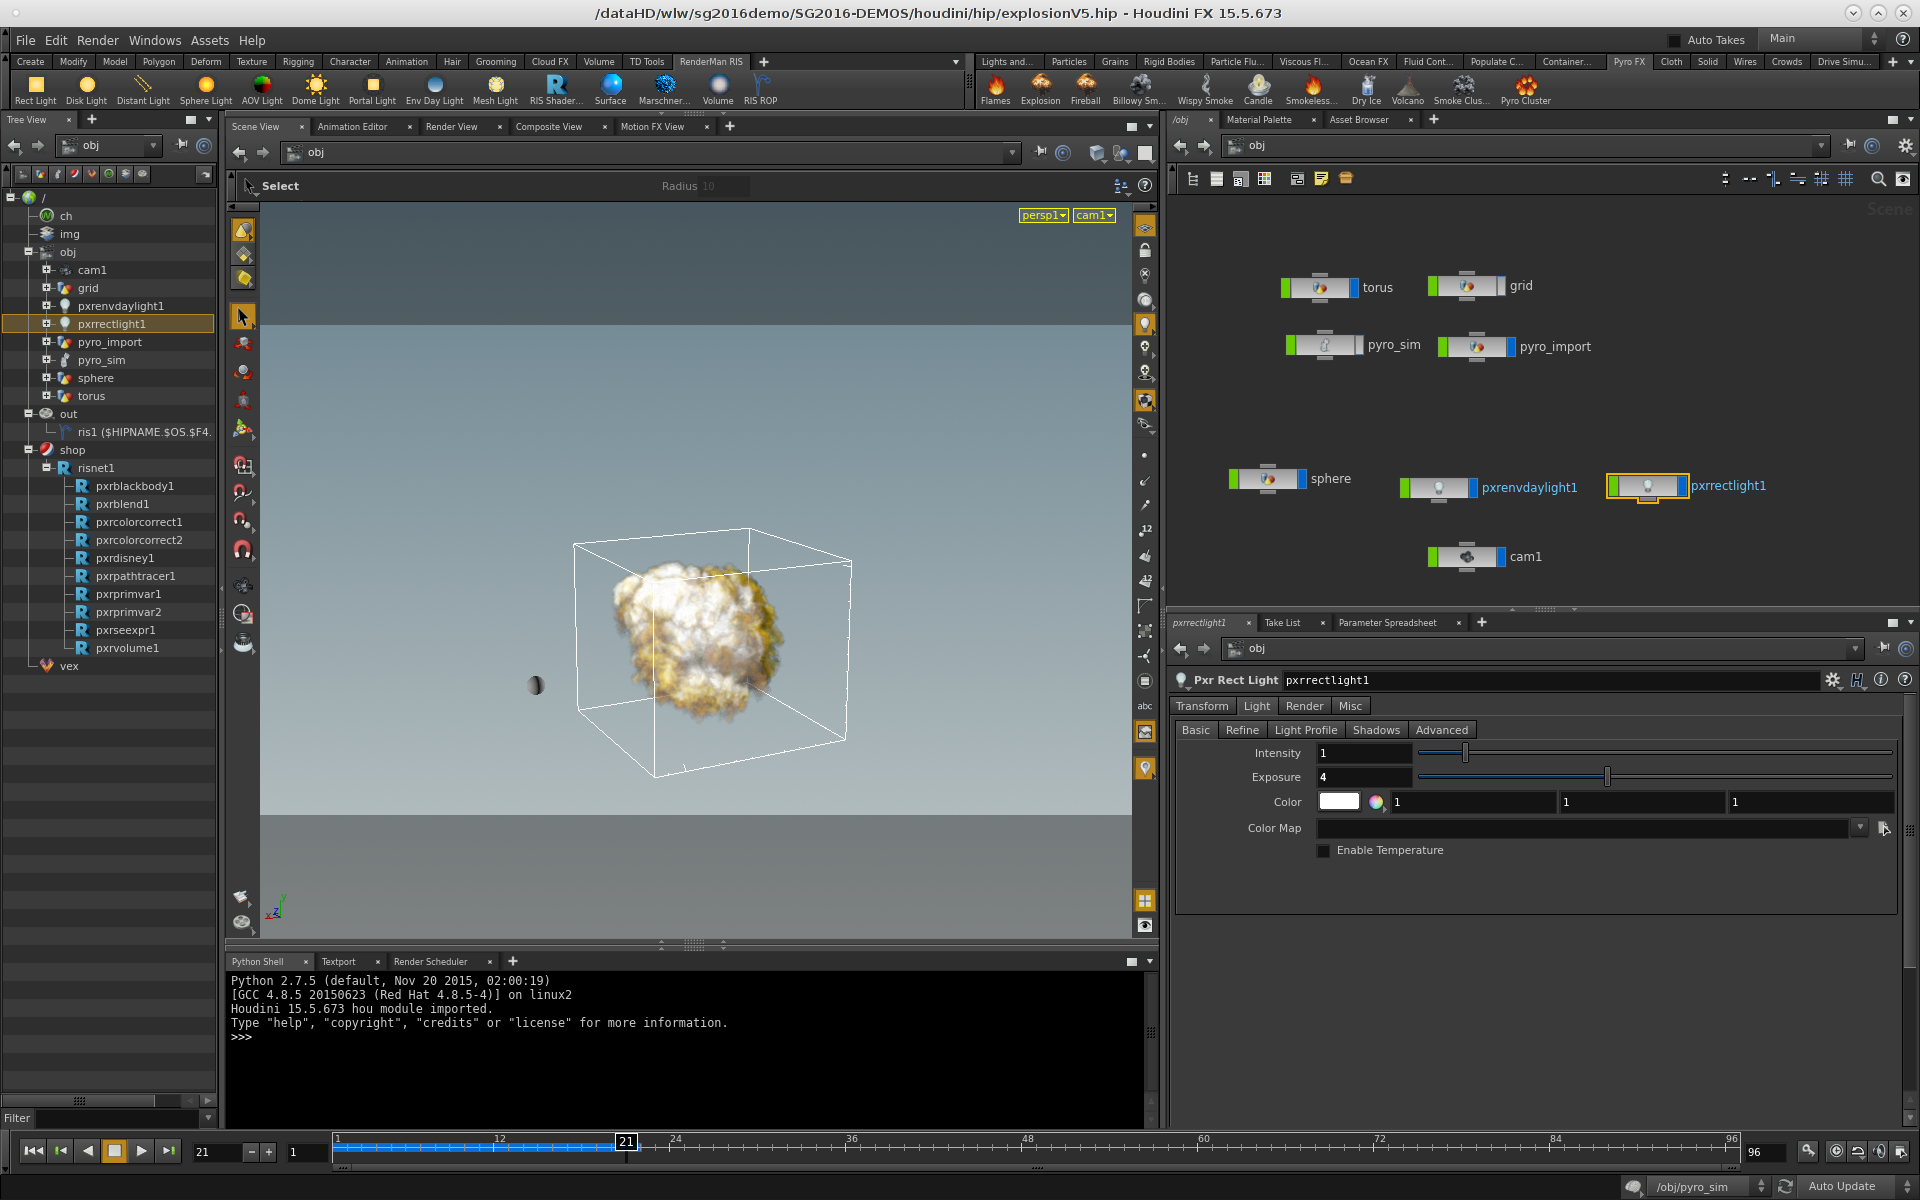
To also give some nice shadows on the smoke of the fireball, I add a "Rect Light" (using the shelf button) off the the left side of the fireball. The parameters are as show below. Note I scaled the light up uniformly by a factor of 10.
Now that we have lights in the scene, we could start rendering the fireball, but that would still be boring, since the fireball is not shaded yet. The next step is to build a shader network for the fireball volume simulation. There are two key variables from the simulation that we use to drive the shading network, "heat" and "temperature". We get at the value of those variables on the simulation using the PxrPrimVar nodes as shown below. Note I dropped into the risnet1 SHOP node and hit TAB and typed PxrPrimVar to create each of the PrimVar shading nodes. In the first I look up the variable "temperature" and the second, I look up "heat".
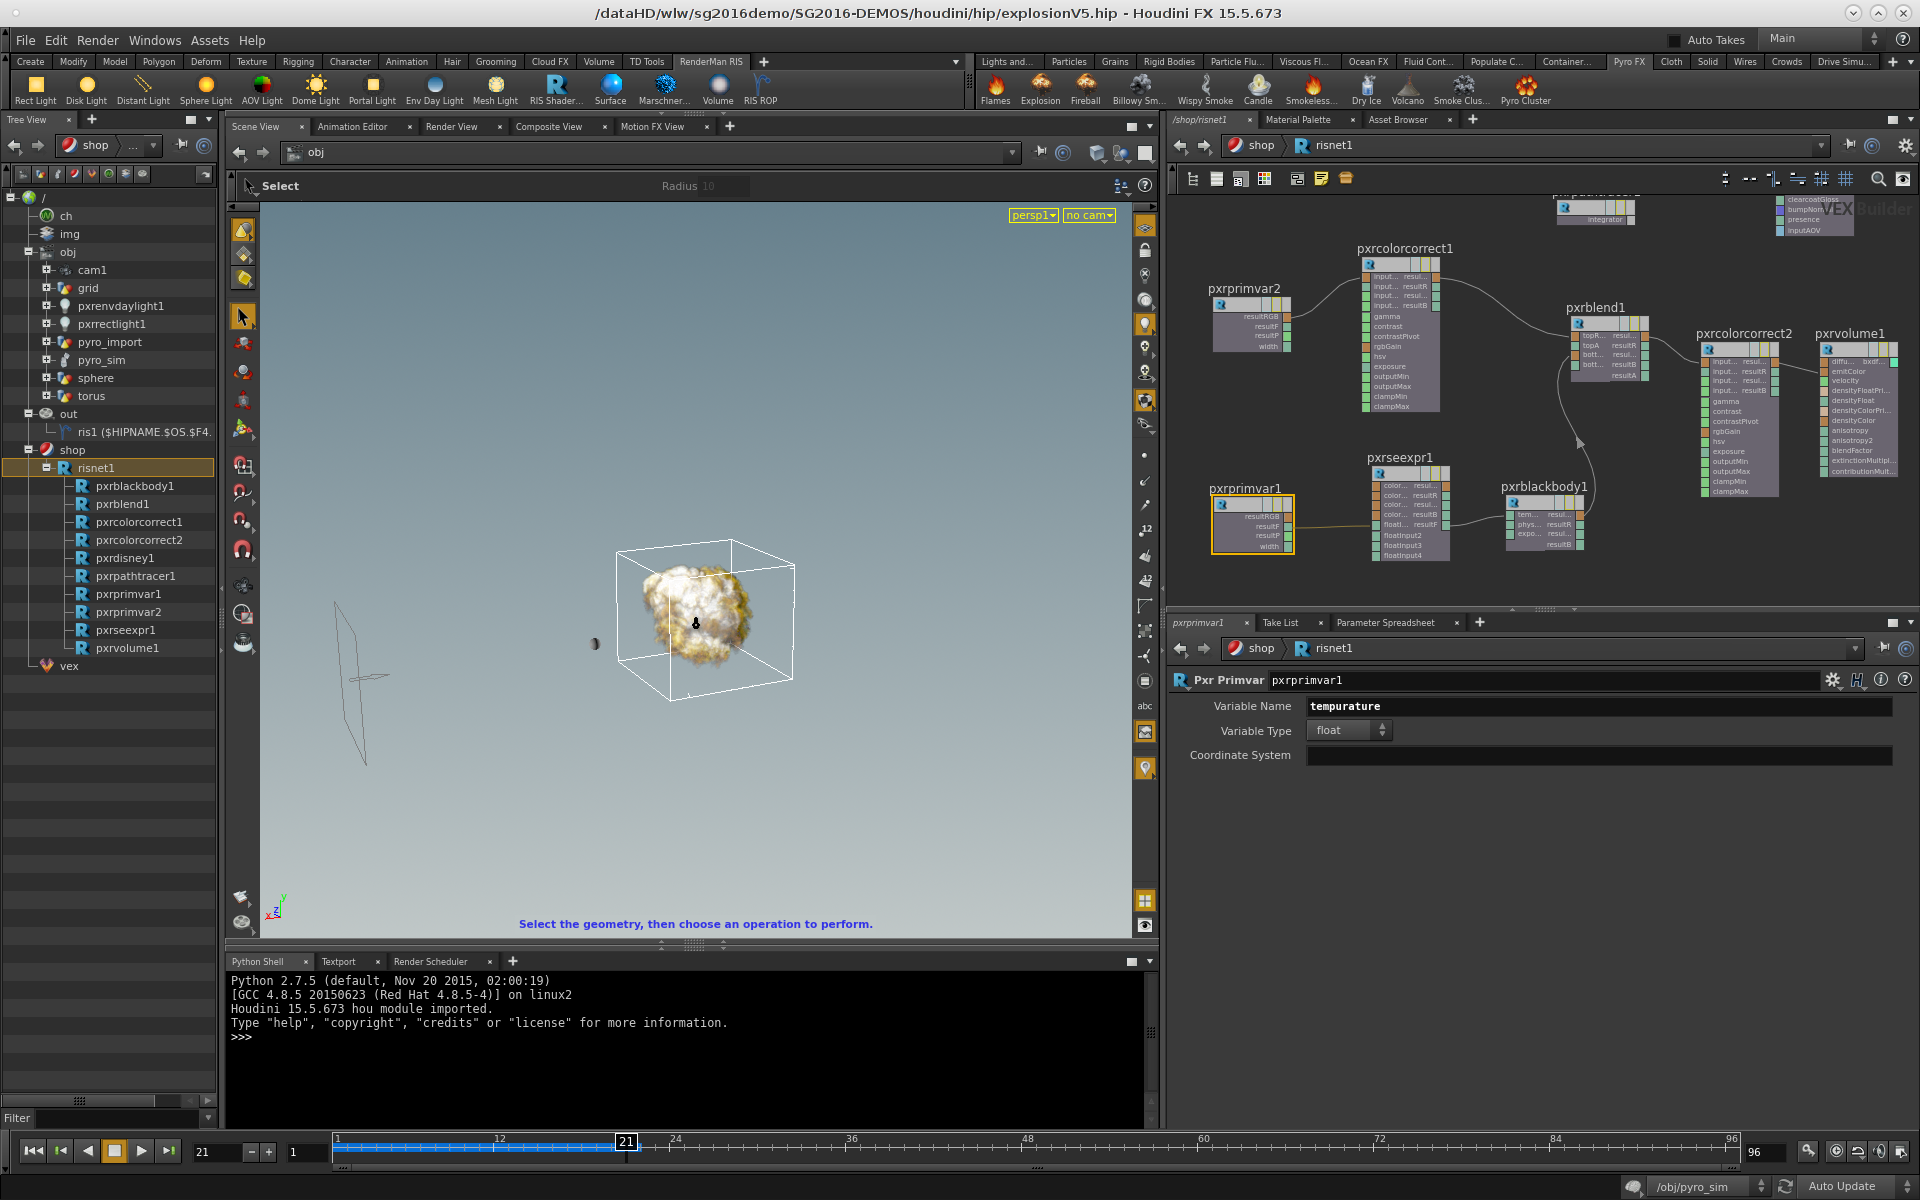

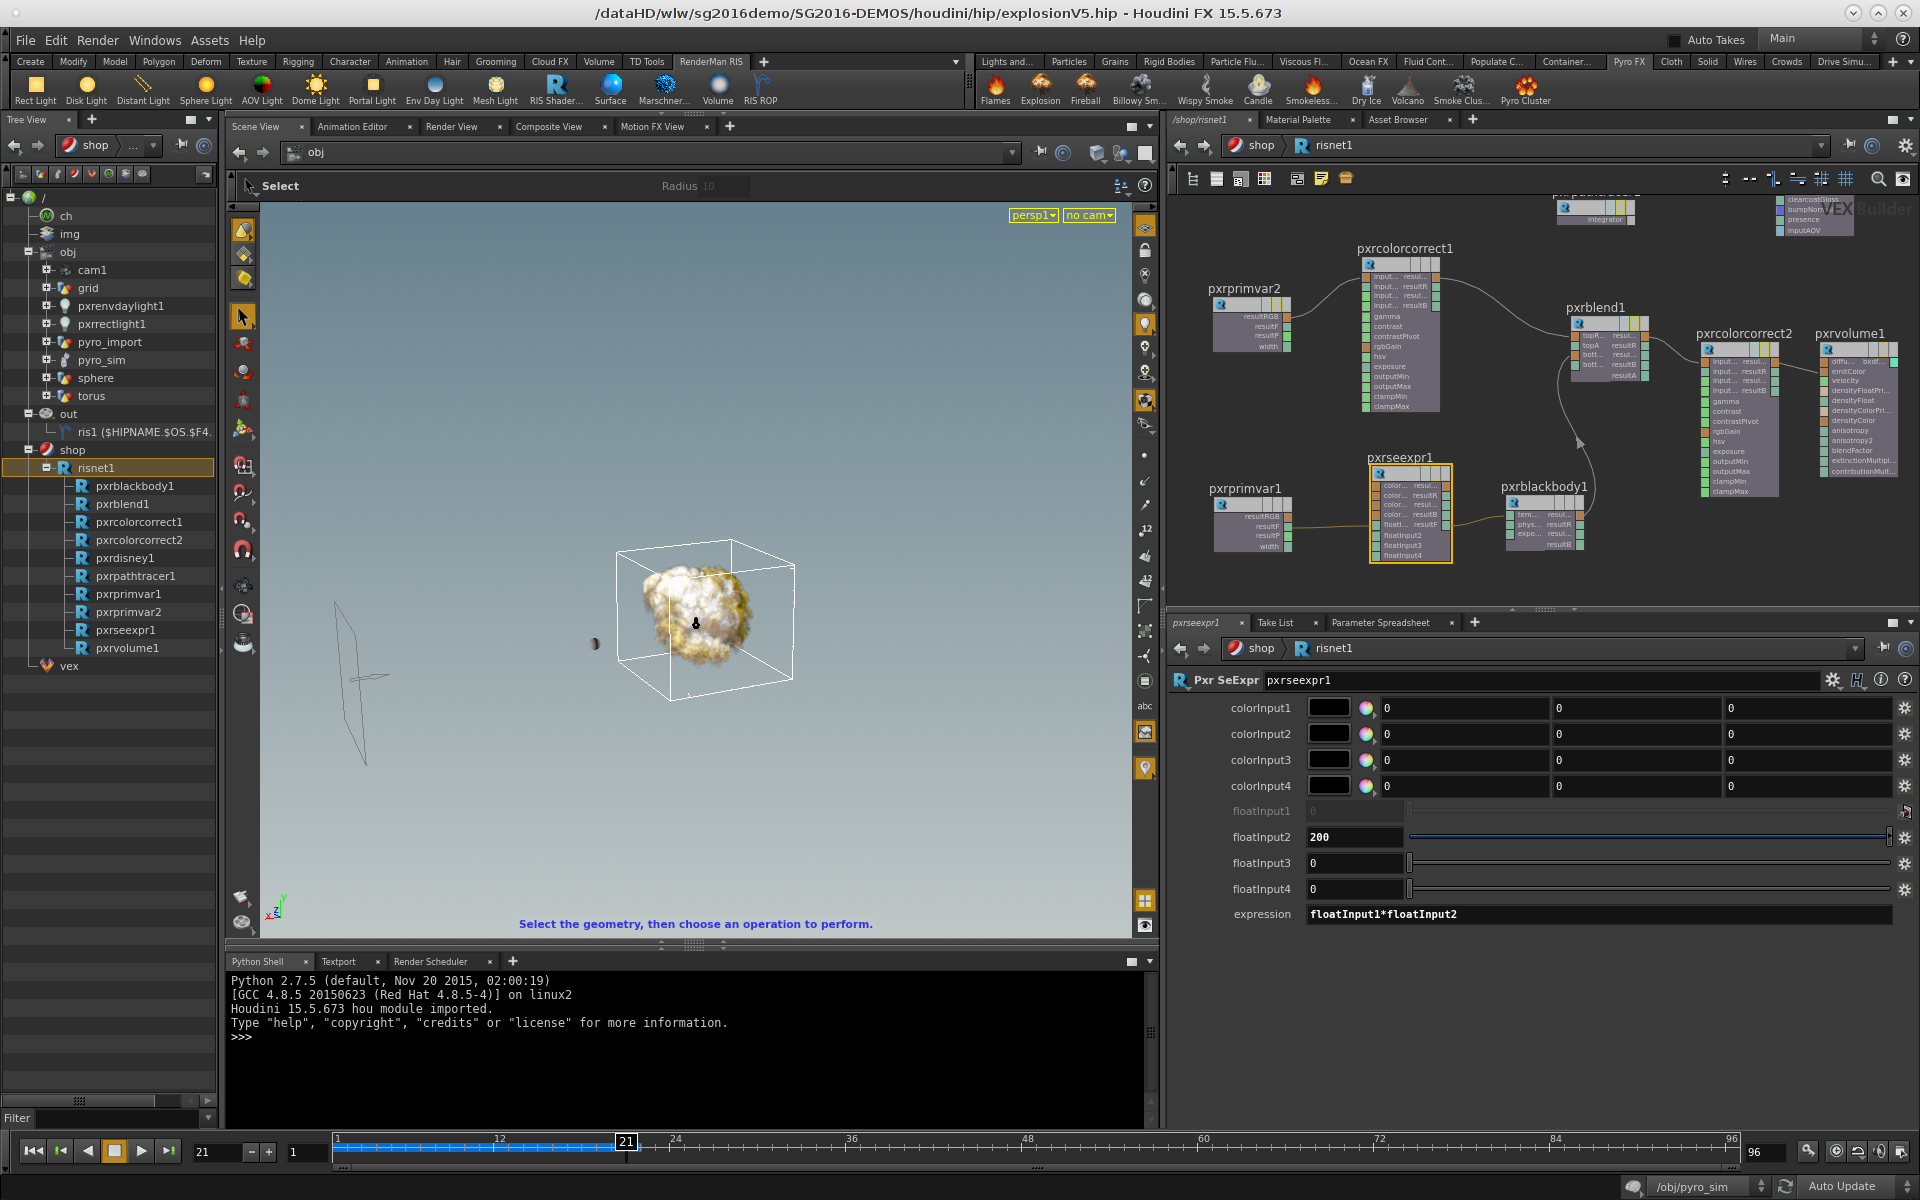
So I want to drive the intensity of the fireball with the "heat" and I want to drive the color with "temperature". So first I add a PxrSeExpr node, to scale the temperature by a factor of 200. We do this so it more closely matches the scale we expect from our physically based PxrBlackBody node, which will take temperature and convert it to a color. We drag a connection from the "resultF" of the PxrPrimVar node, into the "floatInput1" of the PxrSeExpr node, and we set the value of the second float input to a constant value of 200, the expression in the PxrSeExpr node simply multiplies the input PrimVar value by 200 and feeds the resulting floating point output into the PxrBlackBody node.
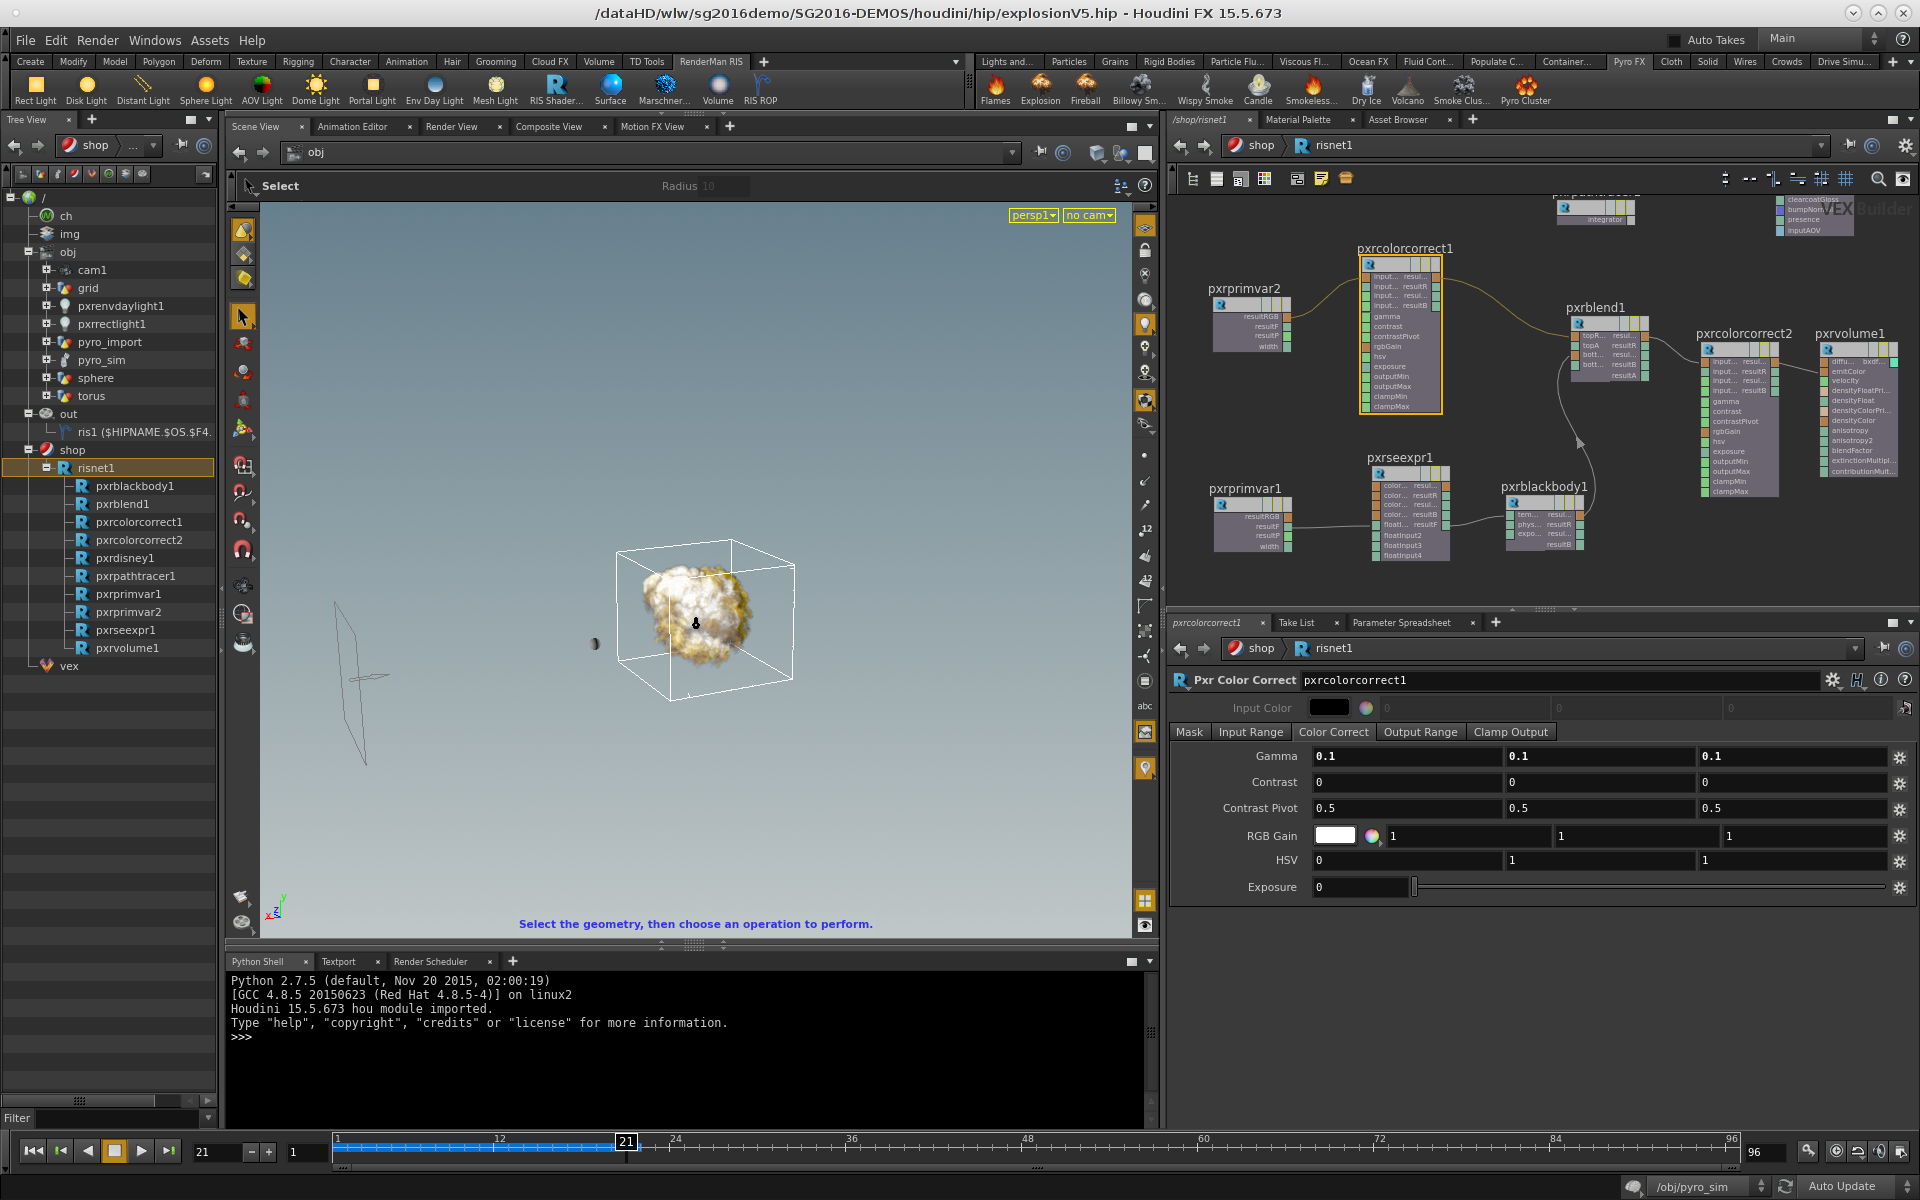
For the "heat" part of the shader, we feed that into a "PxrColorCorrect" node, which will let us apply a gamma curve of .1 to the value to make the intensity less sharp.
Then we blend the heat and the temperature values with a PxrBlend node using multiplication.

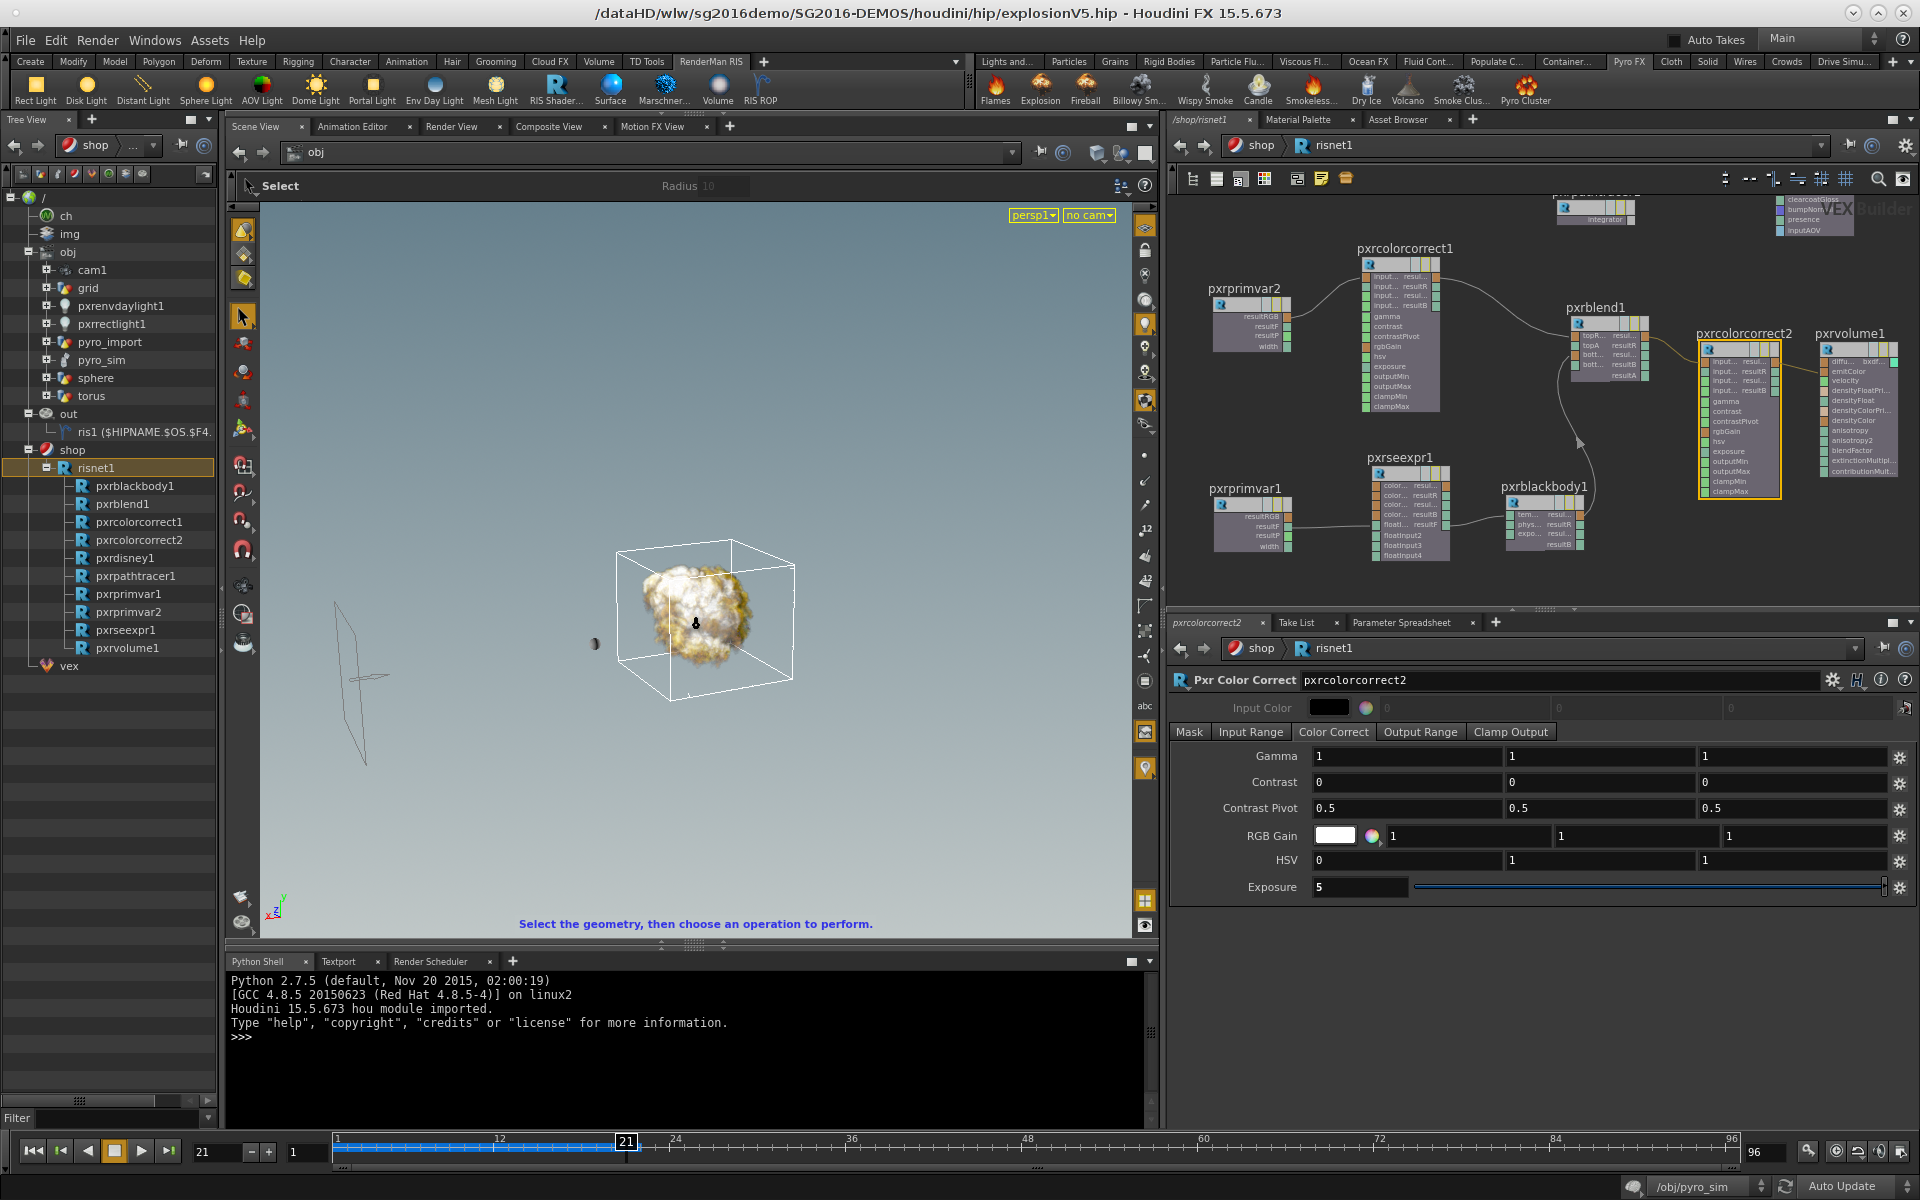
We finally color correct the final values coming out of the pxrblend1 node and feed that into the Emit Color on the PxrVolume shader. Note we first change the Exposure to 5.
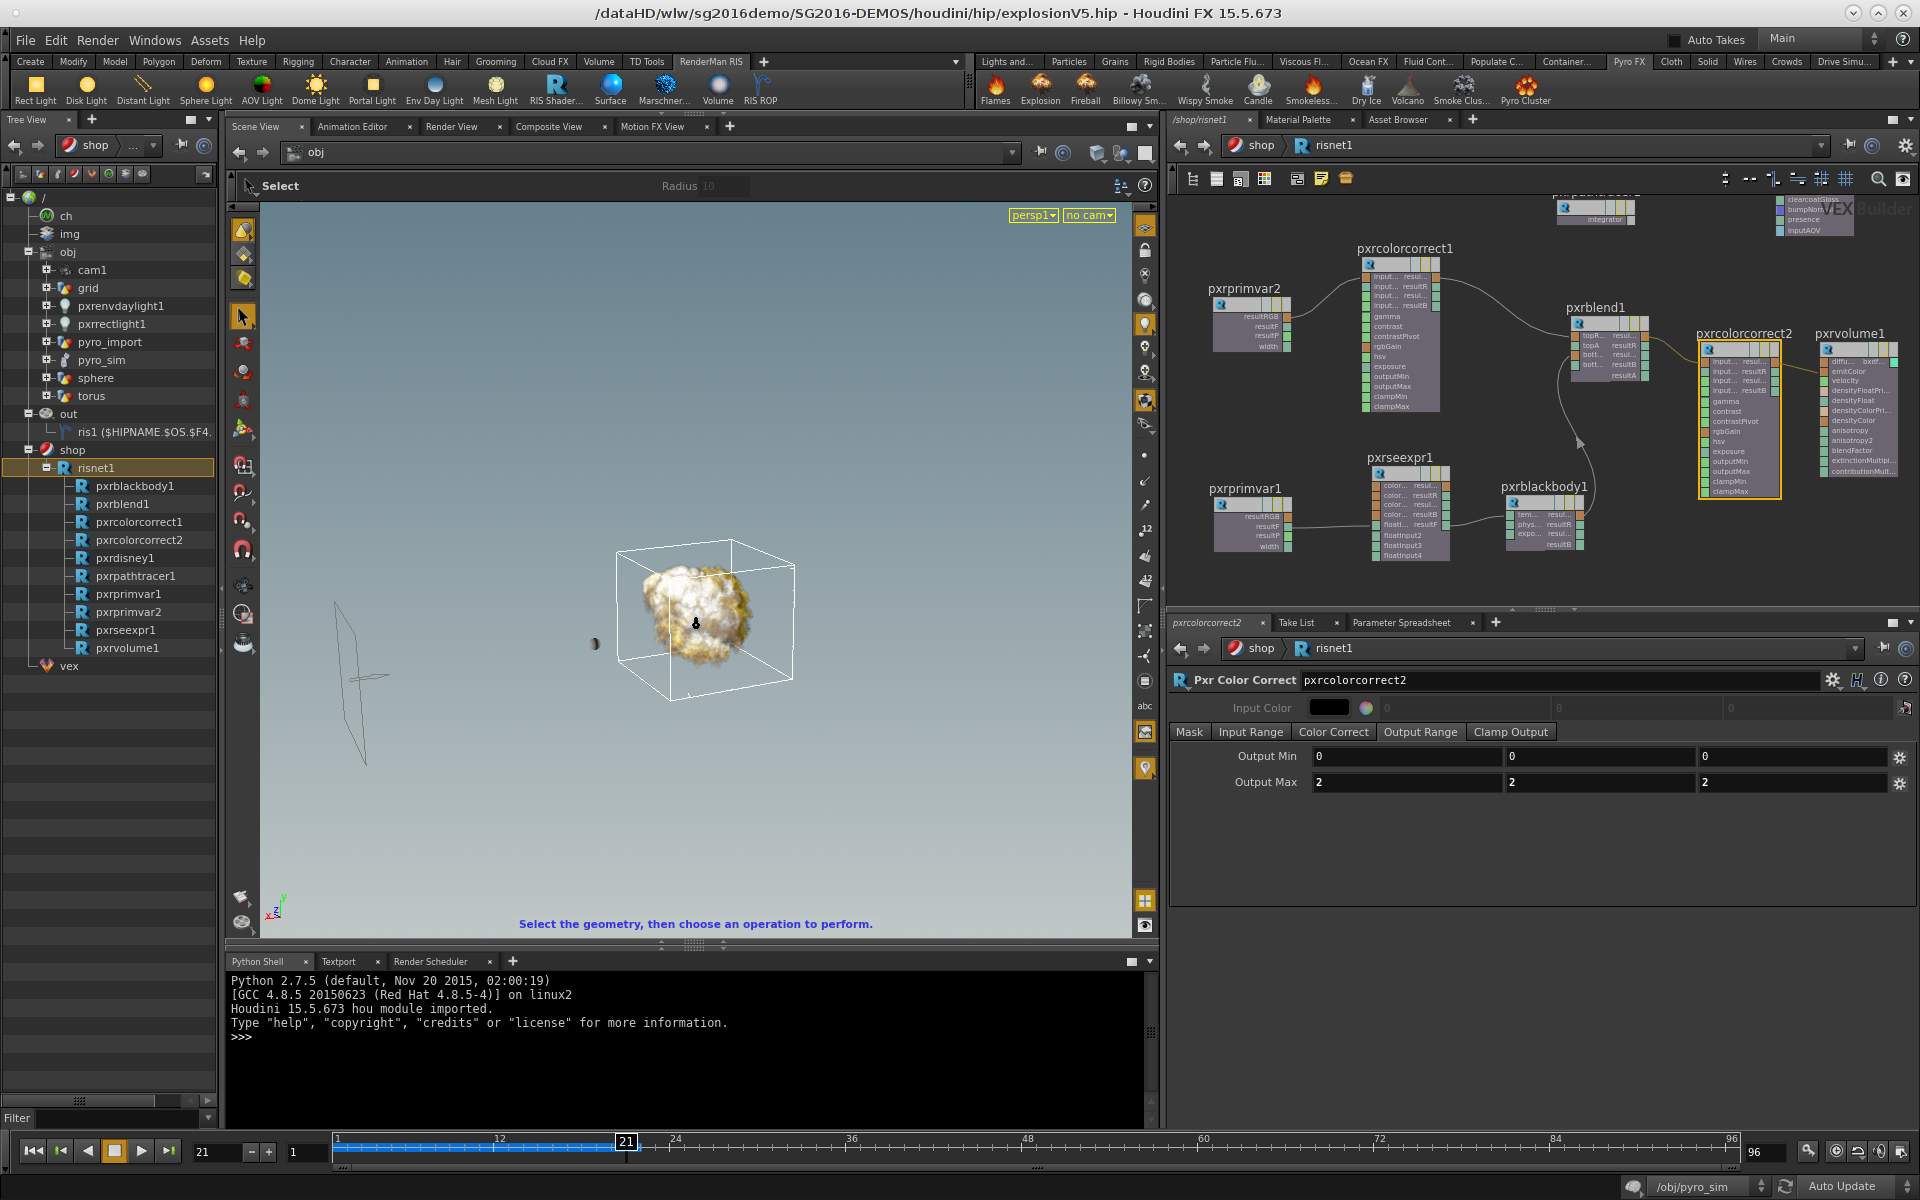
And we also alter the Output Range.
We don't show a screen shot, but on the PxrVolume node, we set the Max Density parameter to 20, to give RenderMan hints that will help it converge faster. We also switched over to the sampling tab, and set Samples to 8 and set the Step Size to 0.1
Set the pyro_import's Material to /shop/risnet1/pxrvolume1 to assign the volume shader.
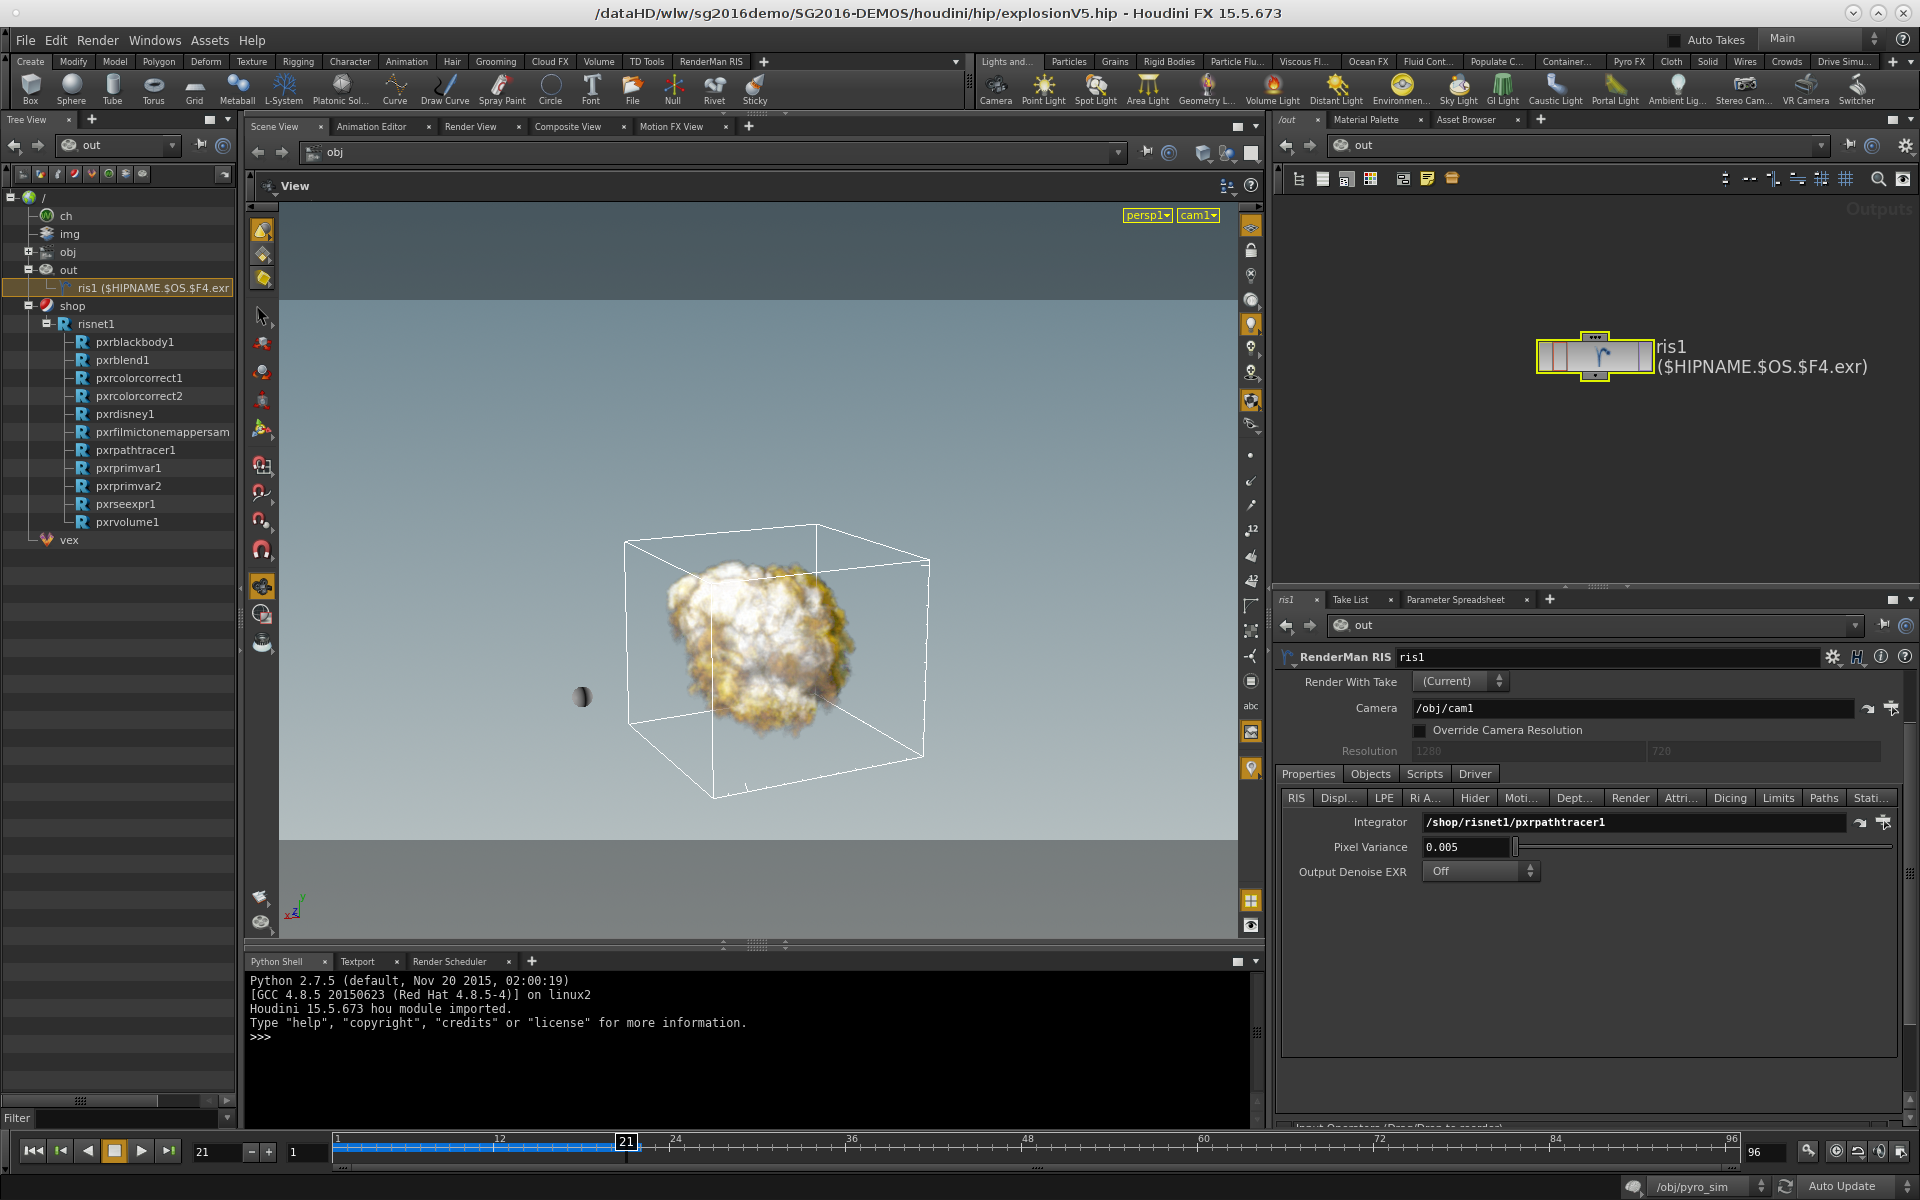
At this point, the scene can finally be rendered out. One can add a camera object by clicking on the Scene View, hitting TAB and typing "Camera". The cam1 node can then be selected with the yellow drop down in the upper right hand corner of the Scene View. By clicking the padlock icon, next to the camera selection menu, the camera can be interactively manipulated to frame the scene for rendering.
Once the camera has been setup, we can switch to the "Render View". There one can select the ris1 ROP and the cam1 camera, and hit the render button. Depending on how far along the volume simulation has advanced, Houdini will take some time generating the scene data before it starts to render, but eventually rendered buckets will start to appear and will continue to refine until the render is finished. It should converge fairly quickly like below.

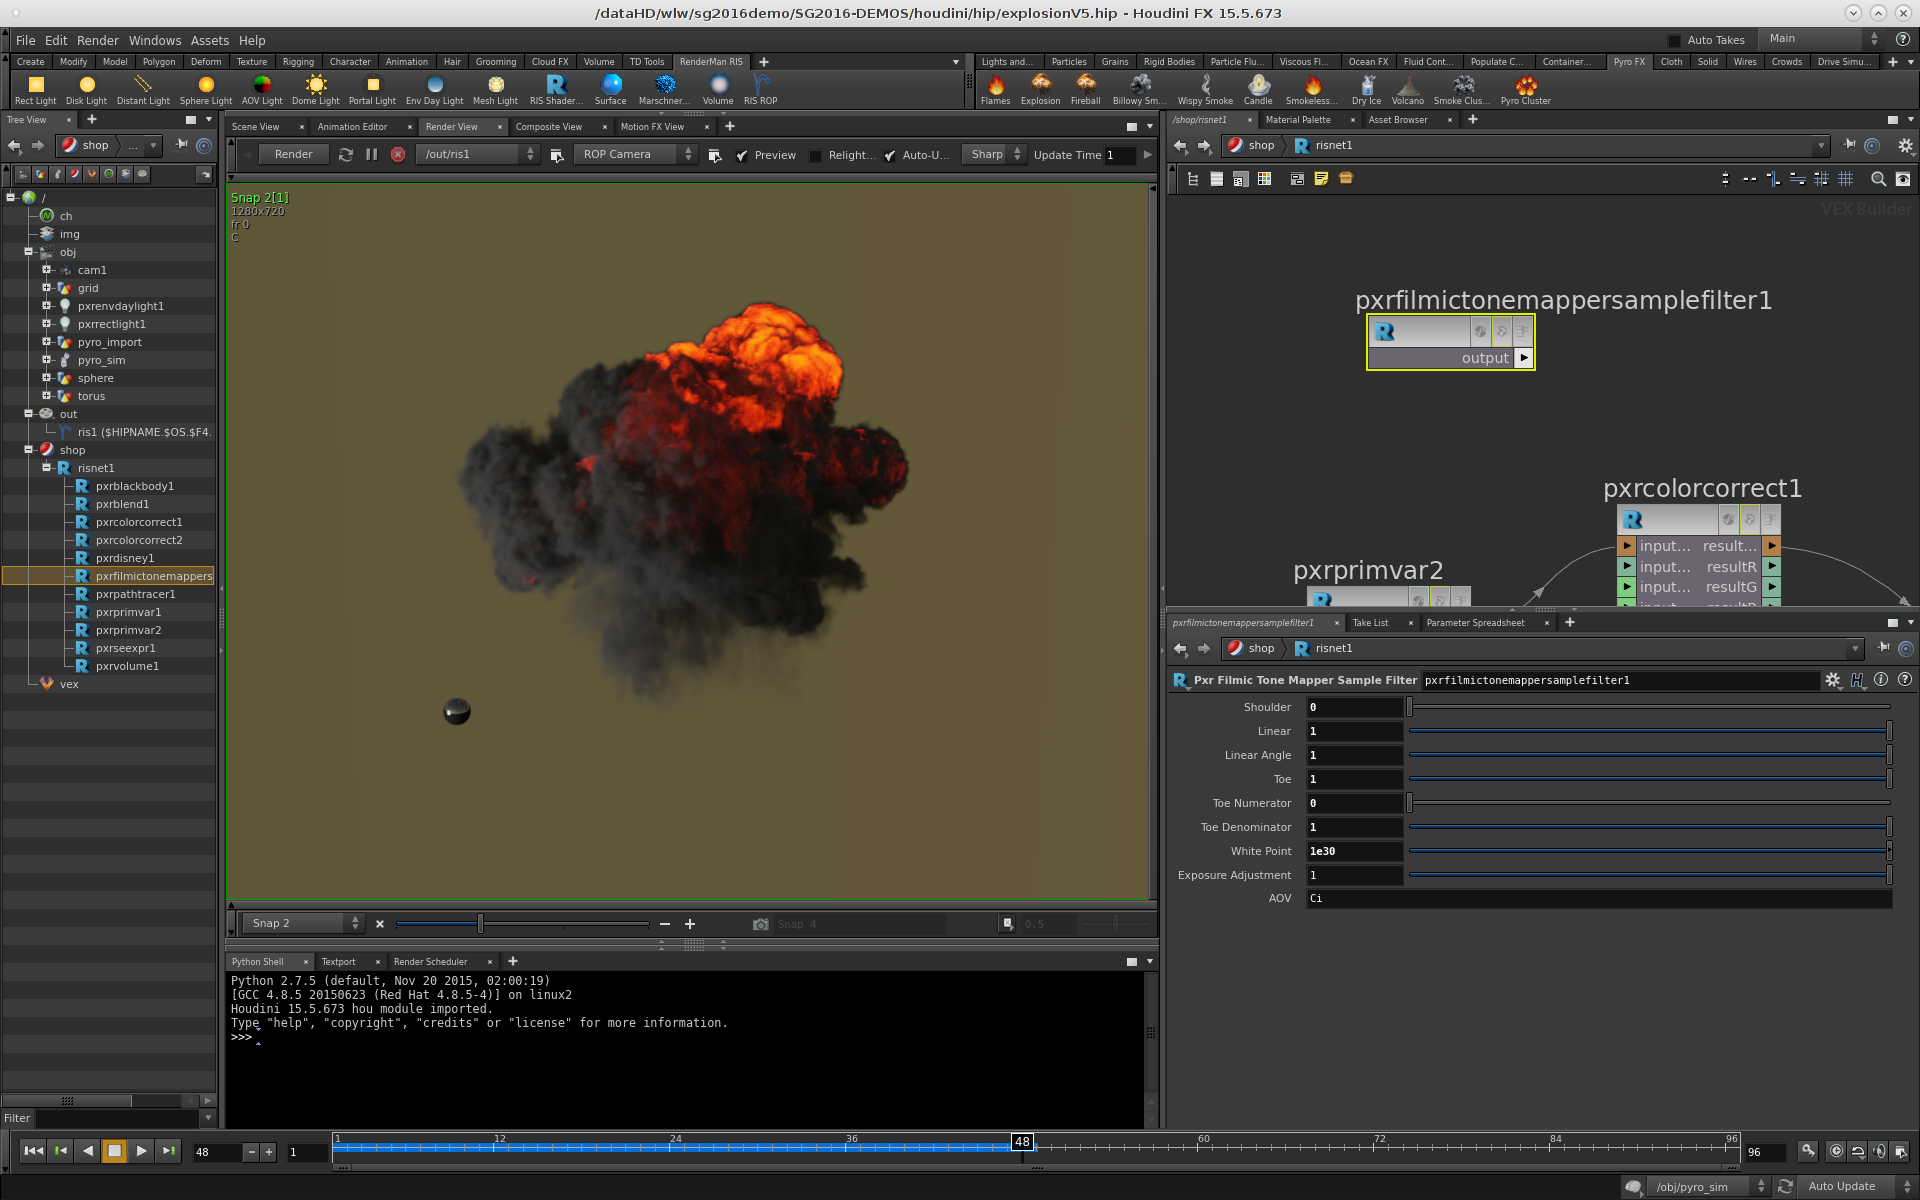
Interestingly enough, we have rendered a High Dynamic Range image, where the intensities in the hot part of the fireball are much brighter than can be represented on a typical computer monitor. In order to get the image to not be blown out, we will want to apply a technique called "Tone Mapping" to the render. Fortunately RenderMan provides very powerful tone mapping operators right out of box. In this case I will show how a tone mapping Sample Imager shader can be applied to get a more appealing looking explosion when displayed on a standard monitor.
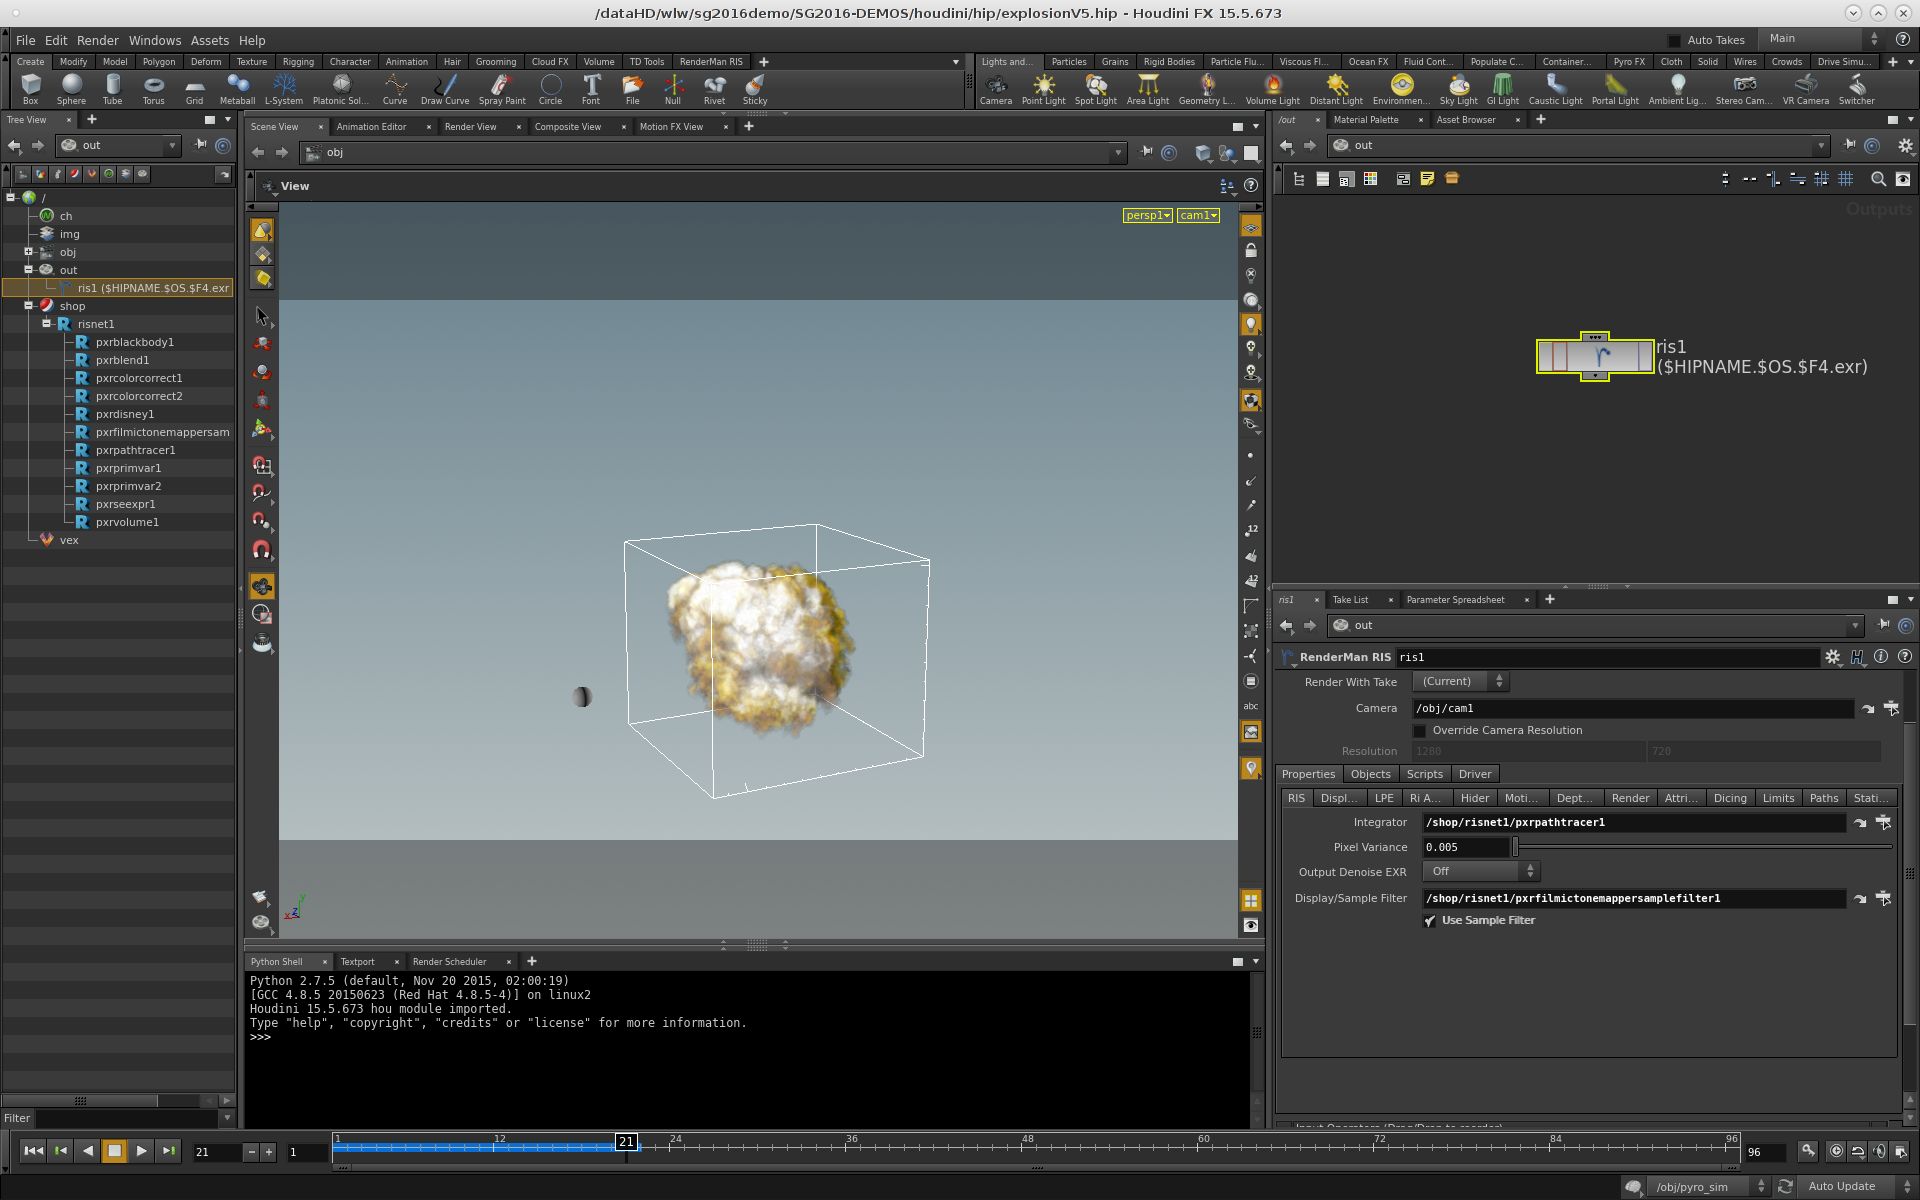
First you want to select the RIS SHOP network, and add a PxrFilmicToneMapperSampleFilter shader to the shader network.
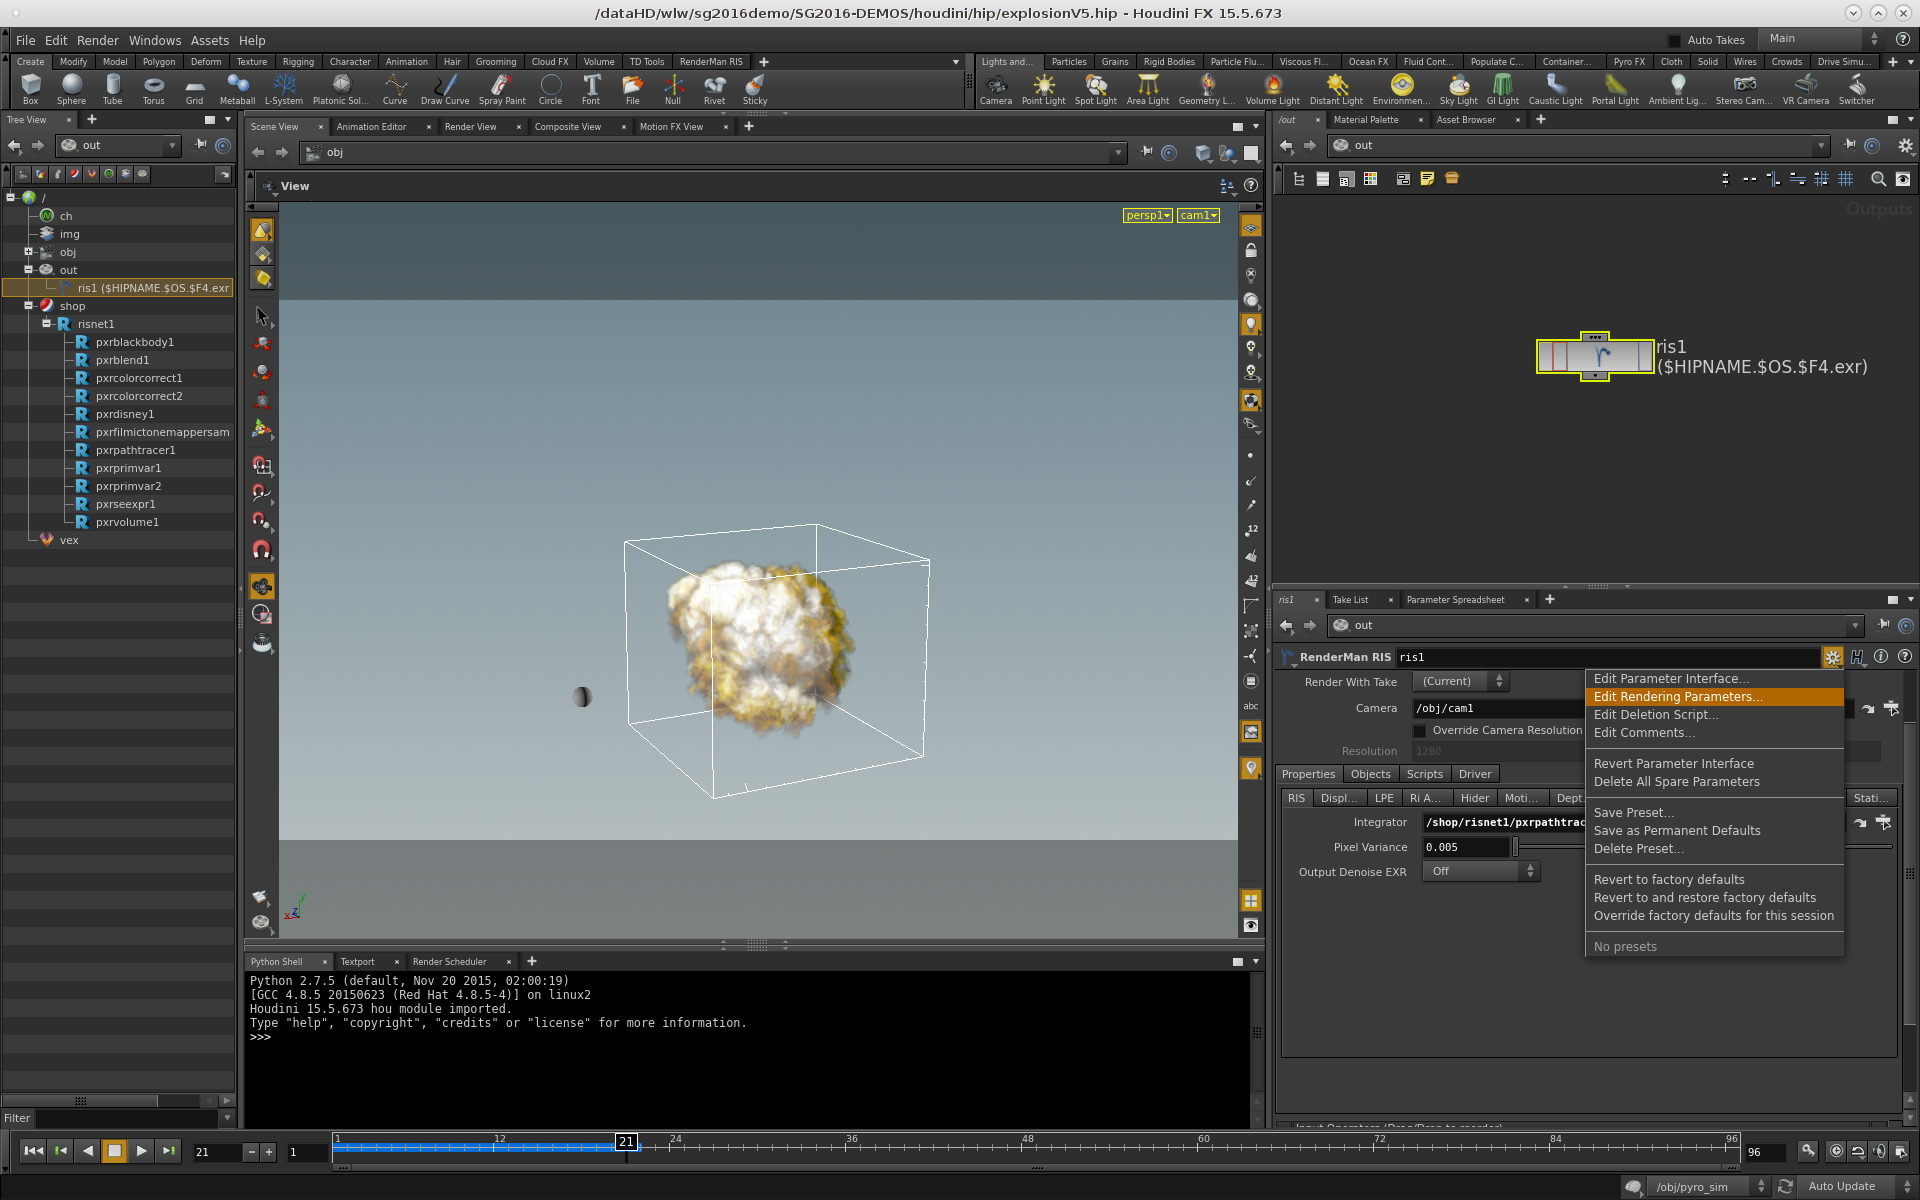
You will want to set the parameters as above to achieve "Reinhardt ToneMapping" which gives a nice appealing contrast curve to the fireball part of the explosion. Then you want to select the RIS ROP and click on the RIS tab like below.
Then we will select the "Gear Icon" next to the "Houdini H" icon. This icon will let us add new user interface elements to the RIS ROP node.
One the "Edit Rendering Parameters" has been selected, type "Sample Filter" in the Filter entry box in the lower left hand corner, then select "Pixar's RenderMan 21.0" and open up the Shaders section. Select both the "Display/Sample Filter" and the "Use Sample Filter" UI elements and DRAG them over to the Existing Parameters section of the RIS tab.
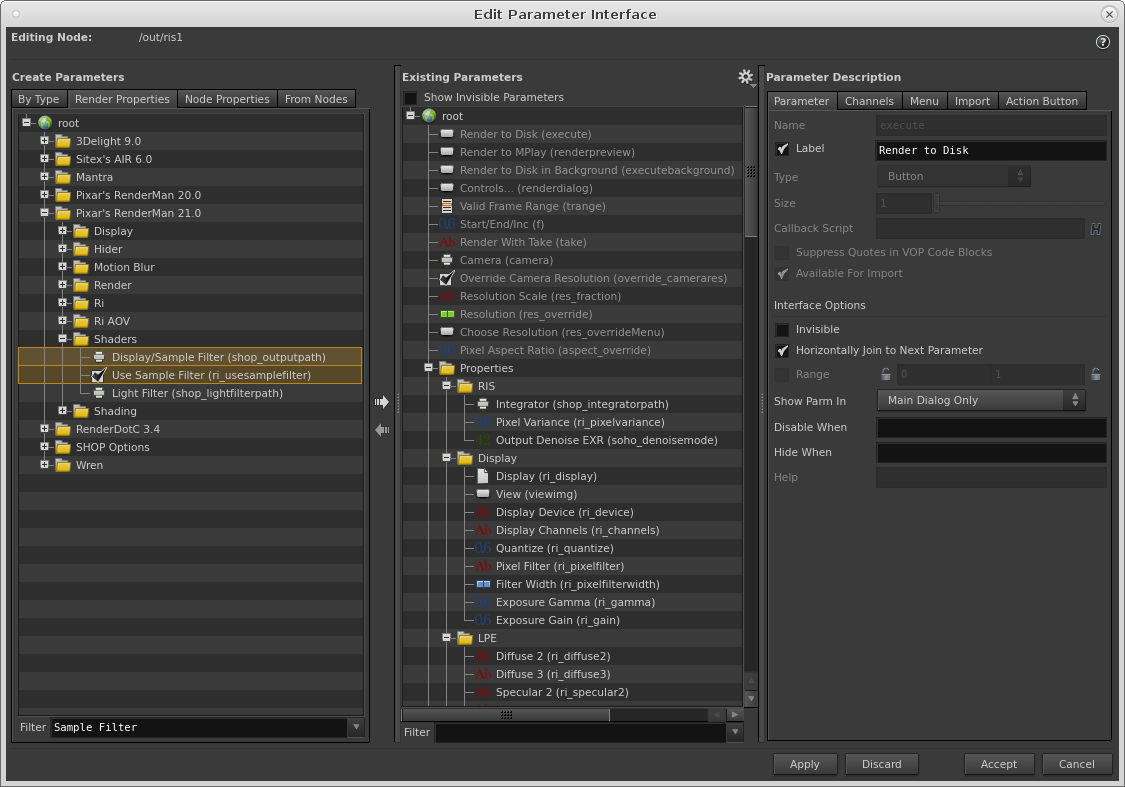
Then these elements will show up in the UI, and you can drag/drop the filmic tone mapper node from the SHOP section of the scene graph and select the button to use the Sample Filter.
Now when rendering the volume, it will not look blown out, and the contrast in the explosion will look more appealing.