Contents
Many studios working with Maya use XGen to create hair and fur. RenderMan for Maya supports rendering XGen hair. What many people don't know, is that you can also render XGen hair through Katana as well.
As a part of RenderMan for Maya, we provide a RenderMan Procedural that you can use to render XGen hair within Katana. This page will give you the details of how you can render XGen via Katana. I will provide the step-by-step instructions for how to get Katana to render XGen. I've also included the files used to generate the image you see at the end of this page. Below is a render of the example we'll be working with.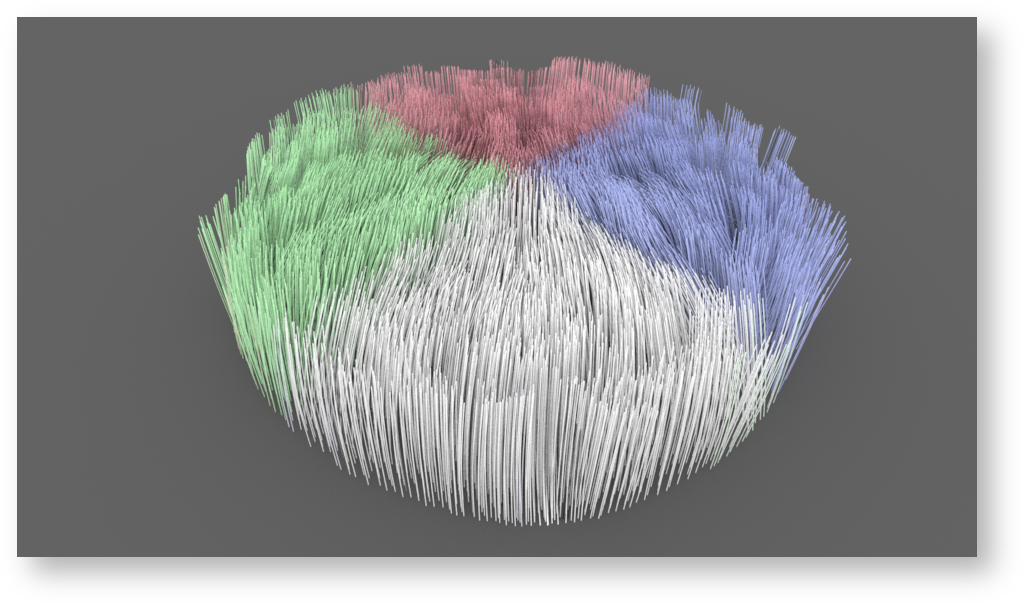
Preparation within Maya
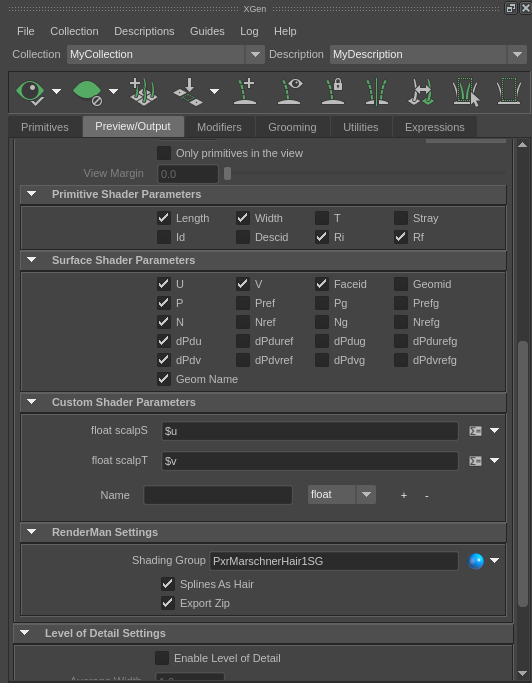
In this example, I have assigned a set of per-hair colors based on the values in a texture. In order for RenderMan to accomplish this, we need to output the scalpS and scalpT primitive variable from XGen. In our shading network, we will reference these primvars as we read the texture. I detail how to do this in the Katana section below. Here is a screen snapshot of how the Preview/Output tab of your XGen attributes should look to enable this:
Important: Update the XGen Preview
No matter how you want to shade the hair, you MUST click the eye icon in the upper-left corner of the XGen window in order to Update the XGen Preview. This will cause XGen to process the information that it needs when RenderMan procedurally calls it during the render.
Process in Katana
Because we provide a RenderMan procedural that interfaces with XGen to dynamically create + pass the curves to RenderMan at render-time, the work to get XGen rendering from Katana centers around adding a RenderMan procedural to your scene and configuring the arguments that it requires.
You will have to perform the following steps:
- Add a "renderer procedural" via a PrimitiveCreate node in the Node Graph
- Set up the arguments to the procedural
- Create your material and assign it to the renderer procedural
Add a "renderer procedural"
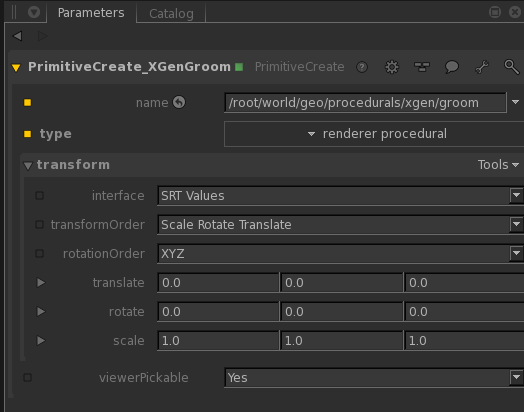
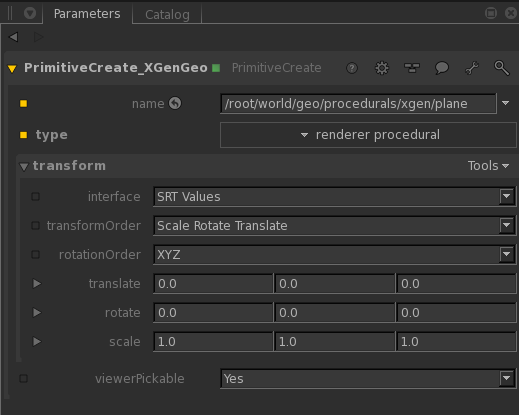
The first step is to add two "renderer procedural" locations to your scene graph via a PrimitiveCreate node in your Node Graph. I have included a screen snapshot of how you should set your parameters. The first tells XGen about your groom, the second tells XGen about the geometry it is associated with. In this example, the groom is spawned from a plane, so I've named the scene graph locations appropriately.
Setting up arguments to the procedural
To set up the procedural properly, you will need to pass in several parameters to make XGen render. We do it in several steps. Two AttributeSet nodes per procedural (for a total of four) and one OpScript node to set some other parameters that XGen requires to be in your scene.
The first set of AttributeSet nodes tell the renderer procedural where the shared library is with the code that knows how to call XGen to do the work of creating your curves or geometry dynamically. You must create one for the groom procedural, and one for the plane procedural. Below are two screen snapshots illustrating what your AttributeSet nodes should look like. Note that the path references RenderMan for Maya, not RenderMan for Katana. This is because we ship the XGen RenderMan procedural as a part of the RenderMan for Maya distribution.


Once you have set the path to the renderer procedural, the next thing to do is to pass parameters to the procedural so it knows which files to look at and how it build the curves. you do this with two more AttributeSet nodes, one for the groom procedural, one for the plane procedural. I have included the two screen snapshots that show this below.
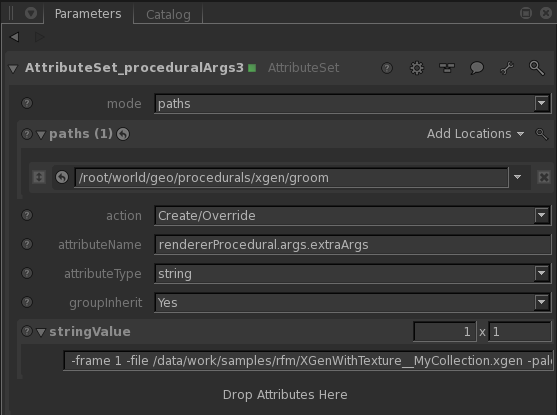
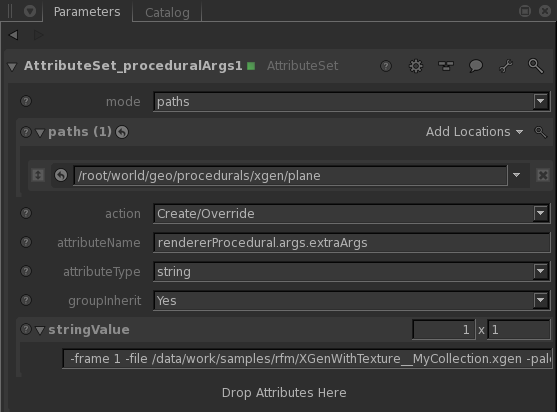
Because the arguments are cut off in the images above, I've also included them below.
For the groom procedural: -frame 1 -file /data/work/samples/rfm/XGenWithTexture__MyCollection.xgen -palette MyCollection -geom /data/work/samples/rfm/XGenWithTexture__MyCollection.abc -patch groom -description MyDescription -fps 24
For the plane procedural: -frame 1 -file /data/work/samples/rfm/XGenWithTexture__MyCollection.xgen -palette MyCollection -geom /data/work/samples/rfm/XGenWithTexture__MyCollection.abc -patch pPlane1 -description MyDescription -fps 24
The parameters you pass here are critical to getting your scene properly rendered. You must:
- Make sure that the frame number is correct – in a production Katana setup, you will most likely drive this with an expression
- Make sure that the paths tot he .xgen and .abc files are correct. If you don't have them, make sure you have clicked the "Update the XGen Preview" button in the XGen window within Maya
- The -palette argument needs to reference your XGen collection
- The -description argument needs to reference the XGen description that contains your groom
- The -patch for the plane procedural must match the name of the node in Maya that you spawned your XGen groom from
Autodesk's RenderMan DSO page of the XGen Technical Documentation documents all of the arguments that the procedural supports.
After you have added all of your AttributeSet nodes, there is still more to do. We must add an OpScript node that sets a few more parameters that XGen must have in order to do its work. I have included a screen snapshot of that node below.
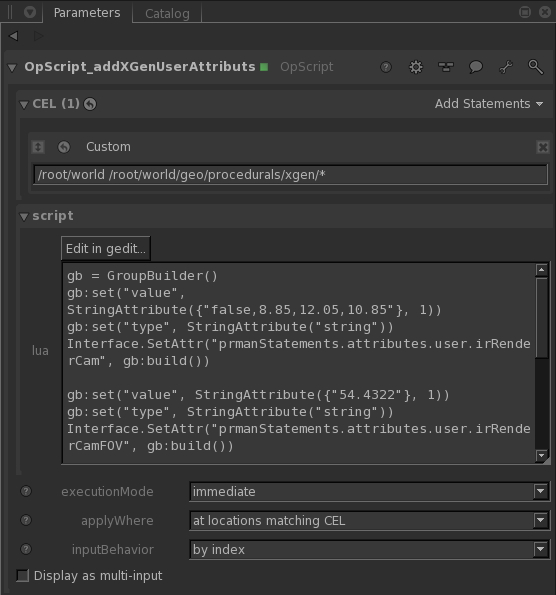
And here is the code within the node:
gb = GroupBuilder()
gb:set("value", StringAttribute({"false,8.85,12.05,10.85"}, 1))
gb:set("type", StringAttribute("string"))
Interface.SetAttr("prmanStatements.attributes.user.irRenderCam", gb:build())

gb:set("value", StringAttribute({"54.4322"}, 1))
gb:set("type", StringAttribute("string"))
Interface.SetAttr("prmanStatements.attributes.user.irRenderCamFOV", gb:build())

gb:set("value", StringAttribute({"0.745476,2.77556e-17,-0.666532,0,-0.469152,0.710328,-0.524718,0,0.473457,0.70387,0.529533,0,8.85,12.05,10.85,1"}, 1))
gb:set("type", StringAttribute("string"))
Interface.SetAttr("prmanStatements.attributes.user.irRenderCamXform", gb:build())

gb:set("value", StringAttribute({"1"}, 1))
gb:set("type", StringAttribute("string"))
Interface.SetAttr("prmanStatements.attributes.user.irRenderCamRatio", gb:build())
These parameters are fully documented by Autodesk in their RenderMan DSO page of the XGen Technical Documentation.
There are a few things you need to be especially aware of:
- The field of view you tell XGen about must match the field of view of the camera you use in Katana
- The irRenderCam attribute must match the position of the camera that you use in Katana
- The irRenderCamXForm must match the camera matrix that you use in Katana.
In a production scene, you will most likely use a script or other programmatic way of making sure that all of these parameters match your camera because it is error-prone to do so manually.
Shading your XGen groom
Once you have your procedurals their arguments configured, the next thing to do is to add shading to your groom. As I mentioned above, we are going to assign a different color to each hair based on a texture. To do this, we told XGen to output the scalpS and scalpT primitive variable as a part of its work. We will use this primitive variable to shade the curves that are a part of our groom.
Below you will find the node graph that I used to generate the material.
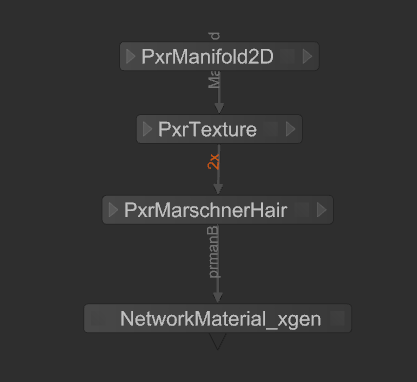
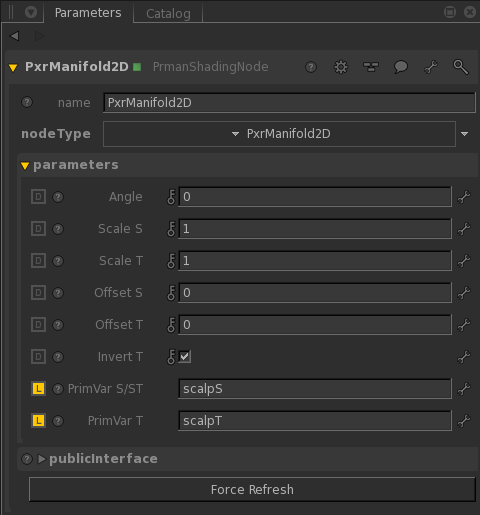
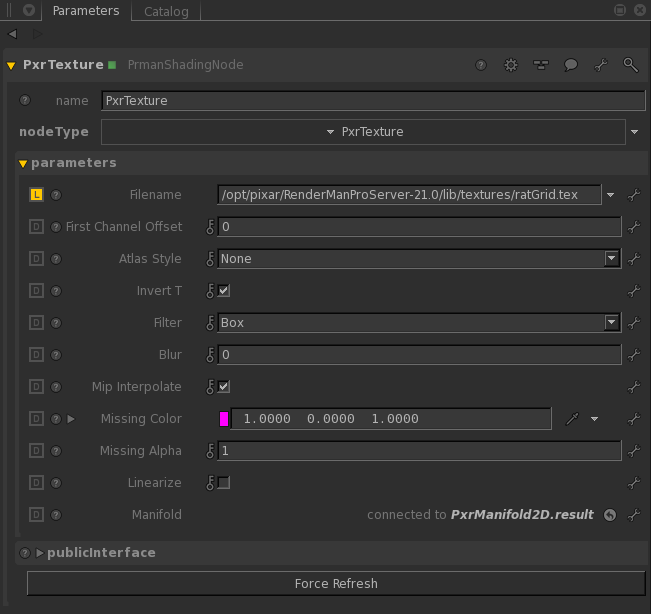
As I mentioned above, the key to making this particular material work is to pull the scalpS and scalpT primitive variables from the curves that XGen emits to RenderMan and use those as the basis for indexing the texture. The PxrManifold2D node does this because it is wired into the PxrTexture node. Below I have included screen snapshots of both the PxrManifold2D an PxrTexture nodes.
The final piece is to wire the PxrTexture into the diffuse and transmit specular colors of the PxrMarschnerHair Bxdf.

Sample Files
 XGenWithTexture.21__MyCollection.abcXGenWithTexture.21__MyCollection.xgenXGenWithTexture.21.maratGrid.texXGenInKatana.katana
Other References
RenderMan DSO page of the XGen Technical Documentation
Also see the Katana User Guide from The Foundry, accessible via the Help menu within Katana.