...
| Info |
|---|
If you're having trouble with image quality instead, take a look at the page on Sampling Modes and Reducing Noise. |
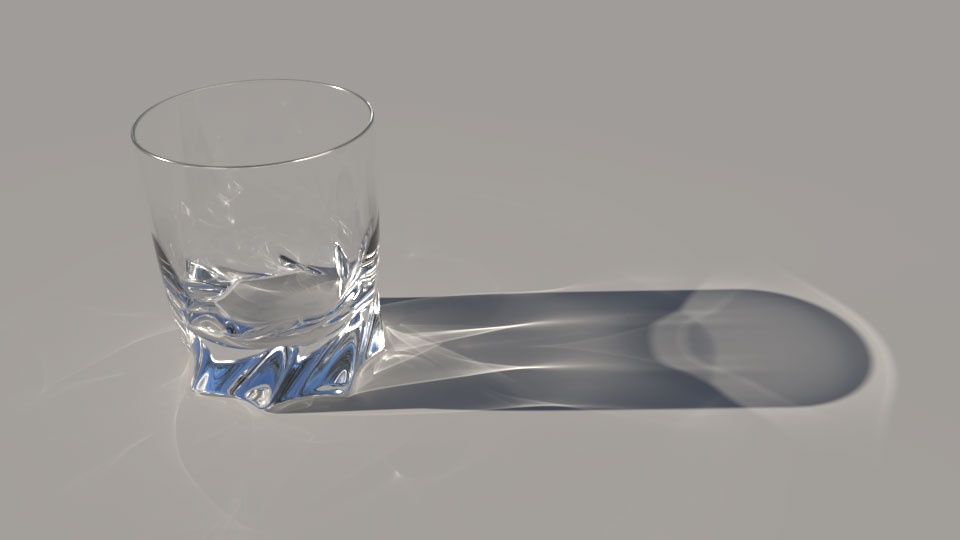
Glass Scene courtesy of Julien Duval
...
| Note |
|---|
The PxrUnified Integrator does not support separate diffuse and specular depth and these are ignored. Instead it has a unified max depth control. |
There are two main parameters per-object for deciding how much bounce will happen before a ray is terminated and the result is stored.
- Max Specular Depth - This is how many times a ray will reflect or refract for an object with a specular material lobe. Think of a mirror and how it reflects the light that reaches it instead of being absorbed.
- Max Diffuse Depth - This is how many times a ray will bounce off of objects with a diffuse lobe. Think of this as color bleeding from nearby objects.
- There is also a maximum combination of the two controlled by the integrator explained at the bottom.
| Note |
|---|
Why are they separate?
It's possible that you only need higher depths of one interaction, specular or diffuse. So rather than trace more rays of a type that may be unnecessary visually, the user can decide which needs to travel further. Below are some examples. We'll begin with Diffuse Depth
...
Below we have a simple scene that represents a long diffuse box-like trench with mirrors on either end and some red spheres. We'll set the Specular Depth to zero to avoid it completely. Max Diffuse Depth is set to zero as well.
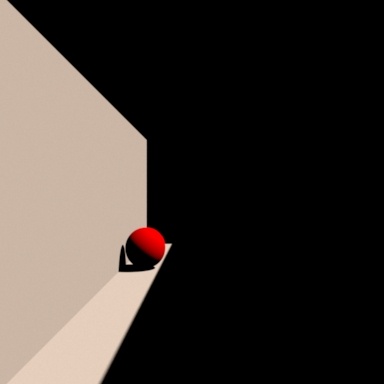
There's not a lot to see. This is direct lighting only at this depth (0 additional bounces). In fact, we can confirm this by using the PxrDirectLighting Integrator and see we get the exact same image. So below we'll increase just the Max Diffuse Depth Parameter to get a better look at the scene.
...
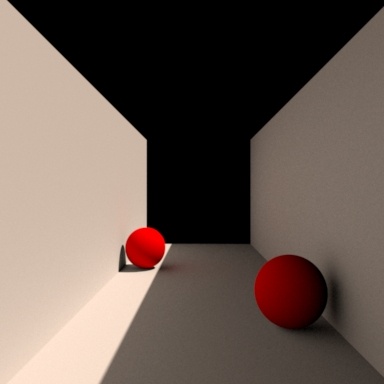
Notice how the image gets brighter with the additional bounces but even as the bounces creep higher and higher, the change becomes more and more subtle as energy is eventually absorbed. For this reason, most animation, and visual effects work is only interested in one to two bounces at most. Architectural and product renderings may require much more than that.
Max Specular Depth
Remember the explanation of the scene, there are mirrors at either end of the trench. Rendering the scene with Specular Depth zero and Diffuse Depth one gives us the below image. Doesn't appear to be any reflection happening.
There's not going to be any visible reflections or refractions at this setting, so we'll increase the amount below.
...
| Note |
|---|
If using the PxrPathTracer for such scenes you can keep your trace depth to lower numbers because of how RenderMan tracks each bounce. This is counted differently in the PxrVCM and PxrUnified integrators and may require higher trace depths in those integrators for a similar look. This may change in a future version. |
Below we use the PxrVCM integrator to show the results of raising the trace depths on a glass, beginning with a trace depth of zero for both diffuse and specular bounces. Trace depth count is handled differently in RenderMan's bidirectional integrators.
As you can tell from the progression, specular trace depth makes a lot of difference in the look of the scene. As the trace depth increases, more light is collected from beyond the next glass surface. The diagram below explains how each segment of the path may look.
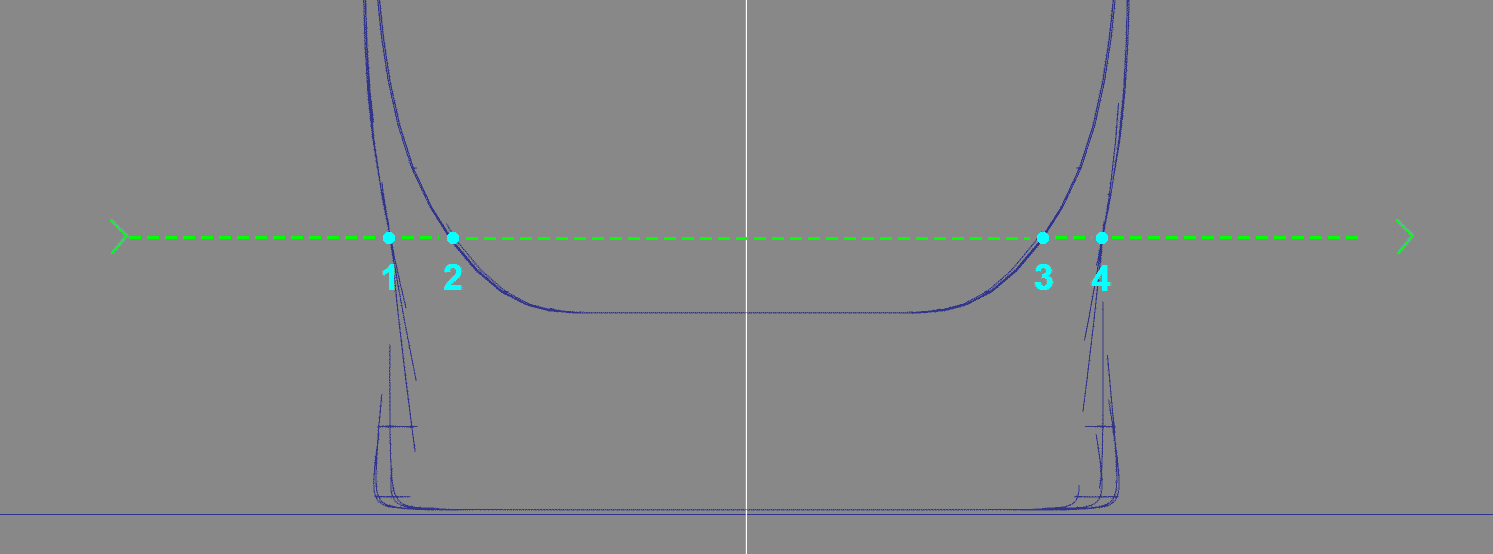
You'll notice in the animation that the glass becomes truly transparent at depth four. If you look at the above illustration you'll notice the cross section of the correctly modeled glass has 4 surfaces to pass through before exiting. Since the first intersection is handled by the camera ray (corresponds to the 1 on the illustration) you would need 4 more to pass through 2, 3, and 4 and still have depth to exit the glass. This is what makes the glass transparent where we can see the ground on the other side.
...
Using the PxrVCM integrator and Trace Light Paths in the PxrDomeLight, you'd expect to see caustic light patterns off of and through the glass. But with the Max Diffuse Depth at zero, there's no collection of diffuse lighting from the glass at all. Below the diffuse depth is increased for each render by one and you can see quite a dramatic difference in the amount of light collected. You may also notice that this is an artificial way to limit caustics in your scene if they become time-consuming or distracting visually.
| Anchor | ||||
|---|---|---|---|---|
|
Maximum trace levels.
...
For the PxrVCM and PxrUnified there's a more unified Max Path Length that defines all paths to and from the light allowed in a single connected path. The maximum is 20 before it terminates in PxrVCM.
Per object trace depths.
Objects in a scene may be given local overrides to increase or decrease their trace depth settings. These are Max Diffuse Depth and Max Specular Depth. When using these attributes be sure the global Max Path Length as described above is sufficient or else it may stop tracing too soon if these local controls are raised too high. This does not apply to PxrUnified as it ignores Diffuse and Specular trace depth separation.