Contents
Rendering in RenderMan is accomplished using the ROP node in Houdini. If you choose the shelf button, we will create and connect the common choices for rendering including using the PxrPathTracer Integrator.
There are many options for rendering and some are obscure or for special circumstances. This document aims to help you navigate the differences as simply as possible.
Standard Controls
Buttons
- Render - Initiate an Interactive Render to RenderMan
- Stop - Cancel or End the interactive render (you may also stop the render from "it")
- Render in Background - Render while keeping the Houdini UI available
- Dump Rib - Export a RIB file (defaults to the location of your .hip scene file) The default is Binary to save space. You may change this in the RIB Tab
- Controls... - Additional options for rendering like quality overrides and frame settings
Common Choices
- Valid Frame Range - Choose the frames to render, not valid for interactive rendering
- Start/End/Inc - The frame range and increments, accepts floating point values
- Render With Take - Which versioning to use
- Camera - Path to the chosen camera from which to render. This must have a camera specified. If using our shelf button, we will populate the field
- Override Camera Resolution - Change the render resolution from the one specified in the camera settings
Options
Common Tab
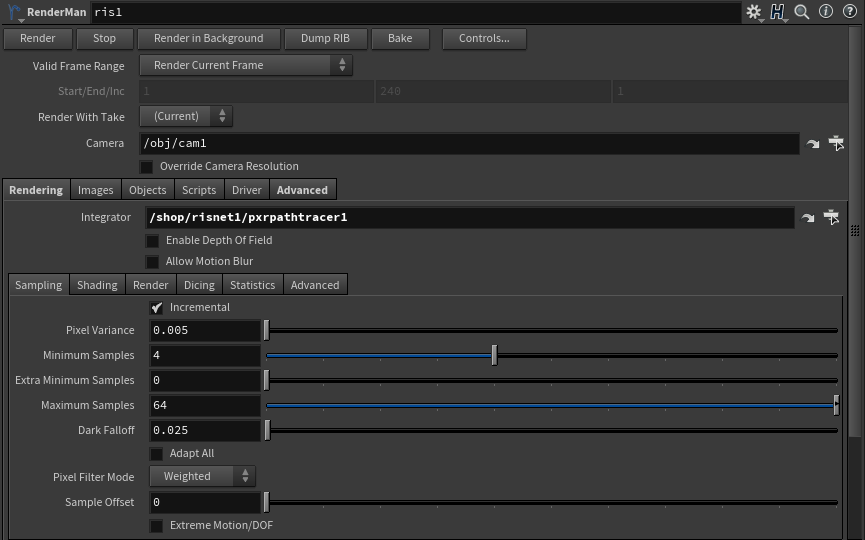
- Pixel Variance - This is your main quality control for the render. Lower values are higher quality. Typical production settings are 0.005 to 0.001 (extreme high quality). 0.01 is reasonable good to medium quality depending on scene complexity
- Hider
- Raytrace Hider - This is used to render an image
- Bake Hider - This is used to invoke pattern baking
- Incremental - Render frame passes instead of bucket/tile based rendering. Preferred for most rendering choices including batched and checkpointed renders
- Sampling
- Minimum Samples - The lowest number of sample required per-pixel. A value of 0 takes the nearest square root of the Maximum Samples setting. Higher numbers may be necessary to capture small image features like small particles or thin hair
- Extra Minimum Samples - If a pixel fails the variance test, this value forces a specified number of additional samples before testing the variance again. At 0 it defaults to the same number as the Minimum Samples
- Maximum Samples - The most samples we will take before stopping samples on a pixel. Higher values may be necessary when rendering depth of field, motion blur, or other noisy effects
- Dark Falloff - If an area of the image is darker than this threshold, stop sampling since it won't be visible or perceived
- Adapt All - Test all the AOVs against the variance threshold. This means your AOVs are more likely to be noise-free but can significantly increase render times as some AOVs may trigger more samples without much gain to image quality