Contents
Overview
Starting with 23.3, RenderMan can bake integrator results to images or points clouds.
Potential applications include transferring pre-computed global illumination for real-time realtime playback or optimising render times for large static assets.
Limitations
The current implementation comes with a number of important limitations:
- Baking is non-incremental.
- This limitation excludes integrators that can not be setup to render in a single increment, like PxrVCM.
- PxrPathTracer, PxrDirectLighting, PxrOcclusion and PxrVisualizer are compatible.
- Baking is incompatible with curves.
- Each baking display can use at most one RGBA display channel.
- Use multiple display drivers to output multiple signals.
- All images are baked at the same resolution.
- No breakpointing / stop-and-resume during baking
- There is no separate irradiance output
As a workaround, we suggest baking illumination and albedo: dividing the illumination by the albedo gives the irradiance.
2D Baking
Image naming
The name(s) of the baked image file(s) is/are specified with a Display line. Baking uses the same display drivers as raytrace rendering, including openexr, tiff, png, and many more.
Usually one will want to bake to a separate image for each object. This can be done by encoding the Display filename with string “wildcards” that get substituted with actual filenames depending on Attributes on the objects. For example:
Display "<user:filename>.exr" "openexr" "rgb"
In this case, the wildcard <user:filename> is replaced by the corresponding user attribute specified for each object. For example:
Attribute "user" "string filename" "box1_global"
which then gets substituted into the Display filename. Alternatively, the filename can be specified with other attributes such as <identifier:name>. No image will be baked for an object if the wildcard substitution fails or if the filename for that object is the empty string.
Image resolution
The resolution of the baked 2D images is determined by the standard Format description. For example:
Format 256 256 1
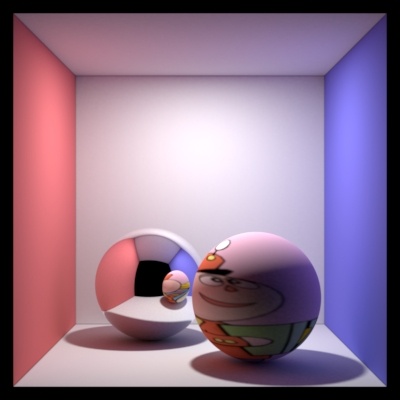
As an example, we’ll bake 2D textures of global illumination in a Cornell box with two spheres. The box consists of five squares, each with a separate texture. One of the two spheres is purely specular so we do not bake on that. Figure 2(left) shows the baked images for the five faces of the box and for the diffuse sphere.
After baking is done, the next step is to run ‘txmake’ on each image to create a MIP-mapped cache-friendly texture in .tex format. These textures can then be read during rendering using e.g. OSL’s texture() function. Figure 2(right) shows the Cornell box and diffuse sphere shaded using the precomputed illumination textures (while the reflection in the specular sphere is rendered with ray tracing).
Similar to pattern baking, you may specify which texture coordinates are used for the output manifold. The default texture coordinates are ``st''.
Additionally you may choose to invert the ``t'' direction. The invert default is true.
Hider "bake"
"string bakemode" ["integrator"]
"string[2] primvar" ["foo" "bar"]
"int invert" [0]
Atlas Images
Multiple outputs can be generated if the texture coordinates for the selected output extend outside the [0,1) range. In this case, the filename should contain a special atlas wildcard to generate a unique output name for each image tile.
Attribute "user" "string filename" "box_direct.<UDIM>.tif"
In this case, the (s,t) texture coordinate of each baked point gets mapped to a UV tile such as 1001. The supported atlas wildcards are:
<udim>or<UDIM>(i.e.\ Udim tile: 1001, 1002, 1003, ...)<u>and<v>(i.e.\ tile indices starting at zero: 0, 1, 2, ...)<U>and<V>(i.e.\ tile indices starting at one: 1, 2, 3, ...)
3D Baking
To bake illumination in the entire scene to a single point cloud file, simply specify the file name in the Display line:
Display "box_direct.ptc" "pointcloud" "Ci"
Or to specify a separate point cloud file for each object:
Display "<user:filename>.ptc" "pointcloud" "Ci"
The dicing and hence point cloud density can be controlled using existing dicing controls such as worlddistancelength:
Attribute "dice" "float worlddistancelength" 0.02
As two examples, we'll bake 3D point clouds of direct and global illumination in a Cornell box with two teapots.
Two views of a single point cloud with direct illumination on the box and the two teapots (baked with the PxrDirectLighting integrator).
Two point clouds with global illumination (baked using the PxrPathTracer integrator): one for the box and one for a teapot.

