Contents
RenderMan allows for creating complex looks through layering materials. This means effects like car paint, labels on bottles, dirt or mud, can all be layered efficiently for rendering.
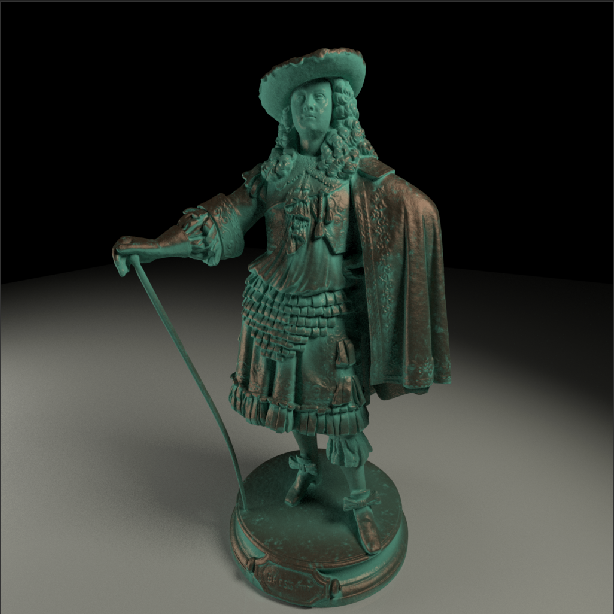
Below you can find a step by step example of creating a patina on a bronze statue. At the bottom of this tutorial you can find a Katana scene to download with the parts necessary to reproduce this image.
Basic Scene Prep
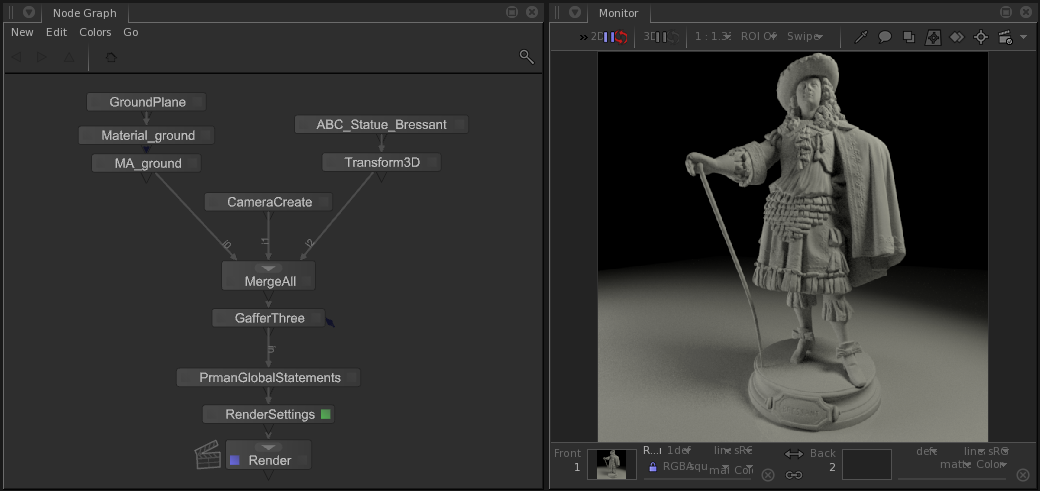
Load the layeredMaterial_prep.katana tutorial scene which contains the framework for loading the statue geometry, a ground plane and spot lights. The scene is renderable at this point, however we have no materials assigned to the statue so it will render with RenderMan's default Bxdf shader: PxrDiffuse.
Step 1: PxrLayerSurface
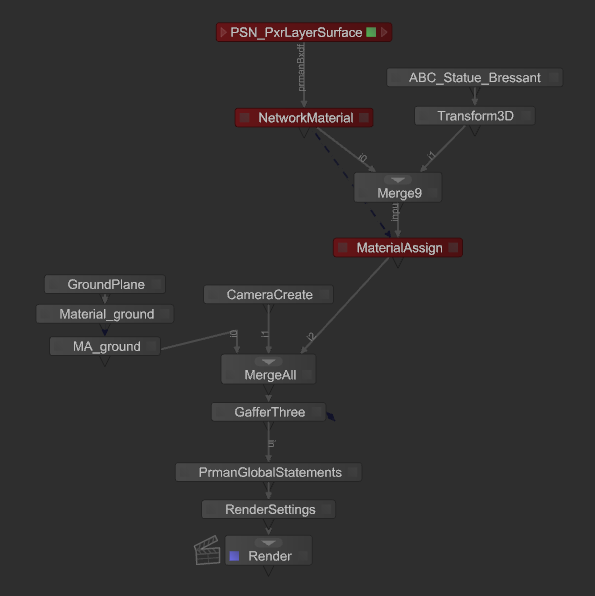
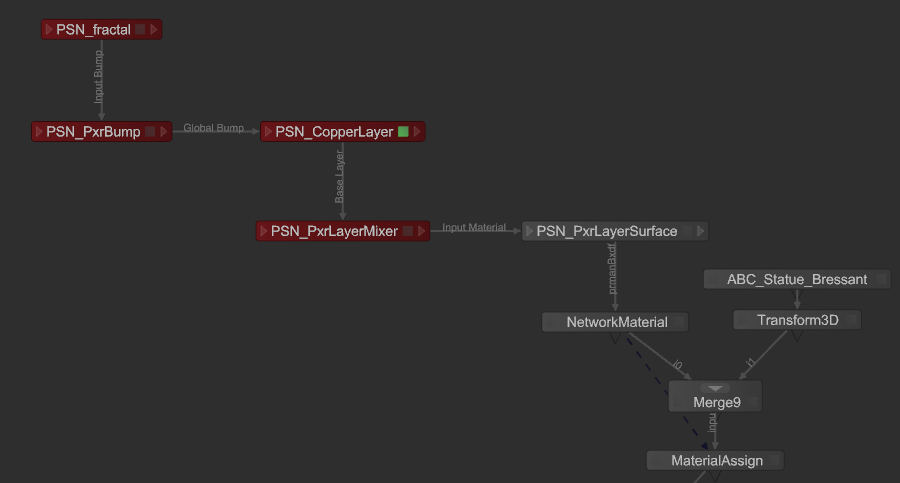
Create a shading network and assign a PxrLayerSurface Bxdf to your object. This is the framework that will inform RenderMan which materials will be rendered for the assigned object (new nodes are colored with red):
At this point you could render with our new shading network but there's not much you can do with this material on its own; this node has a limited set of attributes. The reason for this is that PxrLayerSurface is designed as the Bxdf on top of which layers of patterns are combined. PxrLayerSurface contains only global attributes which would apply to all layers. Layer-specific attributes such as color and texture come from upstream materlal(s) connected into the inputMaterial attribute.
From here planning is very important to avoid duplicating work and making your material network as simple and useful as possible. In researching the creation of a patina on copper or other metal you will find it is a multi-stage project which can involve a variety of methods. Depending on the look you are aiming for the layout of the materials will vary. For example, heating a metal to produce different colors could be replicated using the iridescence attributes in PxrLayerSurface. Another method for creating a patina is to use vinegar and salt to create a crust on the metal, which is the look we'll experiment with here.
Two basic layers of materials are needed:
- A metal layer like bronze or copper
- A patina, a diffuse layer that's a bit crusty and blue-green in color
Below are the layers seen separately:
 |  |
|---|
Step 2: PxrLayerMixer
Create a PxrLayerMixer and connect its out port to the inputMaterial port of the PxrLayerSurface. This sets up the node where we will be connecting all the layers. Let's take a look at the default state of a PxrLayerMixer shading node:
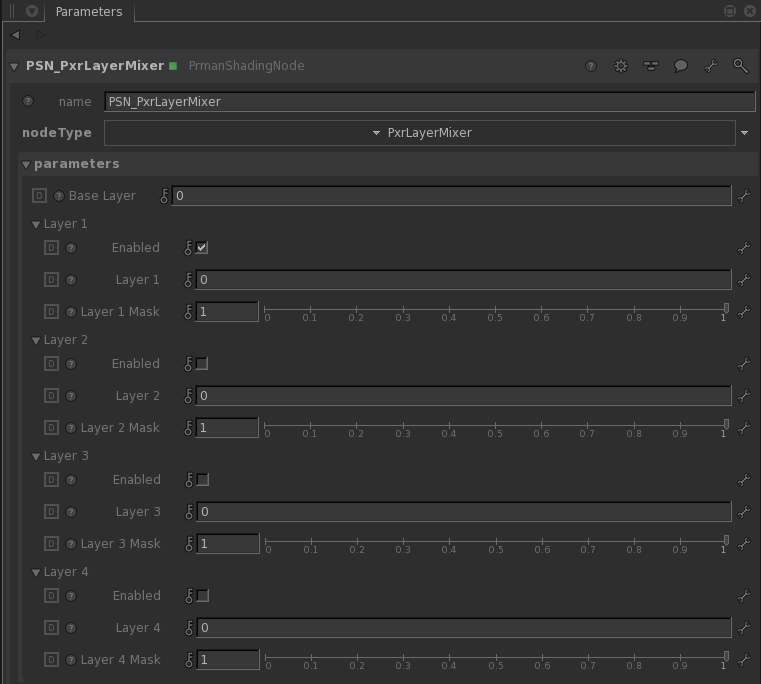
There is a BaseLayer plus four other layers, numbered 1-4. Note that Layer 1 is enabled by default with the assumption being that there will usually be at least two layers coming in to the PxrLayerMixer. If a layer is enabled but not connected the entire render will go black. We will focus on building our base layer first so let's disable Layer 1 until we wire our patina layer in. Note you can connect other PxrLayerMixers into the layers for using collections of looks and masking them together. This is great if you want to reuse networks somewhere else. For this example we're just using two layers, the Base and Layer 1.
Step 3: Base Layer
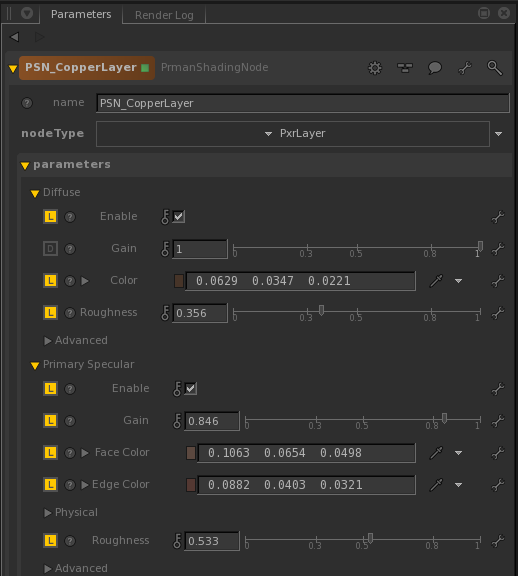
The Copper/Bronze will be our "base" layer. Create a PxrLayer and connect its pxrMaterialOut port to the Base Layer input port of the PxrLayerMixer.
To approximate a copper material we set the diffuse and specular then add some procedural bump so the copper has a nice texture to it. The settings are somewhat arbitrary since they are art directed, but we're looking for an older dull copper or bronze look:
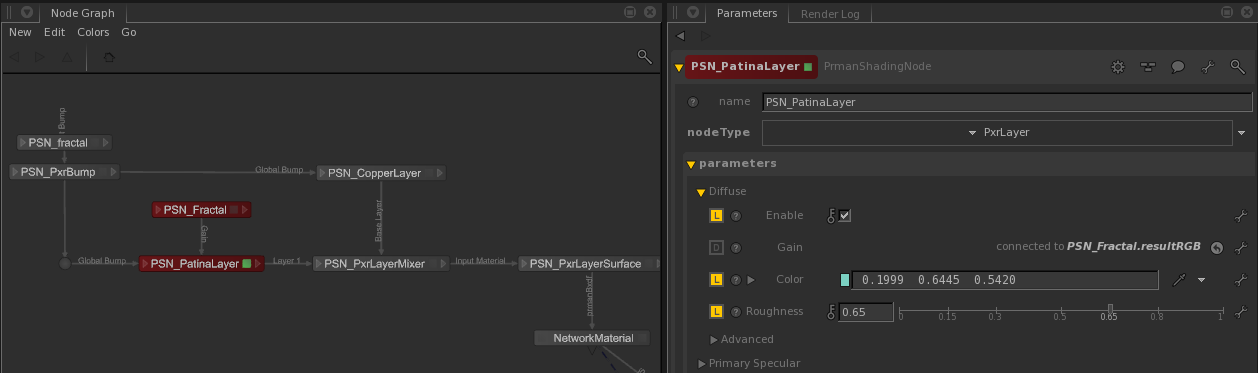
Step 4: Patina Layer
The Patina will be our "Layer 1", sitting on top of the base layer. Create another PxrLayer node and connect its pxrMaterialOut output port to the Layer 1 input port of your PxrLayerMixer. Note that you may have to re-enable Layer 1 if you had disabled it while working on the base layer. The patina shading is a diffuse color is sampled from a real image with some diffuse roughness to help bring out the "powdery" look from the patina crust. We've added a PxrFractal and a bump pattern to increase the realism. The previous bump pattern is used again in this layer to be consistent but you could actually use a different one here to really improve the realism.
This layer will completely cover the Base layer until we add an input to Layer 1 Mask.
Step 5: Patina Mask
We could accomplish this using textures but instead we make use of the PxrDirt node to control where the patina and metal are seen. PxrDirt is an occlusion shader which allows us shading effects affected by the local topology in the geometry (i.e. nooks & crannies). Create a new PrmanShadingNode and set the node type to PxrDirt. Its output is a color but since we're creating a mask you can wire the resultRinto the Layer 1 Mask of the PxrLayerMixer (you could also use a PxrToFloat to convert the color into a scalar value).
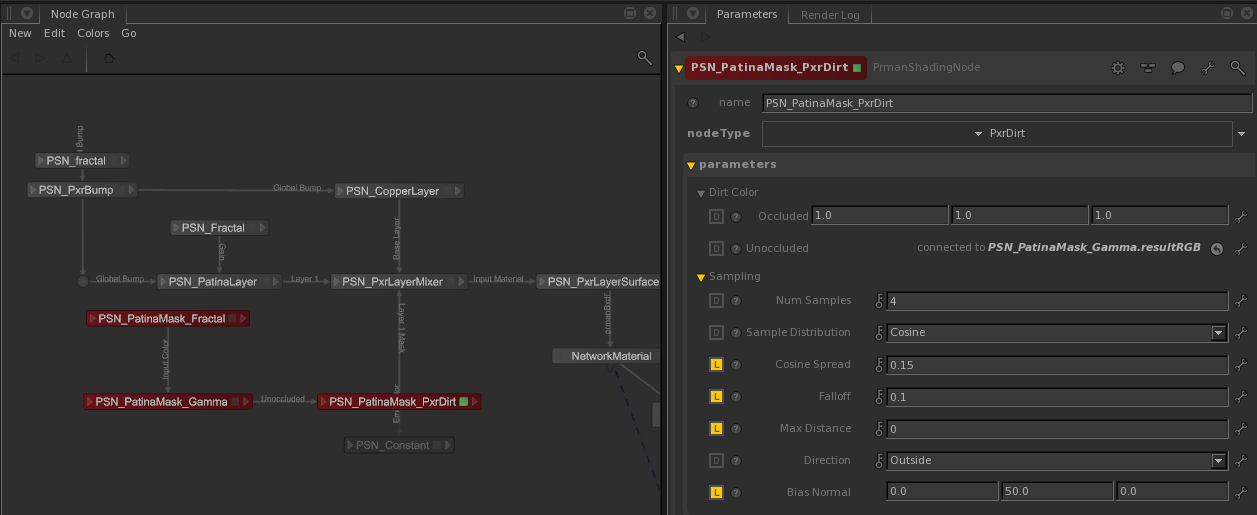
To produce the weathering pattern seen in the final image we increase the Y component of the Bias Normal attribute in PxrDirt to stretch out the result vertically as if rain and weathering has run down the statue. The PxrDirt Unoccluded attribute is driven by a PxrFractal and PxrGamma to break up the result some and control the strength respectively. Note the extra PSN_PxrConstant node that is sitting below PxrDirt. By connecting the PxrDirt output resultRGB into the emitColor of the PxrConstant we could swap the PxrLayerSurface Bxdf for the PxrConstant Bxdf to see the dirt layer mask rendered independently.
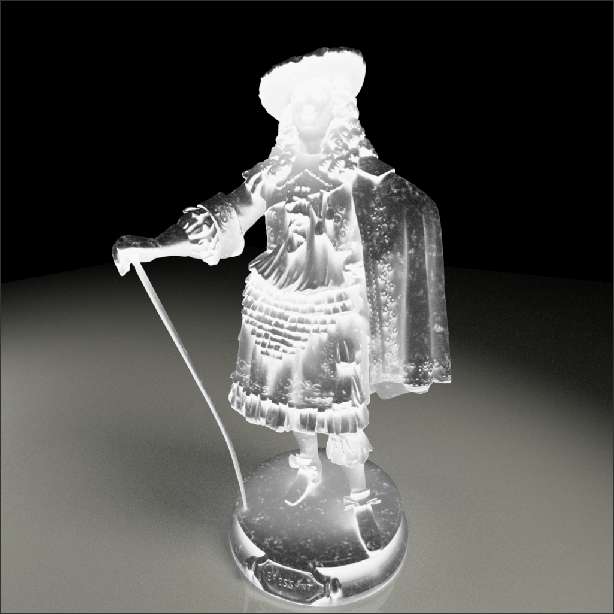
Below is the resulting mask rendered alone from PxrDirt:
Step 6: Render!
Step 7: Tweak Parameters, Repeat Step 6
Notes
The model is free from Three D Scans .
Find the Katana scene link above, and the Three D Scans link to obtain some geometry.